
Grandma Olson’s Beloved Rye Bread
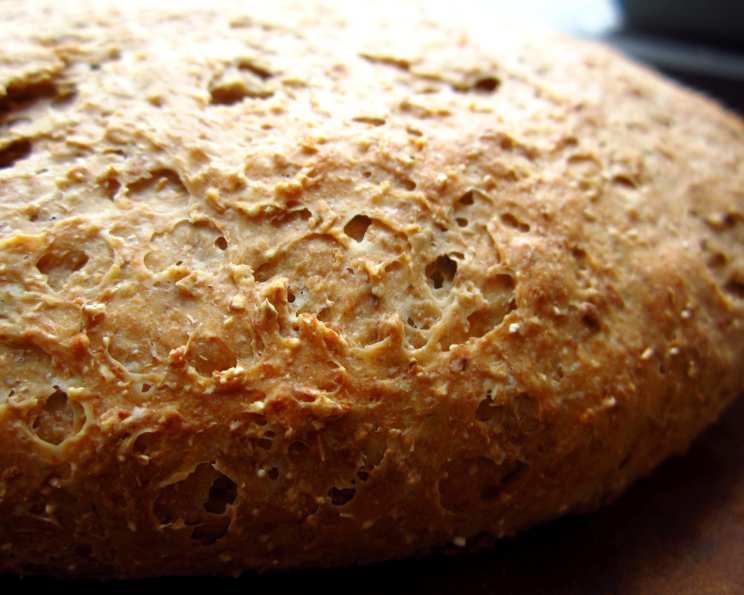
There are some recipes that are more than just a list of ingredients and instructions; they are living testaments to family, tradition, and the warmth of a shared kitchen. Grandma Olson’s rye bread is one of those recipes for me. I can still vividly recall the comforting aroma that would waft from her oven on a crisp autumn afternoon, a scent that was a perfect blend of earthy rye and sweet molasses, promising a loaf that was both hearty and delightfully tender. Those golden-brown crusts, dusted with a whisper of flour, were the prelude to slices that were the perfect vehicle for a smear of rich butter or a dollop of homemade jam.
Recipe Overview
- Prep Time: 15 minutes (plus rising time)
- Cook Time: 50-60 minutes
- Total Time: Approximately 4 hours 30 minutes (including rising)
- Yields: 2 large loaves
- Serves: 24 (based on 12 slices per loaf)
- Dietary Type: Contains Wheat, Dairy
Ingredients
This recipe yields two wonderfully rustic loaves, perfect for sharing.
- 1 cup rye flour
- 6-8 cups unbleached all-purpose flour (you’ll use this for kneading and dusting)
- 1 tablespoon active dry yeast (or one envelope)
- 1/2 cup brown sugar
- 2 cups milk
- 1/2 cup warm water (100-120°F / 38-49°C)
- 1/3 cup molasses
- 3 tablespoons shortening
- 1 tablespoon salt
Equipment Needed
- 2 medium mixing bowls
- 1 very large mixing bowl
- Microwave or stovetop for warming milk
- Measuring cups and spoons
- Whisk
- Plastic wrap
- Tea towel
- Clean work surface for kneading
- 2 greased 5×9 inch bread pans
- Large knife for dividing dough
- Oven
- Cooling rack
Instructions
Baking this rye bread is a journey that rewards patience with unparalleled flavor and texture. Follow these steps carefully for a truly exceptional loaf.
- Activate the Yeast: In a small bowl, combine the active dry yeast and the 1/2 cup of warm water. Stir gently to dissolve any lumps. Cover the bowl with plastic wrap and set it aside for about 5 minutes. You’ll know the yeast is ready when it becomes bubbly and emits a distinct yeasty aroma.
- Warm the Milk: While your yeast is waking up, gently warm the 2 cups of milk. You can do this in the microwave or on the stovetop until it’s just warm to the touch. Be careful not to let it boil or bubble, as extreme heat can kill the yeast.
- Combine Wet Ingredients: In a very large mixing bowl, combine the shortening, brown sugar, and salt. Mix these together until they are well incorporated. Next, add the molasses and the warmed milk. Stir the mixture until it’s smoothly combined. If you have a thermometer, this is a good time to check the temperature of this mixture. It should be no warmer than 120°F (49°C). If it’s hotter, allow it to cool for a few minutes to avoid harming the yeast.
- Incorporate Yeast and Rye Flour: Add your activated yeast mixture to the milk and molasses combination. Then, stir in the 1 cup of rye flour until it is fully combined.
- Add All-Purpose Flour Gradually: Begin adding the unbleached all-purpose flour, one cup at a time. After adding each cup, stir it into the wet ingredients until it’s incorporated before adding the next. Continue this process until the dough begins to pull away from the sides of the bowl, forming a cohesive mass.
- Knead the Dough: Turn the dough out onto a lightly floured work surface. Begin to knead the dough for 8-10 minutes. As you knead, add small amounts of all-purpose flour as needed to prevent the dough from sticking excessively to your hands or the counter. The goal is to achieve a smooth, slightly springy, and glossy ball of dough.
- First Rise: Lightly spray a large bowl with non-stick spray. Place the kneaded dough ball into the prepared bowl, turning it over once to coat all surfaces with the spray. Cover the bowl with a clean tea towel and place it in a warm, draft-free spot to rise for 1 to 1.5 hours, or until the dough has approximately doubled in size.
- Second Rise: Gently turn the risen dough out onto a lightly floured surface. Press the air out of the dough with your hands. Knead it a few more times. Place the dough back into the greased bowl, turning it once to coat. Cover it again and let it rise for another hour.
- Shape the Loaves: After the second rise, turn the dough out onto a floured surface. Gently press the air out once more. Using a large knife, cut the dough in half.
- Form the Logs: For each half, stretch the dough into a rectangle. The shorter side of each rectangle should be approximately the length of your bread pan. Starting from one of the short sides, roll each rectangle up tightly to form a log. Place the formed logs seam-side down into your 2 greased 5×9 inch bread pans. If you wish, you can score the tops of the loaves at this stage. Cover the pans and allow the dough to rise one last time, about one hour, or until the dough has risen at least as high as the edge of the pans.
- Bake the Bread: Preheat your oven to 350°F (175°C), positioning a rack in the middle of the oven. Bake the loaves for 50 to 60 minutes.
- Cool Completely: Once baked, remove the loaves from the oven immediately and turn them out of their pans. Cover the loaves with a tea towel and allow them to cool completely on a cooling rack before slicing. This step is crucial for the bread’s texture.
Expert Tips & Tricks
The art of great bread baking often lies in the nuances. Here are a few insights to elevate your rye bread experience:
- The “Warm Spot”: Finding the perfect spot for your dough to rise can make a difference. A slightly warm oven (turned off, but with the light on), near a sunny window, or even on top of your (turned-off) refrigerator can provide the gentle warmth needed.
- Doneness Test: Beyond the timer, you can check if your bread is done by tapping the bottom of the loaf. It should sound hollow.
- Crust Control: For a softer crust, you can lightly brush the tops of the loaves with melted butter or milk immediately after they come out of the oven. For a crisper crust, allow them to cool completely uncovered.
- Flour Power: The amount of all-purpose flour needed can vary depending on humidity and the specific flour you use. Add it gradually during kneading until the dough is no longer excessively sticky but still feels soft and pliable.
Serving & Storage Suggestions
This robust rye bread is incredibly versatile. It’s fantastic toasted and slathered with butter, served alongside hearty stews and soups, or piled high with your favorite deli meats for a satisfying sandwich. Because it makes two loaves, it’s perfect for making ahead or sharing.
To keep it fresh, store uncut loaves at room temperature in a bread box or loosely wrapped in a clean kitchen towel for 4-5 days. If you anticipate not finishing both loaves within that time, slicing them before freezing is an excellent strategy. Place the slices in a freezer-safe bag or container, and you can go directly from freezer to toaster, enjoying a slice of this delicious bread anytime.
Nutritional Information
Here is an approximate nutritional breakdown per serving (assuming 24 servings from two loaves):
| Nutrient | Amount per Serving | % Daily Value |
|---|---|---|
| Calories | 188.3 kcal | N/A |
| Total Fat | 2.8 g | 4% |
| Saturated Fat | 0.9 g | 4% |
| Cholesterol | 2.9 mg | 0% |
| Sodium | 305.3 mg | 12% |
| Total Carbohydrate | 36.2 g | 12% |
| Dietary Fiber | 1.6 g | 6% |
| Sugars | 7.1 g | 28% |
| Protein | 4.5 g | 8% |
| Calories from Fat | N/A | 24% |
(Note: Nutritional information is an estimate and can vary based on specific ingredients and preparation methods.)
Variations & Substitutions
While this recipe is a classic for a reason, feel free to explore these variations:
- Caraway Seeds: For a more traditional rye flavor, add 1-2 tablespoons of caraway seeds to the dough during the kneading stage.
- Whole Wheat Flour: You can substitute a portion of the all-purpose flour with whole wheat flour for added fiber and a nuttier flavor. Start with 1-2 cups and adjust as needed for dough consistency.
- Sweetness Adjustment: If you prefer a less sweet bread, you can slightly reduce the amount of brown sugar and molasses.
FAQs
Q: Why is my rye bread not rising properly?
A: Ensure your yeast is fresh and that the water used to activate it was the correct temperature (100-120°F). Also, make sure the dough is in a sufficiently warm and draft-free spot for rising.
Q: How can I get a darker, more rustic crust?
A: You can achieve a darker crust by baking the bread at a slightly higher temperature for the last 10-15 minutes, or by placing a shallow pan of water on the bottom rack of the oven during the first half of baking to create steam.
Q: Can I use rye flour instead of all-purpose flour for the entire recipe?
A: No, the high proportion of rye flour can make the bread dense and gummy. The all-purpose flour is crucial for structure and a lighter texture.
Q: My dough is too sticky to knead. What should I do?
A: Gradually add small amounts of all-purpose flour (a tablespoon at a time) while kneading until the dough becomes manageable but still soft.
Q: How can I ensure my bread is evenly baked?
A: Make sure your oven rack is in the center of the oven and that your oven temperature is accurate. Rotate the pans halfway through baking if you notice uneven browning.
Final Thoughts
There’s a profound satisfaction that comes from pulling a perfectly baked loaf of homemade rye bread from the oven. It’s a connection to generations past and a tangible representation of care and effort. This recipe, passed down and cherished, embodies that spirit. I encourage you to bake it, share it, and savor every slice. It pairs beautifully with a steaming mug of coffee or a glass of rich, dark beer, making any meal feel a little more special. Let us know how your loaves turn out!