
Rosalita’s Arepas Con Queso: A Taste of Comfort
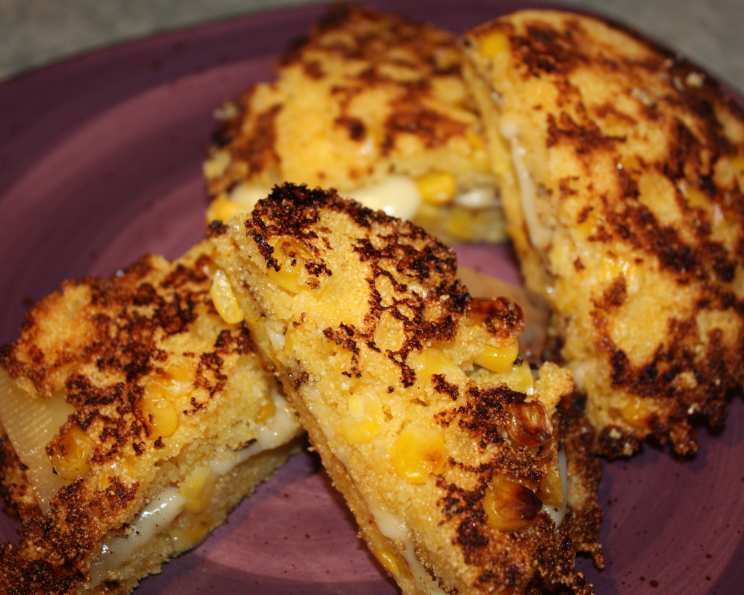
The scent of warm corn and melting cheese is an olfactory siren song for me, one that instantly transports me back to bustling market stalls and the comforting embrace of family kitchens. I remember one particular afternoon, a little overcast and decidedly chilly, when my abuela, Rosalita, decided it was the perfect day to make arepas. Not just any arepas, mind you, but her special arepas con queso, a delightful balance of sweet corn, savory cheese, and a whisper of buttery richness. The anticipation in the small kitchen was palpable as the milk simmered and the corn was pulsed, creating a batter that promised pure, unadulterated comfort. These aren’t just corn cakes; they’re little golden pockets of joy, perfect for breakfast, a snack, or even a light supper.
Recipe Overview
- Prep Time: 15 minutes
- Cook Time: 30 minutes
- Total Time: 45 minutes
- Servings: 6
- Yield: Approximately 8-10 arepas
- Dietary Type: Vegetarian, Gluten-Free
Ingredients
- 3/4 cup whole milk
- 3 tablespoons unsalted butter
- 1-2 tablespoons unsalted butter (for frying)
- 1/4 cup buttermilk
- 1 cup frozen corn kernels, thawed
- 1 cup finely ground yellow cornmeal
- 1/4 cup sugar
- 1/4 teaspoon salt
- 1 cup Monterey Jack cheese, grated
- 6 slices mozzarella cheese (about 6 ounces)
Equipment Needed
- Medium saucepan
- Food processor or blender
- Large mixing bowl
- Griddle or large skillet
- Spatula
Instructions
- In a medium saucepan, bring the whole milk to a boil over high heat. Watch closely as it approaches boiling, as milk can easily boil over.
- Once the milk has boiled, remove it from the heat and let it sit for about one minute.
- Stir in the 3 tablespoons of unsalted butter and the buttermilk. Stir continuously until the butter has completely melted and is incorporated into the milk mixture. Allow this mixture to sit for approximately 2 minutes to slightly cool.
- While the milk mixture is resting, place the thawed frozen corn kernels in a food processor or blender. Pulse the corn kernels until they are just coarse. You don’t want a completely smooth puree; a slightly chunky texture is desirable.
- In a large bowl, combine the pulsed corn, finely ground yellow cornmeal, sugar, salt, and grated Monterey Jack cheese. Stir everything together to ensure the ingredients are evenly distributed.
- Gradually add enough of the warm milk mixture to the dry ingredients to create a very thick batter. You may not need all of the milk mixture, or you might need a touch more cornmeal if the batter is too thin. The batter should be thick enough to hold its shape when scooped.
- Heat your griddle or large skillet over medium-high heat. Add 1-2 tablespoons of unsalted butter and allow it to melt. Cook until the butter stops foaming, indicating it’s at the right temperature for frying.
- Using a spoon, drop about 2 tablespoons of batter into the hot skillet for each arepa. Aim for them to be about 3 inches in diameter. Cook until the underside is golden brown, which should take approximately 4 minutes.
- Carefully flip each arepa and brown the other side, cooking for another 4 minutes, or until both sides are golden brown and the arepa is cooked through.
- Once the arepas are cooked on both sides and the batter is no longer doughy in the center, sandwich one slice of mozzarella cheese between two cooked arepas.
- Reduce the heat on your griddle or skillet to low. Continue cooking the filled arepas, just until the mozzarella cheese melts. You may need to turn them once or twice to ensure even melting and prevent burning.
- Continue this process of filling and cooking the remaining arepas until all are prepared.
- Rosalita’s Arepas Con Queso are best served hot.
Expert Tips & Tricks
For an even richer corn flavor, consider using fresh corn kernels if they are in season. If using fresh corn, you’ll want to lightly cook them before pulsing in the food processor. When pulsing, err on the side of under-processing rather than over-processing the corn; small kernels add a delightful texture. If your batter seems a little too thick and difficult to stir, you can add a tablespoon or two of the reserved milk mixture, or even a splash of whole milk, until it reaches a more manageable, yet still thick, consistency. When cooking the arepas, maintaining a consistent medium-high heat is key. If the heat is too high, the outside will burn before the inside is cooked through. If it’s too low, they may become greasy. The goal is a beautiful golden-brown crust and a tender, cooked interior. For the cheese melting step, a lid on the skillet can help the cheese melt more quickly and evenly, especially if you notice the arepas starting to brown too much on the outside.
Serving & Storage Suggestions
These arepas are at their absolute peak when served immediately after the cheese has melted, warm from the skillet. They make a fantastic breakfast alongside scrambled eggs or a simple side salad. For a heartier meal, they can be served with a dollop of avocado crema or a vibrant salsa. If you happen to have leftovers (which is unlikely!), they can be stored in an airtight container in the refrigerator for up to 2 days. To reheat, gently warm them in a skillet over low heat, or toast them in a toaster oven until heated through and the cheese is gooey again. Microwaving is an option, but it can sometimes result in a less desirable texture.
Nutritional Information
| Nutrient | Amount per Serving | % Daily Value |
|---|---|---|
| Calories | 405.1 kcal | – |
| Calories from Fat | 198 kcal | – |
| Total Fat | 22.1 g | 33% |
| Saturated Fat | 13 g | 65% |
| Cholesterol | 63.4 mg | 21% |
| Sodium | 413.3 mg | 17% |
| Total Carbohydrate | 39 g | 12% |
| Dietary Fiber | 2.6 g | 10% |
| Sugars | 10.9 g | 43% |
| Protein | 15.8 g | 31% |
(Note: Nutritional values are estimates and can vary based on specific ingredients and portion sizes.)
Variations & Substitutions
While this recipe is delightful as is, it’s a wonderful canvas for creativity. For a spicier kick, you could add a finely minced jalapeño pepper to the corn mixture, or a pinch of cayenne pepper. If you’re looking for a dairy-free version, you could experiment with a plant-based milk and butter, though the cheese would need to be substituted with a dairy-free alternative, which may alter the melting consistency. For a more savory profile, reduce the sugar slightly. Some people also enjoy adding a touch of finely chopped cilantro to the batter for an herbaceous note.
FAQs
Q: Can I make the arepa batter ahead of time?
A: It’s best to make the batter fresh, as the cornmeal can absorb too much moisture and the texture may change if left to sit for too long.
Q: What is the best way to ensure the arepas cook through evenly?
A: Maintaining a consistent medium heat and not overcrowding the pan are crucial. Ensure the batter is thick enough to hold its shape when dropped into the skillet.
Q: Can I use a different type of cornmeal?
A: Finely ground yellow cornmeal is recommended for this recipe to achieve the desired texture and consistency. Coarser grinds may require adjustments to the liquid.
Q: My arepas are sticking to the pan. What should I do?
A: Ensure your griddle or skillet is properly preheated and that you’ve used enough butter. A non-stick skillet can also be very helpful.
Q: How can I tell if the arepas are cooked through before adding the cheese?
A: They should be firm to the touch, golden brown on both sides, and the edges should look set. You can also gently poke one with a toothpick; it should come out clean.
Final Thoughts
Rosalita’s Arepas Con Queso are more than just a recipe; they are an invitation to a moment of pure, unadulterated comfort. The simplicity of the ingredients belies the depth of flavor and satisfaction they provide. Whether enjoyed with a strong cup of coffee in the morning or as a delightful afternoon treat, these cheesy corn pockets are sure to bring a smile to your face. I encourage you to gather your ingredients, channel a little bit of that kitchen magic, and experience this simple yet profound joy for yourself. They pair beautifully with a fresh fruit salad or a light, crisp white wine. Enjoy every warm, cheesy bite!