
The Quintessential Rocky Road Fudge: A Nostalgic Sweet Symphony
There are certain flavors that, for me, are inextricably linked to cherished memories, and Rocky Road Fudge is undoubtedly one of them. I can vividly recall countless rainy afternoons spent in my grandmother’s kitchen, the air thick with the sweet scent of melting chocolate. She’d let me “help” stir the concoction, my small hands gripping the wooden spoon, the warm, glossy mixture a mesmerizing sight. The sheer magic of transforming simple ingredients into a treasure trove of textures and tastes—chewy marshmallows, crunchy nuts, and that deep, satisfying chocolate base—felt like pure alchemy. This particular recipe holds a special place in my heart because it ingeniously uses a jar of chocolate fudge frosting as its secret weapon, simplifying the process without sacrificing that beloved, rich chocolate flavor that defined those treasured childhood moments.
Recipe Overview
- Prep Time: 15 minutes
- Cook Time: 5 minutes (for melting)
- Total Time: 1 hour 15 minutes (including chilling)
- Servings: 6
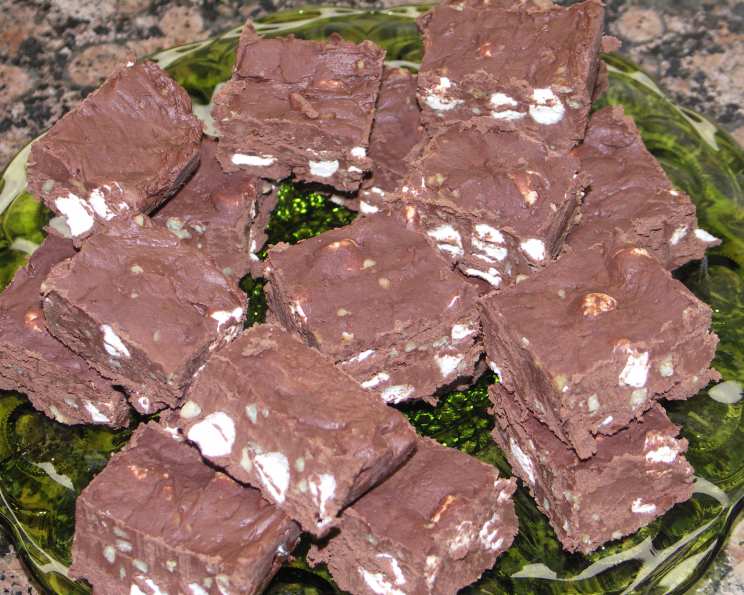
- Yield: 36 squares
- Dietary Type: Not specified (can be adapted for dietary needs)
Ingredients
Here’s what you’ll need to conjure this delightful treat:
- 1 (12-ounce) package semi-sweet chocolate chips
- 1 (16-ounce) can chocolate fudge frosting
- 1 ½ cups miniature marshmallows
- ¾ cup chopped mixed nuts (or ¾ cup chopped walnuts as an alternative)
Equipment Needed
- An 8-inch square baking pan
- Aluminum foil
- A medium saucepan
- A sturdy spoon or spatula for stirring
- A sharp knife for cutting
Instructions
Crafting this Rocky Road Fudge is a wonderfully straightforward process, perfect for bakers of all levels. Follow these steps carefully to achieve that irresistible, classic taste and texture:
- Prepare Your Pan: Begin by lining an 8-inch square baking pan with aluminum foil. Ensure the foil extends generously over the edges of the pan; this will act as handles to lift the finished fudge out cleanly later.
- Butter the Foil: Lightly butter the aluminum foil. This extra step ensures the fudge won’t stick, making for a beautiful, unmarred finish.
- Melt the Chocolate: Place the semi-sweet chocolate chips into a medium saucepan. Heat them over very low heat, stirring continuously. The key here is patience and gentle heat to prevent scorching. You want the chips to melt into a smooth, glossy liquid.
- Incorporate the Frosting: Once the chocolate chips are completely melted and smooth, remove the saucepan from the heat. Immediately stir in the entire 16-ounce can of chocolate fudge frosting. Continue stirring until the frosting is fully incorporated and you have a rich, unified chocolate mixture.
- Add the Rocky Road Elements: Now for the fun part! Gently fold in the miniature marshmallows and the chopped mixed nuts (or chopped walnuts, if you prefer). Mix until all the marshmallows and nuts are thoroughly coated in the luscious chocolate base.
- Spread into the Pan: Carefully spoon the mixture into the prepared, buttered foil-lined pan. Use your spoon or spatula to spread it evenly, ensuring it reaches all the corners for consistent thickness.
- Chill to Firmness: Place the pan in the refrigerator and allow the fudge to chill until firm. This typically takes about 1 hour, but keep an eye on it; you want it to be solid to the touch.
- Unmold and Cut: Once the fudge is firm, use the overhanging foil to lift the entire slab out of the pan. Gently peel away the foil from the fudge. Place the fudge on a cutting board and use a sharp knife to cut it into squares.
Expert Tips & Tricks
- Low and Slow for Melting: When melting chocolate, the mantra is “low and slow.” Using very low heat and constant stirring prevents the chocolate from seizing or burning, which can result in a grainy texture. If you’re nervous about direct heat, you can also use a double boiler method.
- Room Temperature Ingredients: While not strictly necessary for this recipe, ensuring your marshmallows and nuts are at room temperature can help them incorporate more evenly into the warm chocolate mixture.
- Quality Counts: While this recipe is designed for ease, using good quality semi-sweet chocolate chips and chocolate fudge frosting will elevate the final flavor.
- Cutting for Clean Squares: For the cleanest cuts, chill the fudge for a little longer if needed, and consider warming your knife slightly under hot water (and drying it thoroughly!) before slicing.
Serving & Storage Suggestions
Rocky Road Fudge is a delightful treat served chilled, cut into bite-sized squares. It’s perfect for a holiday cookie platter, a potluck contribution, or simply as an after-dinner indulgence. Store any leftover fudge in an airtight container at room temperature for up to 3 days, or in the refrigerator for up to 2 weeks. If refrigerated, allow the fudge to sit at room temperature for a few minutes before serving for optimal texture. It also freezes beautifully for longer storage; simply wrap individual squares or the entire slab tightly in plastic wrap and then in foil, and it will keep for up to 3 months.
Nutritional Information
| Nutrient | Amount per Serving | % Daily Value |
|---|---|---|
| Calories | 118.9 kcal | |
| Calories from Fat | ||
| Total Fat | 6.5 g | 10 % |
| Saturated Fat | 2.6 g | 12 % |
| Cholesterol | 0 mg | 0 % |
| Sodium | 44.9 mg | 1 % |
| Total Carbohydrate | 16.3 g | 5 % |
| Dietary Fiber | 0.9 g | 3 % |
| Sugars | 13.8 g | 55 % |
| Protein | 1.1 g | 2 % |
Note: Nutritional information is an estimate and may vary based on specific ingredients used.
Variations & Substitutions
While the classic Rocky Road is beloved, there are always ways to put your own spin on it:
- White Chocolate Base: Swap the semi-sweet chocolate chips for white chocolate chips and use a white chocolate fudge frosting for a lighter, sweeter variation.
- Nut-Free: For those with nut allergies, simply omit the nuts entirely. The chewy marshmallows and rich chocolate are still incredibly satisfying. You could also add mini pretzels for a salty crunch.
- Add-Ins: Get creative! Consider adding mini M&M’s, shredded coconut, or even a swirl of caramel before chilling for extra flavor and texture dimensions.
- Boozy Kick: For an adult-friendly version, a tablespoon or two of bourbon or rum can be stirred into the chocolate mixture along with the frosting.
FAQs
Q: Can I use milk chocolate chips instead of semi-sweet?
A: Yes, you absolutely can! Using milk chocolate chips will result in a sweeter, less intensely chocolatey fudge.
Q: My fudge seems too soft. What did I do wrong?
A: It’s likely that the fudge didn’t chill long enough or your refrigerator isn’t cold enough. Ensure it’s very firm before attempting to cut it.
Q: Can I melt the chocolate and frosting in the microwave?
A: Yes, but you must do it with extreme caution. Microwave in 30-second intervals, stirring well between each, to avoid scorching the chocolate.
Q: How should I store this fudge if I want to keep it for a long time?
A: For the longest shelf life, wrap the fudge well and store it in the freezer. It maintains its quality for up to three months.
Q: What kind of “mixed nuts” are best for this recipe?
A: A combination of pecans, walnuts, and almonds works wonderfully. However, you can use any mix you enjoy, or stick to just one type like walnuts if that’s your preference.
Final Thoughts
This Rocky Road Fudge is more than just a sweet treat; it’s an invitation to create joy, whether you’re revisiting fond memories or forging new ones. Its simplicity belies its delicious depth, offering a delightful interplay of textures and that universally loved chocolatey goodness. Whip up a batch for your next gathering, or simply enjoy a square (or two!) with a cup of steaming hot cocoa. I’d love to hear about your creations and any personal twists you’ve added to this classic recipe!