
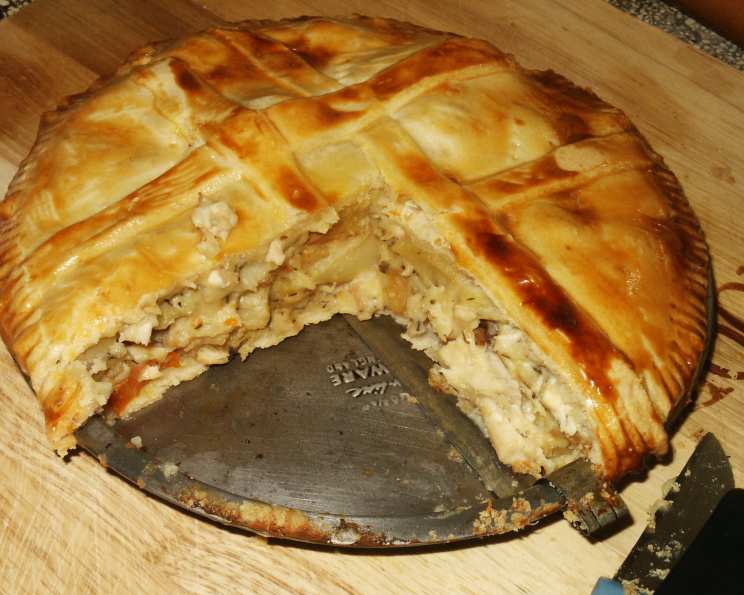
The Ultimate Roasted Chicken Pot Pie: A Symphony of Comfort and Flavor
There are certain dishes that evoke a primal sense of comfort, a warm hug on a chilly evening, and for me, that dish is unequivocally chicken pot pie. I can vividly recall my grandmother’s kitchen, perpetually filled with the comforting aromas of simmering stock and baking pastry. Her chicken pot pie wasn’t just a meal; it was an event, a culinary centerpiece that brought our bustling family together, a testament to simple ingredients transformed into something truly magical. The anticipation as the golden crust rose in the oven, promising a rich, savory filling, is a memory etched deep within my gastronomic soul. It’s this very dish, this distillation of home and hearth, that I’m thrilled to share with you today, a recipe perfected over years of dedicated practice, ensuring it lives up to the comforting promise of its humble origins.
Recipe Overview
- Prep Time: 1 hour 15 minutes
- Cook Time: 1 hour 25 minutes
- Total Time: 2 hours 40 minutes
- Servings: 4
- Yield: 1 pot pie (or 4 individual pies)
- Dietary Type: Classic Comfort
Ingredients
For the Roasted Chicken and Vegetables:
- 1 (3 lb) whole chicken
- 3 tablespoons olive oil, divided
- Salt and freshly ground black pepper, to taste
- 2 medium potatoes, peeled and cut into 1/2 inch chunks (Yukon Gold recommended for their creamy texture)
- 3 medium carrots, peeled and cut into 1/2 inch chunks
- 24 white pearl onions, peeled and left whole
- 1 clove garlic, minced
- 8 mushrooms, halved or quartered if large
- 2 tablespoons chopped fresh parsley
- 2 tablespoons chopped fresh rosemary
- 2 tablespoons chopped fresh thyme
- 1 cup peas, defrosted if frozen
For the Rich Sauce:
- 4 cups chicken stock
- 6 tablespoons butter (or less, if pan drippings are abundant)
- 6 tablespoons all-purpose flour
- Salt and freshly ground black pepper, to taste
- Additional herbs (parsley, rosemary, thyme), to taste
For the Golden Crust:
- 1 sheet puff pastry (homemade or good quality store-bought)
For the Egg Wash:
- 1/2 egg yolk
- 1/4 cup heavy cream
Equipment Needed
- Large roasting pan
- Measuring cups and spoons
- Sharp knife and cutting board
- Slotted spoon
- Gravy separator or measuring cup (for separating fat from juices)
- Saucepan (if not using the roasting pan on the stove)
- Whisk
- Small bowl (for egg wash)
- Pastry brush
- Baking sheet
- 4 ovenproof individual bowls (approximately 18 oz each) OR a 2-quart casserole dish
- Foil or parchment paper (for template)
- Rolling pin
Instructions
Roasting the Chicken & Vegetables:
- Preheat your oven to 375°F (190°C).
- Begin by preparing the chicken. Rub it all over with 1 tablespoon of olive oil, then sprinkle generously, inside and out, with salt and pepper. This initial seasoning is crucial for building depth of flavor from the very start.
- In a separate bowl, toss the cut potatoes, carrots, pearl onions, minced garlic, mushrooms, and fresh herbs (parsley, rosemary, and thyme) with the remaining 2 tablespoons of olive oil, along with a good pinch of salt and pepper. Ensure all the vegetables are evenly coated.
- Place the seasoned chicken breast-side down in your large flameproof roasting pan. This initial position helps to render some of the fat from the breast and keep it moist.
- Scatter the prepared vegetables around the chicken in the roasting pan.
- Roast for 1 hour and 15 minutes, stirring the vegetables several times during this period. This ensures they cook evenly and develop those coveted caramelized edges.
- Once the chicken is cooked through and the vegetables are tender, carefully remove the chicken from the pan to a cooling rack to rest.
- Using a slotted spoon, remove the roasted vegetables from the pan and set them aside in a bowl, along with the defrosted peas.
- Do not clean out the roasting pan. Those browned bits clinging to the bottom are pure gold, forming the base of our incredibly flavorful sauce.
- Allow the chicken to cool for at least 15 minutes, or until it’s comfortable to handle. Once cooled, pull the meat from the bones, discarding the skin and bones. Cut the chicken meat into small chunks, about 1/2 to 1 inch in size. Set this aside. It’s often easiest to do this after the sauce is made or while someone else is attending to the sauce.
Making the Rich Sauce:
- Assess your roasting pan. If there is a significant amount of juices and fat accumulated at the bottom, proceed to the next step. If the pan is relatively dry, you can skip ahead to step 15.
- Pour the accumulated fat and juices from the roasting pan into a measuring cup or gravy separator. Allow the fat to separate from the juices.
- Add the collected juices to your 4 cups of chicken stock. Measure out the rendered fat and add enough butter to the fat to make a total of 6 tablespoons of fat and butter combined.
- Place the roasting pan (still containing those delicious caramelized bits) on the stove over medium heat.
- Pour in the 6 tablespoons of fat and butter mixture. Once it’s melted and bubbling gently, add the 6 tablespoons of flour. Stir constantly with a whisk to create a smooth roux. Be sure to scrape up any caramelized bits from the bottom of the pan as you stir.
- Cook the roux, stirring constantly, until it is lightly browned, which should take about 5 minutes. This toasting of the flour adds a nutty depth of flavor to the sauce.
- Gradually add the chicken stock (which now contains the pan juices). Bring the mixture to a boil, then reduce the heat to a simmer.
- Continue to stir and scrape the bottom of the pan to ensure nothing sticks and to fully incorporate all the browned bits.
- Cook the sauce for at least 15 minutes, whisking occasionally, until it has thickened to a consistency similar to heavy cream.
- Season the sauce generously with salt, pepper, and additional chopped fresh herbs to taste. Adjust the seasoning as needed – this is your chance to make it truly perfect.
Assembling the Pot Pie(s):
- Preheat your oven to 400°F (200°C).
- Choose your vessels: either four ovenproof bowls (approximately 18 oz each) for individual servings or a 2-quart casserole dish for one large pie.
- Cut out a circle template from foil or parchment paper that is about the size of the rim of each bowl or the casserole dish. This will help you cut the puff pastry to the correct size.
- Divide the cooked chicken chunks, roasted vegetables, and peas among your chosen dishes.
- Spoon the warm, thickened sauce over the chicken and vegetable mixture in each dish, ensuring everything is well-coated.
- Place the filled dishes on a baking sheet. This is a crucial step to catch any drips that might escape in the oven, making cleanup much easier.
Topping with Puff Pastry:
- For individual pies: On a lightly floured board, cut the puff pastry sheet into 4 equal pieces. Quickly roll out each piece into a circle that is slightly larger than your template. The extra dough will drape down the sides of the bowls, creating a beautiful, rustic finish. Remember to work quickly to prevent the butter in the pastry from melting and becoming greasy; you may need to lightly flour your hands and the dough to keep it from sticking.
- As each piece of dough is rolled out, carefully place it on top of a filled bowl, pressing gently along the edges to seal.
- For one large pie: Lay the puff pastry on a floured board and roll it out to a shape that is larger than your casserole dish template. The excess dough will drape over the sides. Again, work quickly to maintain the pastry’s integrity.
- Lay the rolled-out dough on top of the filled casserole dish, pressing along the edges to seal.
- Prepare the egg wash: In a small bowl, whisk together the 1/2 egg yolk and 1/4 cup of cream.
- Brush the egg wash evenly over the top of the puff pastry with a pastry brush. This will give your crust a beautiful golden sheen as it bakes.
- You do not need to make any vent holes in the pastry. The steam will naturally escape along the edges where the pastry meets the dish, creating a lovely puffed effect.
Baking the Pot Pie(s):
- Bake in the preheated 400°F (200°C) oven for 30 to 55 minutes. The exact time will depend on your oven and the size of your dishes. You are looking for the crust to be thoroughly browned and dramatically puffed.
Expert Tips & Tricks
- Make-Ahead Magic: The beauty of this recipe lies in its make-ahead potential. The chicken and vegetables can be roasted, the meat pulled, and the sauce prepared up to 2 days in advance. Store them separately in airtight containers in the refrigerator. Assemble the pot pie(s) just before baking. The puff pastry can also be rolled out and stored in the refrigerator for a day, or even frozen for a few weeks if you prepare it in advance.
- Don’t Fear the Fat: While we separate some of the fat, the residual fat in the roasting pan is essential for a deeply flavorful roux. Don’t be tempted to wipe the pan completely clean!
- Vegetable Versatility: Feel free to add other root vegetables like parsnips or celery to the mix. Just ensure they are cut to a similar size as the potatoes and carrots to ensure even cooking.
- Herbal Harmony: Fresh herbs are a game-changer here. If you must use dried, use about a third of the amount called for fresh, as their flavor is much more concentrated.
- Crispy Bottom Crust? If you’re concerned about a soggy bottom, especially with individual ramekins, consider briefly pre-baking the pastry bases for about 5-7 minutes before adding the filling. However, with this method, the steam escaping around the edges usually suffices.
Serving & Storage Suggestions
Serve your magnificent roasted chicken pot pie piping hot, straight from the oven. The golden, puffed pastry is a feast for the eyes, and the aroma is simply intoxicating. A simple green salad with a light vinaigrette or some steamed green beans makes a perfect accompaniment to cut through the richness.
Leftovers are a treasure! Cover any leftover pot pie tightly with foil and refrigerate for up to 3 days. To reheat, place individual portions in a moderate oven (around 350°F / 175°C) until warmed through, or reheat a larger pie carefully. The puff pastry may lose some of its crispness upon reheating, but the filling will remain incredibly delicious. For longer storage, the assembled, unbaked pot pies can be frozen. Thaw overnight in the refrigerator before baking as directed, adding a few extra minutes to the baking time if necessary.
Nutritional Information
| Nutrient | Amount per Serving | % Daily Value |
|---|---|---|
| Calories | 1153 kcal | |
| Calories from Fat | ||
| Total Fat | 67.5 g | 103% |
| Saturated Fat | 25.3 g | 126% |
| Cholesterol | 248.4 mg | 82% |
| Sodium | 669.7 mg | 27% |
| Total Carbohydrate | 83 g | 27% |
| Dietary Fiber | 11.5 g | 45% |
| Sugars | 24.1 g | 96% |
| Protein | 55.7 g | 111% |
Note: Nutritional information is an estimate and can vary based on specific ingredients and portion sizes used.
Variations & Substitutions
- Heartier Vegetables: Don’t hesitate to add other sturdy vegetables like parsnips, turnips, or even sweet potatoes (cut small) to the mix.
- Creamier Texture: For an even richer sauce, you could incorporate a splash of heavy cream or a dollop of crème fraîche into the sauce just before assembling.
- Gluten-Free Crust: While puff pastry is traditional, you could experiment with a gluten-free pie crust if needed. Adjust baking times as gluten-free crusts can behave differently.
- Poultry Swap: Turkey thighs or a mix of chicken and turkey can be used interchangeably for a delightful variation.
FAQs
Q: Can I use pre-cooked rotisserie chicken instead of roasting a whole chicken?
A: Yes, you can absolutely use shredded rotisserie chicken. You’ll miss out on the flavorful pan drippings for the sauce, so be prepared to build the sauce from scratch with butter and stock, and perhaps add a bouillon cube for extra depth.
Q: My puff pastry seems to be melting too quickly. What should I do?
A: Work in a cooler environment, and if your kitchen is warm, consider placing the dough back in the refrigerator for a few minutes between rolling out each portion. Keep your rolling pin and work surface lightly floured.
Q: The sauce seems too thin. How can I thicken it further?
A: You can create a slurry by whisking together 1 tablespoon of flour or cornstarch with 2 tablespoons of cold water, then stirring it into the simmering sauce until it thickens. Let it cook for another minute or two to remove any raw flour taste.
Q: How do I know if the chicken is cooked through when roasting?
A: The juices should run clear when the thigh is pierced, and an instant-read thermometer inserted into the thickest part of the thigh (without touching bone) should register 165°F (74°C).
Q: Can I make the entire pot pie ahead of time and bake it later?
A: Yes! You can assemble the entire pot pie, cover it tightly with plastic wrap, and refrigerate it for up to 24 hours before baking. You may need to add a few extra minutes to the baking time.
There you have it – a recipe that promises not just a meal, but an experience. This Roasted Chicken Pot Pie is more than just a collection of ingredients; it’s a testament to the power of comfort food, a dish that nourishes the body and soothes the soul. I encourage you to gather your ingredients, embrace the process, and create your own cherished memories around this timeless classic. When you take that first bite, I hope you feel the same warmth and joy that I do. Happy cooking!