
The Humble Brussel Sprout, Elevated: A Barefoot Contessa Classic
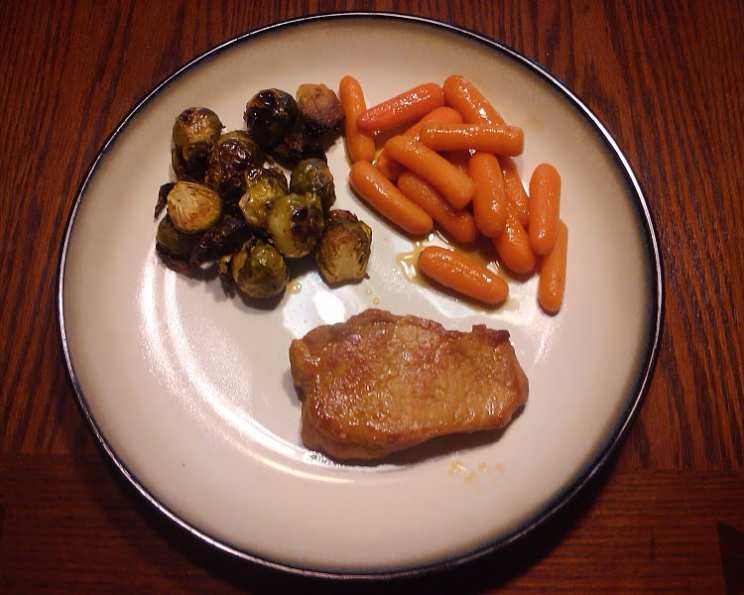
There are certain dishes that, no matter how many culinary trends come and go, remain steadfast pillars of deliciousness. For me, roasted Brussels sprouts, particularly this version from Ina Garten, is one of them. I remember first encountering this recipe years ago, skeptical about the humble sprout’s potential. But one bite, and the game changed. The edges caramelized to a delightful crisp, the centers surrendered with a tender chew, and the simple seasoning allowed the vegetable’s natural sweetness to shine. It’s a testament to the power of good ingredients and straightforward technique, a reminder that sometimes, the most profound flavors come from the simplest preparations.
Recipe Overview
- Prep Time: 15 minutes
- Cook Time: 35 to 40 minutes
- Total Time: 50 to 55 minutes
- Servings: 6
- Yield: Roasted Brussels Sprouts
- Dietary Type: Vegan, Gluten-Free, Dairy-Free
Ingredients
This recipe celebrates the pure essence of Brussels sprouts, allowing their inherent flavor to take center stage.
- 1 ½ pounds Brussels sprouts
- 3 tablespoons olive oil
- ¾ teaspoon kosher salt
- ½ teaspoon fresh ground black pepper
Equipment Needed
For this straightforward preparation, you won’t need much beyond the essentials:
- A sharp knife for trimming
- A cutting board
- A large mixing bowl
- A sheet pan or baking sheet
- A spatula or spoon for tossing
Instructions
The beauty of this recipe lies in its simplicity and the transformative power of heat. Follow these steps for perfectly roasted Brussels sprouts every time.
-
Preheat the Oven: Begin by preheating your oven to 400 degrees Fahrenheit (200 degrees Celsius). Ensuring your oven is at the correct temperature from the start is crucial for achieving that desirable crisp exterior.
-
Prepare the Brussels Sprouts: Take your Brussels sprouts and cut off the brown, woody ends. This not only improves the appearance but also removes any tougher parts. Next, pull off any yellow outer leaves that appear wilted or damaged. For larger sprouts, you can slice them in half lengthwise. This allows for more surface area to come into contact with the heat, promoting even browning and caramelization.
-
Season the Sprouts: Place the prepared Brussels sprouts into your large mixing bowl. Drizzle them generously with the olive oil. Add the kosher salt and fresh ground black pepper. Use your hands or a spatula to toss everything together thoroughly, ensuring each sprout is evenly coated in the oil and seasonings. This coating is key to developing that delicious, slightly crispy texture.
-
Arrange for Roasting: Pour the seasoned Brussels sprouts onto a sheet pan. Spread them out into a single layer, making sure they are not overcrowding the pan. Overcrowding will cause the sprouts to steam rather than roast, resulting in a less desirable texture. If your pan is too full, consider using two separate pans.
-
Roast to Perfection: Place the sheet pan in the preheated oven. Roast for 35 to 40 minutes. During the roasting process, it’s important to shake the pan from time to time. This action helps to brown the sprouts evenly on all sides, ensuring consistent tenderness and crispiness. The goal is to achieve sprouts that are crisp on the outside and tender on the inside.
-
Serve Immediately: Once the Brussels sprouts have reached your desired level of crispness and tenderness, carefully remove the pan from the oven. For an extra touch of flavor, sprinkle with more kosher salt. Serve them immediately while they are hot and at their peak deliciousness.
Expert Tips & Tricks
- The Power of the Cut: Slicing larger Brussels sprouts in half not only aids in even cooking but also creates more surface area for those delightful crispy edges. Don’t be afraid to cut them if they are particularly large.
- Don’t Crowd the Pan: I cannot stress this enough! A single layer is essential for achieving that beautiful roast. If your pan looks too full, it’s a sign you might need a second pan or a larger one. Steamed sprouts are simply not the same as roasted ones.
- Listen to Your Oven: Ovens can vary. Keep an eye on your sprouts during the last 10-15 minutes of roasting. Some might be ready sooner, while others might need a few extra minutes. You’re looking for vibrant green sprouts with lovely brown, crispy edges.
- The Salt Sprinkle: That final sprinkle of kosher salt just before serving is a chef’s secret weapon. It amplifies all the flavors and adds a little textural contrast.
Serving & Storage Suggestions
These roasted Brussels sprouts are incredibly versatile and make a fantastic side dish for a wide variety of meals. They are best served immediately after roasting, as this is when their texture is at its prime – tender on the inside with delightfully crispy edges.
Leftovers can be stored in an airtight container in the refrigerator for up to 3 days. While they will lose some of their crispness upon refrigeration, they are still delicious. To reheat, I recommend spreading them on a baking sheet and warming them in a 350-degree Fahrenheit (175-degree Celsius) oven for about 10-15 minutes, or until heated through. This method helps to recapture some of that roasted texture. You can also reheat them gently in a skillet over medium heat, but be careful not to overcook them. Freezing is not generally recommended for optimal texture.
Nutritional Information
Here is an approximate nutritional breakdown per serving, assuming 6 servings from the recipe:
| Nutrient | Amount per Serving | % Daily Value |
|---|---|---|
| Calories | 101 kcal | N/A |
| Total Fat | 7.3 g | 11% |
| Saturated Fat | 1.1 g | 5% |
| Cholesterol | 0 mg | 0% |
| Sodium | 242 mg | 10% |
| Total Carbohydrate | 8.2 g | 2% |
| Dietary Fiber | 3 g | 12% |
| Sugars | 2 g | 7% |
| Protein | 2.9 g | 5% |
Note: Nutritional values are estimates and can vary based on specific ingredients and preparation methods.
Variations & Substitutions
While this recipe is perfect in its simplicity, there are always ways to add your personal touch.
- Aromatic Infusion: For a subtle depth of flavor, consider adding a few cloves of garlic (either whole or minced) to the pan during the last 15-20 minutes of roasting.
- A Touch of Sweetness: A drizzle of balsamic glaze or a sprinkle of dried cranberries or pomegranate seeds just before serving can add a lovely sweet and tangy counterpoint.
- Nutty Crunch: Toasted pecans, walnuts, or almonds tossed in with the sprouts during the last 10 minutes of roasting, or sprinkled on top after, add a delightful nutty flavor and crunch.
- Cheesy Delight: For a non-vegan option, a sprinkle of grated Parmesan cheese or crumbled feta cheese towards the end of roasting is divine.
FAQs (Frequently Asked Questions)
Q: Why are my Brussels sprouts not crispy?
A: The most common reason is overcrowding the pan, which causes them to steam instead of roast. Ensure they are in a single layer with space around them.
Q: Can I cut the Brussels sprouts ahead of time?
A: Yes, you can cut and prepare the Brussels sprouts a few hours in advance and store them in the refrigerator. Toss them with the oil and seasonings just before roasting for the best results.
Q: What is the best way to trim Brussels sprouts?
A: Trim off the tough, woody base and remove any loose or discolored outer leaves. If the sprouts are very large, slicing them in half lengthwise helps them cook more evenly.
Q: How do I know when Brussels sprouts are done roasting?
A: They should be tender on the inside and have nicely browned, crispy edges. You can pierce a sprout with a fork or knife to check for tenderness.
Q: Can I use a different type of oil?
A: While olive oil is recommended for its flavor and roasting properties, you could experiment with other high-heat oils like avocado oil or grapeseed oil.
Final Thoughts
This recipe for roasted Brussels sprouts is more than just a side dish; it’s a gateway to appreciating vegetables in their most flavorful form. It’s the kind of dish that can convert even the staunchest sprout skeptic into an enthusiast. The simplicity allows the natural sweetness of the sprouts, enhanced by the caramelization from roasting, to truly sing. I encourage you to try this recipe, perhaps serving it alongside a roasted chicken or a hearty lentil loaf. And when you do, I’d love to hear about your experience – does it become a regular on your table too?