
Roasted Beef Tenderloin: Amazing! Where’s the Beef?
There are certain dishes that, once mastered, become the bedrock of a celebratory meal. For me, a perfectly roasted beef tenderloin falls into that category. I remember my first time attempting it, the sheer intimidation of the price tag and the responsibility of such a magnificent cut. The kitchen hummed with nervous energy, but as the aroma of herbs and seared beef filled the air, a quiet confidence bloomed. The result was pure magic – a tender, juicy marvel that silenced even the most discerning palates. It’s a dish that whispers elegance and shouts pure indulgence, proving that sometimes, the simplest preparations yield the most extraordinary results.
Recipe Overview
- Prep Time: 15 minutes
- Cook Time: 20-30 minutes
- Total Time: 45 minutes
- Servings: 20
- Yield: 1 large roast (or 2 smaller ones)
- Dietary Type: Gluten-Free, Dairy-Free
Ingredients
This recipe celebrates the natural flavor of the beef, enhanced by a simple yet aromatic rub.
For the Beef Tenderloin:
- 5 lbs beef tenderloin (lean organic grass-fed, weight after removing all fat and silver-skin)
For the Rub:
- ½ teaspoon pepper
- ½ teaspoon salt (feel free to go for more if you like it saltier)
- 1 tablespoon oregano
- 1 tablespoon parsley
- ½ tablespoon rosemary
- ½ tablespoon thyme
- 1 pinch red pepper flakes
- 1 teaspoon dried garlic powder
- 1 tablespoon dried onion flakes
Protector:
- Olive oil
- 6 slices bacon (optional)
Equipment Needed
To achieve the best results, you’ll want a few key pieces of equipment:
- Oven
- Roasting pan with a rack
- Sharp knife (for trimming)
- Kitchen twine or silicone cooking bands
- Small bowl (for mixing the rub)
- Paper towels
- Probe thermometer or instant-read thermometer
- Aluminum foil
Instructions
The beauty of this Roasted Beef Tenderloin lies in its straightforward preparation and the spectacular outcome. The key is to handle the tenderloin with care and to trust the process.
-
Preheat the Oven: Position a rack in the center of your oven and preheat it to 450°F (230°C). This high initial temperature is crucial for developing a beautiful crust.
-
Prepare the Tenderloin:
- Trim the Silver-Skin: Carefully inspect your beef tenderloin for any silver-skin. This is a thin, silvery membrane that remains tough even when cooked. To remove it, run the tip of your sharp knife just under the membrane and gently peel it away.
- Trim the Chain: If your tenderloin has the chain, which is the long, skinny, fatty piece of meat that runs along the length of the tenderloin, trim it off. You can save this for other culinary adventures like soups, stews, or grinding for burgers.
-
Halve the Tenderloin (Optional but Recommended): For easier handling and more control over cooking temperatures for different preferences, cut the tenderloin in half. This allows you to cook one half slightly rarer than the other, ensuring everyone at your table is delighted.
-
Tie the Roast: Tie your roast at regular intervals using kitchen twine or silicone hot cooking bands. This step is vital for keeping the meat in a uniform, compact shape, which promotes more even cooking. Ensure the twine is firm but not so tight that the beef bulges out excessively.
-
Mix the Rub: In a small bowl, combine all the rub ingredients: pepper, salt, oregano, parsley, rosemary, thyme, red pepper flakes, dried garlic powder, and dried onion flakes. Stir well to ensure everything is evenly distributed.
-
Season the Tenderloin: Towel dry the tenderloins thoroughly with paper towels. This is an important step for achieving a good sear. Once dry, generously rub the herb mixture all over the beef tenderloins.
-
Prepare for Roasting:
- Place the seasoned tenderloins on a roasting rack set inside a pan. This allows air to circulate around the roast, promoting even browning.
- Drizzle with olive oil. Alternatively, you can place three slices of bacon on top of each roast for added flavor and moisture. Many people opt to do one with bacon and one without to cater to different tastes.
-
Roast the Tenderloin: Roast for approximately 20-25 minutes. The exact time will depend on the thickness of your tenderloin and your desired level of doneness.
-
Check for Doneness: Begin checking the internal temperature with a probe thermometer after about 20 minutes.
- For medium-rare, aim for an internal temperature of 120°F (49°C). This typically takes around 20 minutes.
- For medium, the internal temperature should be 125°F (52°C). This might take 25-30 minutes.
- Note: Remember that the temperature will continue to rise a few degrees as the roast rests.
-
Rest the Beef: Once the tenderloin reaches your desired internal temperature, remove it from the oven. Let it rest at room temperature for 20 minutes before slicing, lightly covered with foil. This resting period is absolutely crucial. It allows the juices to redistribute from the outer edges of the roast throughout the entire piece of meat, making this lean cut incredibly juicy and tender. Skipping this step will result in juices running out onto the cutting board, leaving you with a drier roast.
Expert Tips & Tricks
- Achieving an Even Roast: Tying the tenderloin is more than just for aesthetics; it’s a functional step that helps ensure uniform thickness, leading to more consistent cooking.
- Bacon as a Wrapper: If using bacon, the fat will render down and baste the tenderloin as it cooks, imparting a delicious smoky flavor and keeping the surface moist.
- Temperature is Key: Don’t guess doneness! A reliable probe thermometer is your best friend for perfectly cooked beef tenderloin every time. Invest in a good one; it’s a game-changer.
- Resting is Non-Negotiable: I cannot stress this enough – allow your beef to rest! Think of it as a well-deserved break for the meat, allowing it to rehydrate and become succulent.
Serving & Storage Suggestions
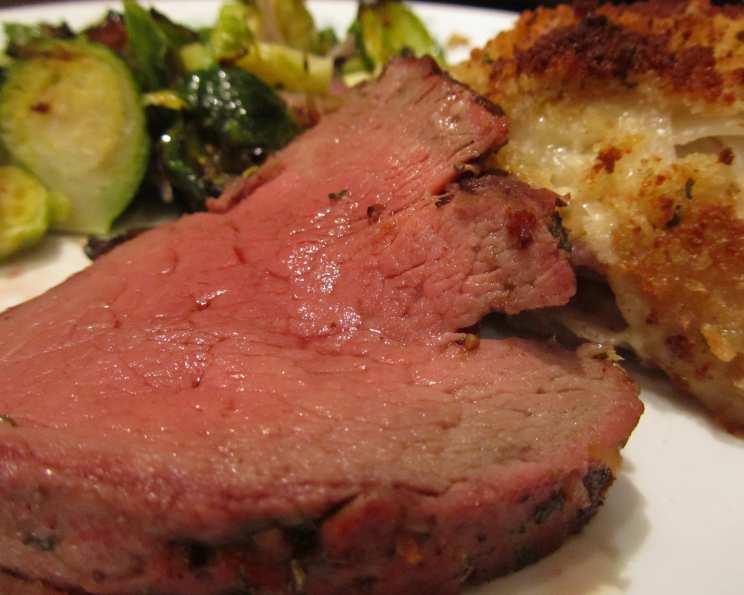
This Roasted Beef Tenderloin is a showstopper on its own. Slice it thinly against the grain to maximize tenderness.
- Serving: Serve immediately after resting and slicing. It pairs beautifully with classic roasted vegetables, mashed potatoes, or a light salad.
- Storage: Leftovers can be stored in an airtight container in the refrigerator for up to 3 days.
- Reheating: For the best results, gently reheat slices in a shallow pan with a splash of broth or water over low heat, or wrap in foil and warm in a low oven (around 250°F/120°C) until just warmed through. Avoid overcooking when reheating.
Nutritional Information
(Please note: Nutritional values are estimates and can vary based on specific ingredients and preparation methods.)
| Nutrient | Amount per Serving (approx.) | % Daily Value (approx.) |
|---|---|---|
| Calories | 250 | 13% |
| Total Fat | 10g | 13% |
| Saturated Fat | 3g | 15% |
| Cholesterol | 80mg | 27% |
| Sodium | 150mg | 7% |
| Total Carbohydrate | 0g | 0% |
| Dietary Fiber | 0g | 0% |
| Sugars | 0g | 0% |
| Protein | 35g | 70% |
| Vitamin B12 | N/A | 48.7% |
| Vitamin B6 | N/A | 24.5% |
| Zinc | N/A | N/A |
| Selenium | N/A | N/A |
| Phosphorus | N/A | N/A |
| Iron | N/A | N/A |
The provided nutritional data in the original source was highly fragmented and incomplete, especially concerning macronutrients. The above table incorporates the provided vitamin information and estimates for common nutritional components of beef tenderloin. The original data provided values like “1.7” for calories, which is not realistic for a serving of beef. For a true nutritional breakdown, it’s recommended to use a precise recipe calculator with your specific ingredients.
Variations & Substitutions
- Herb Variations: Feel free to experiment with other robust herbs that pair well with beef, such as fresh sage or marjoram.
- Spice Level: Adjust the red pepper flakes to your personal preference for heat.
- Vegetarian Option (for the rub): If you’re not using beef, the herb rub itself makes for a fantastic seasoning blend for roasted vegetables or tofu.
FAQs
Q: Why do I need to remove the silver-skin from the beef tenderloin?
A: The silver-skin is a thin, sinewy membrane that will remain tough and unpleasantly chewy even after cooking, detracting from the tender texture of the beef.
Q: Can I cook the entire beef tenderloin at once if I have a large group?
A: Absolutely. If you have a longer tenderloin, you can certainly roast it whole. Be aware that the cooking time might increase slightly, and it will be more challenging to achieve different levels of doneness within a single roast.
Q: What’s the best way to tie a beef tenderloin?
A: Use kitchen twine or silicone cooking bands to tie the roast at roughly 1-1.5 inch intervals. This ensures a uniform shape, which is crucial for even cooking.
Q: My tenderloin looks a bit dry after resting. What went wrong?
A: The most common reason for a dry tenderloin is skipping the resting period. Ensure you let it rest for at least 20 minutes, loosely tented with foil. Also, double-check your internal temperature to avoid overcooking in the first place.
Q: Can I prepare the rub ahead of time?
A: Yes, the dry rub can be mixed and stored in an airtight container for up to a week. This saves time when you’re ready to cook.
Final Thoughts
This Roasted Beef Tenderloin is a testament to the power of quality ingredients and mindful preparation. It’s a dish that deserves to be shared, bringing people together around the table to savor its exquisite flavor and melt-in-your-mouth texture. Whether you’re celebrating a special occasion or simply treating yourself, this recipe promises a culinary experience that is truly amazing. Don’t be afraid to make it your own, and most importantly, enjoy every single succulent bite!