
Roasted Banana Coconut Ice Cream: A Sweet Symphony of Tropical Delights
There are certain scents that transport you instantly. For me, the aroma of caramelized bananas, mingled with the subtle sweetness of coconut and a whisper of vanilla, is pure olfactory bliss. It’s a scent that reminds me of sun-drenched afternoons, the gentle whir of an ice cream maker, and the sheer joy of a homemade treat. This particular ice cream, with its roasted banana base, is more than just a dessert; it’s a memory maker, a delightful secret shared between loved ones, and a testament to how simple ingredients can yield extraordinary results. The depth of flavor that roasting brings to the bananas is truly transformative, turning them into a rich, jammy base that sings against the creamy coconut.
Recipe Overview
- Prep Time: 15 minutes
- Cook Time: 35 to 45 minutes
- Total Time: 50 to 60 minutes (plus freezing time)
- Servings: 4-6
- Yield: 1 batch
- Dietary Type: Dairy-Free, Vegan
Ingredients
This recipe calls for just a handful of simple, wholesome ingredients, proving that exceptional flavor doesn’t require complexity.
- 4-5 medium ripe bananas, sliced into 1-inch pieces
- 2 pitted dates, chopped
- 1 tablespoon pure vanilla extract
- 2 tablespoons coconut oil, melted
- 1 (13.5-ounce) can full-fat coconut milk
Equipment Needed
To bring this tropical dream to life, you’ll want to have the following tools ready:
- An 11-by-7-inch Pyrex baking dish
- A high-powered blender (like a Vita-Mix) or a food processor
- An ice cream maker
- A measuring spoon
- A measuring cup
- An oven
Instructions
Crafting this ice cream is a delightful journey, a two-part process that builds layers of flavor and achieves a luxuriously creamy texture.
- Begin by preparing the star of our show: the bananas. Preheat your oven to 375°F (190°C).
- In your 11-by-7-inch Pyrex baking dish, arrange the banana slices in a single layer.
- Scatter the chopped dates evenly over the bananas. The dates will add a beautiful sweetness and help create a syrupy texture as they roast.
- Drizzle the vanilla extract and the melted coconut oil over the banana and date mixture. Ensure everything is lightly coated.
- Bake in the preheated oven for 35 to 45 minutes. Keep a close eye on the mixture; you’re looking for the bananas to become tender, slightly caramelized, and to release a wonderfully fragrant aroma. The goal is to achieve a sweet, jammy consistency, but be careful not to let them burn.
- Once roasted to perfection, carefully remove the baking dish from the oven. Allow the mixture to cool slightly for a few minutes.
- Transfer the roasted banana and date mixture – along with any accumulated juices from the baking dish – into your high-powered blender. Add the full-fat coconut milk.
- Puree the mixture on the highest setting until it is completely smooth and velvety. This may take a minute or two, depending on your blender. You want a homogenous consistency with no banana chunks remaining.
- Chill the mixture thoroughly in the refrigerator for at least 2 hours, or preferably overnight. This is a crucial step for optimal ice cream making.
- Once the base is well-chilled, pour it into your ice cream maker. Freeze according to the manufacturer’s instructions for your specific machine. This typically involves churning for about 20-30 minutes until the ice cream reaches a soft-serve consistency.
- For a firmer scoopable ice cream, transfer the churned mixture to an airtight container and freeze for an additional 2-4 hours.
- Serve your delightful Roasted Banana Coconut Ice Cream topped with your favorite accompaniments.
Expert Tips & Tricks
- Banana Ripeness is Key: For the most intensely sweet and caramelized result, use bananas that are very ripe, speckled with brown spots. They will break down beautifully in the oven.
- Don’t Skip the Chill: Chilling the base thoroughly before churning in the ice cream maker is paramount for achieving a smooth, creamy texture. A warm base will result in icy ice cream.
- Watch for Burning: While caramelization is desirable, burnt sugar is not. Keep an eye on your bananas during the roasting phase, especially towards the end. If they start to get too dark, you can loosely tent the dish with foil.
- Coconut Milk Quality: Using full-fat coconut milk is essential for the rich, creamy texture of this ice cream. Light coconut milk will not yield the same luxurious result.
- Customizing Sweetness: If you find your bananas aren’t sweet enough, you can add an extra date or a touch of maple syrup to the roasting pan.
Serving & Storage Suggestions
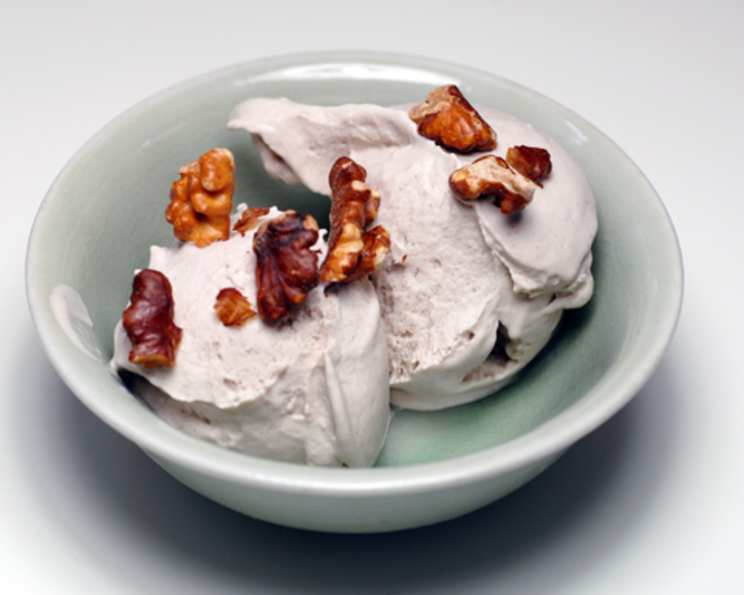
This Roasted Banana Coconut Ice Cream is a marvel on its own, but it truly shines when adorned with a few thoughtful toppings. A sprinkle of toasted shredded coconut, a handful of fresh berries (raspberries and blueberries are particularly lovely), or a scattering of crunchy chopped nuts (almonds, walnuts, or macadamia nuts) all complement the tropical flavors beautifully. For an extra touch of indulgence, a drizzle of melted dark chocolate is divine.
Leftovers can be stored in an airtight container in the freezer for up to 2 weeks. It’s best to let the ice cream soften at room temperature for about 5-10 minutes before scooping, as homemade ice cream can sometimes freeze quite hard.
Nutritional Information
Here’s an estimated nutritional breakdown for a serving of this delicious ice cream:
| Nutrient | Amount per Serving | % Daily Value |
|---|---|---|
| Calories | 376.5 kcal | – |
| Calories from Fat | 224 kcal | – |
| Total Fat | 24.9 g | 38% |
| Saturated Fat | 21.7 g | 108% |
| Cholesterol | 0 mg | 0% |
| Sodium | 51.5 mg | 2% |
| Total Carbohydrate | 38.8 g | 12% |
| Dietary Fiber | 5.6 g | 22% |
| Sugars | 23.6 g | 94% |
| Protein | 4.1 g | 8% |
Note: Nutritional values are estimates and can vary based on specific ingredients and portion sizes.
Variations & Substitutions
While this recipe is wonderfully balanced as is, here are a few ideas to tailor it to your preferences:
- Spice It Up: Add a pinch of cinnamon or nutmeg to the banana mixture before roasting for a hint of warmth. A touch of ground ginger would also be lovely.
- Boozy Twist: For an adult version, consider adding a tablespoon or two of dark rum or coconut rum to the puree mixture before churning.
- Nut Butter Swirl: Once the ice cream is churned but still soft, swirl in some almond butter or cashew butter for a decadent ribbon of flavor.
- Chocolate Lover’s Dream: Add 2-3 tablespoons of unsweetened cocoa powder to the puree mixture for a rich chocolate-banana fusion.
FAQs
Q: Why do I need to roast the bananas first?
A: Roasting concentrates the natural sugars in the bananas, intensifying their sweetness and creating a deep, caramel-like flavor that is more complex and delicious than using raw bananas.
Q: Can I make this ice cream without an ice cream maker?
A: Yes, you can! After pureeing and chilling the base, pour it into a shallow freezer-safe container. Stir vigorously every 30-45 minutes for the first 2-3 hours to break up ice crystals. It won’t be as smooth as machine-churned ice cream, but it will still be delicious.
Q: How can I ensure my ice cream is smooth and not icy?
A: The key is to use very ripe bananas, roast them properly, chill the base thoroughly, and churn in a well-frozen ice cream maker. Stirring regularly if making it without a machine also helps.
Q: Can I use other fruits instead of bananas?
A: While bananas provide a unique creamy texture and sweetness when roasted, you could experiment with roasted sweet potatoes or a combination of roasted apples and pears, though the texture and flavor profile will be different.
Q: How long will the roasted bananas and dates last if I roast them in advance?
A: Once roasted and cooled, the banana and date mixture can be stored in an airtight container in the refrigerator for up to 2 days before pureeing and making the ice cream.
Final Thoughts
This Roasted Banana Coconut Ice Cream is a testament to the magic that can happen with simple, wholesome ingredients. It’s a dessert that’s both comforting and exotic, familiar yet exciting. The process of roasting the bananas is where the true enchantment lies, unlocking a depth of flavor that will have you coming back for scoop after scoop. I encourage you to give this recipe a try, to experience the joy of creating something truly special from scratch. Share it with loved ones, or keep it all to yourself – either way, it’s a sweet indulgence you won’t soon forget.
Enjoy this creamy, dreamy, dairy-free delight!