
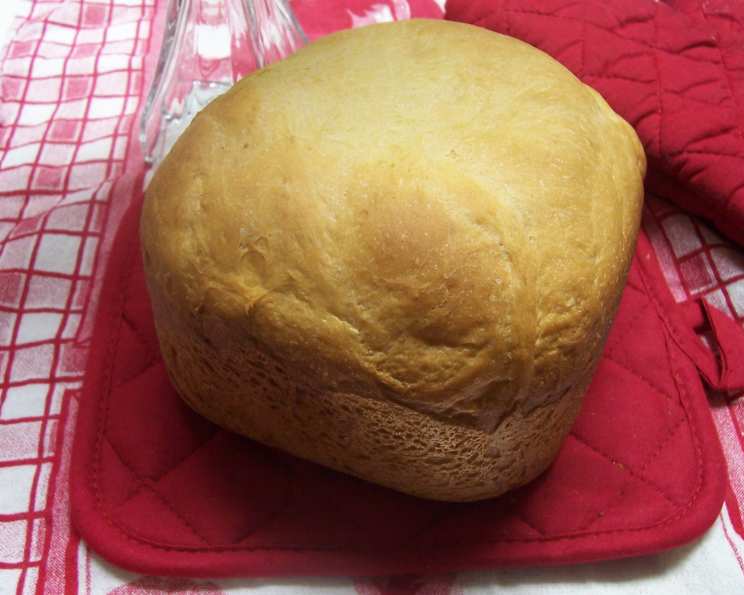
The Unassuming Charm of Ricotta Bread for Your Bread Machine
There’s a certain magic that happens when the aroma of freshly baked bread fills your kitchen, a scent that instantly transports me back to my grandmother’s bustling Sunday dinners. While she was a master of many baked goods, there was a particular loaf that always held a special place in my heart: a simple, yet incredibly tender ricotta bread. It wasn’t the towering, artisan-style loaf that graces bakery windows, but something far more comforting and approachable. This bread machine version captures that same delightful richness and soft crumb, a testament to the humble power of ricotta cheese to elevate even the most basic dough. It’s the kind of bread that makes you appreciate the quiet joy of a perfectly executed, straightforward recipe.
Recipe Overview
- Prep Time: 10 minutes
- Cook Time: 3 hours 5 minutes (as per bread machine cycle)
- Total Time: 3 hours 15 minutes
- Servings: 8
- Yield: 1 pound loaf
- Dietary Type: Vegetarian
Ingredients
This recipe is designed for a standard 1-pound bread machine loaf pan. The beauty of this bread lies in its simplicity and the subtle, creamy richness that ricotta imparts.
- 3 tablespoons skim milk or 3 tablespoons whole milk
- 2⁄3 cup low-fat ricotta cheese or 2⁄3 cup ricotta cheese
- 4 teaspoons unsalted butter, softened to room temperature
- 1 large egg
- 2 tablespoons granulated sugar
- 1⁄2 teaspoon salt
- 1 1⁄2 cups bread flour, plus more bread flour, as needed
- 1 teaspoon active dry yeast
Equipment Needed
- 1-pound capacity bread machine
- Measuring cups and spoons
- Spatula or spoon for checking dough consistency
Instructions
The true elegance of this recipe lies in its effortless execution within the confines of your bread machine. Follow these steps for a foolproof loaf:
-
Load the Bread Machine: Carefully add all the ingredients to your bread machine pan in the order specified by your manufacturer’s manual. This usually means liquids first, followed by softened butter, eggs, sugar, salt, flour, and finally, the yeast. It’s crucial to ensure the yeast does not come into direct contact with the liquid or salt at this stage, as this can inhibit its activation.
-
Select the Cycle and Crust: Set your bread machine to the basic bread cycle and select the light crust setting. The basic cycle typically handles all the kneading, rising, and baking automatically, making it ideal for this recipe. The light crust setting is chosen because the higher moisture content from the ricotta can sometimes lead to a browner crust than desired if left on a darker setting.
-
Monitor Dough Consistency (Crucial Step): After approximately 5 minutes of the machine’s mixing cycle, it’s time for a quick peek. Gently open the lid and observe the dough. It should be forming a cohesive ball that is smooth and slightly tacky, pulling away from the sides of the pan.
- If the dough appears too wet (sticky and not forming a ball, sticking excessively to the sides of the pan), carefully add more bread flour, one tablespoon at a time, allowing the machine to incorporate each addition before adding more. Do not over-add flour, as this can result in a dry, dense loaf. The amount of flour needed can vary based on the humidity of your kitchen and the specific brand of flour you are using.
- If the dough appears too dry (crumbly and not coming together, struggling to form a ball), add a tiny bit of water, about one teaspoon at a time, until the dough reaches the correct consistency. Be very sparing with water, as it’s easy to add too much. The goal is a soft, pliable, and slightly tacky ball.
-
Let the Machine Work its Magic: Once you’ve adjusted the dough consistency, close the lid and allow the bread machine to complete its cycle. This includes kneading, multiple rising periods, and the final baking stage, which will take approximately 3 hours and 5 minutes in total.
-
Remove and Cool: As soon as the bread machine finishes its cycle, carefully remove the bread pan from the machine. Invert the pan onto a wire cooling rack to release the loaf. If the loaf is difficult to remove, gently shake the pan or use a silicone spatula to loosen the edges. Allow the ricotta bread to cool completely on the wire rack before slicing. This is essential for the bread’s texture to set properly. Slicing too early can result in a gummy interior.
Expert Tips & Tricks
- Ricotta Quality Matters: While this recipe works with both low-fat and regular ricotta, using full-fat ricotta will yield a slightly richer, more tender crumb. Ensure your ricotta is well-drained if it appears particularly watery.
- Butter Softness: Make sure your butter is truly softened to room temperature, not melted. This allows it to emulsify better into the dough, contributing to a tender texture.
- Yeast Freshness: Always check the expiration date on your active dry yeast. Stale yeast is a common culprit for failed bread machine recipes.
- Flour Measurement: For the most accurate measurement of bread flour, spoon it into your measuring cup and level it off with a straight edge, rather than scooping directly from the bag. This prevents packing too much flour.
- Machine Manual is Your Friend: Every bread machine is slightly different. Familiarize yourself with your machine’s specific instructions for loading ingredients and selecting cycles.
Serving & Storage Suggestions
This ricotta bread is wonderfully versatile. It shines when served warm, lightly toasted, and spread with a generous amount of good quality butter. Its subtle sweetness also makes it a delightful base for a variety of toppings, from fruit preserves and honey to cream cheese and smoked salmon.
For storage, once the bread has cooled completely, wrap it tightly in plastic wrap or place it in an airtight container. It will keep well at room temperature for 2 to 3 days. If you live in a warm or humid climate, refrigerating the bread can help prevent mold growth, though it may slightly alter the texture.
To freeze, wrap the cooled loaf tightly in plastic wrap, then in aluminum foil, or place it in a freezer-safe bag. It can be frozen for up to 3 months. Thaw at room temperature and toast if desired.
Nutritional Information
Here’s an estimated breakdown of the nutritional content for a slice of this ricotta bread. Please note that these values are approximate and can vary based on the specific ingredients used (e.g., fat content of ricotta, type of milk).
| Nutrient | Amount per Serving | % Daily Value |
|---|---|---|
| Calories | 156 | |
| Calories from Fat | 42 | |
| Total Fat | 4.7g | 6% |
| Saturated Fat | 2.6g | 13% |
| Cholesterol | 34.8mg | 12% |
| Sodium | 184.1mg | 8% |
| Total Carbohydrate | 22.6g | 8% |
| Dietary Fiber | 0.8g | 3% |
| Sugars | 3.3g | 13% |
| Protein | 6g | 12% |
(Nutritional values are calculated based on the use of skim milk and low-fat ricotta. Serving size is assumed to be 1/8 of the loaf.)
Variations & Substitutions
While this recipe is designed for a classic flavor profile, here are a few ways to add your personal touch:
- Herbed Ricotta Bread: For a savory twist, add 1-2 teaspoons of finely chopped fresh herbs like rosemary, thyme, or chives to the wet ingredients.
- Citrus Zest: Incorporate the zest of half a lemon or orange into the dough for a subtle bright note that complements the richness of the ricotta.
- Sweet Additions: A handful of dried cranberries, raisins, or even mini chocolate chips can be added during the last few minutes of the initial kneading cycle for a sweeter bread.
- Alternative Milks: While dairy milk provides a classic flavor, you can experiment with non-dairy alternatives like almond or soy milk, though the richness may be slightly altered.
FAQs (Frequently Asked Questions)
Q: Why is my bread machine loaf not very tall?
A: This recipe is intentionally designed to produce a slightly denser, more tender loaf due to the ricotta content, rather than a very tall, airy one. The amount of flour is correct for this intended outcome.
Q: Can I use all-purpose flour instead of bread flour?
A: While you can, bread flour has a higher protein content, which develops better gluten structure and results in a chewier, more resilient loaf. Using all-purpose flour might yield a slightly softer, less structured bread.
Q: My bread machine has a larger pan. How can I adapt this recipe?
A: For larger capacity machines, you might find the 1-pound loaf shape to be quite odd. You can instead use the machine solely for mixing and rising the dough. Once the dough has completed its first rise, turn it out, shape it into a traditional loaf pan, and bake it in a preheated oven at 350°F (175°C) for approximately 30-40 minutes, or until golden brown and cooked through.
Q: How do I know if the bread is fully baked in the machine?
A: Bread machines are designed to bake automatically. The recipe duration is the indication of doneness. If you are concerned, you can use an instant-read thermometer to check the internal temperature of the loaf; it should read between 190-200°F (88-93°C).
Q: Can I omit the egg?
A: The egg contributes to the richness, tenderness, and structure of the bread. Omitting it might result in a less tender loaf with a slightly different crumb. If you need an egg-free option, you would need to find a recipe specifically formulated without eggs.
Final Thoughts
This ricotta bread is a gentle reminder that sometimes, the most comforting flavors come from the simplest ingredients. It’s a testament to the power of a well-balanced recipe and the sheer convenience of modern kitchen tools like the bread machine. I encourage you to embrace its understated charm, perhaps enjoying a slice with a cup of freshly brewed tea or a glass of milk. Don’t hesitate to share your creations and any delightful variations you discover; I always love hearing how these recipes come to life in your kitchens. Happy baking!