
Indulge in the Decadent Delight of Red Velvet Whoopie Pies
There’s a certain magic that happens when familiar comfort food gets a playful, whimsical makeover. For me, red velvet has always been that flavor – a deep, mysterious crimson hue promising a rich, cocoa-kissed indulgence, yet with a subtle tang that keeps it from being overly sweet. The first time I encountered a red velvet whoopie pie, it was a revelation. I remember biting into one at a local bakery, the soft, cake-like cookie yielding to a creamy, sweet filling, all while the vibrant red color held a delightful surprise. It was pure joy in a portable, handheld package, and it instantly transported me back to childhood days of baking with my grandmother, where every creation felt like a special occasion. These red velvet whoopie pies capture that very essence, transforming a classic cake into a delightful sandwich cookie that’s perfect for any celebration or just a moment of pure, unadulterated bliss.
Recipe Overview
- Prep Time: 15 minutes
- Cook Time: 12 to 15 minutes
- Total Time: ~30 minutes (plus cooling time)
- Servings: ~18
- Yield: 9 sandwich cookies
- Dietary Type: Can be adapted for dairy-free/egg-free with substitutions.
Ingredients
For the Red Velvet Cookies:
- 1 box (about 15.25 ounces) devil’s food cake mix
- 3⁄4 cup water
- 1⁄2 cup vegetable oil
- 3 large eggs
- 2 tablespoons red food coloring (gel or liquid)
- 1 box (3.5 ounces) chocolate instant pudding, and pie filling mix
For the Cream Cheese Filling:
- 1 cup butter, softened (or 1 cup margarine, softened for a dairy-free option)
- 2 cups marshmallow creme
- 1 1⁄2 cups powdered sugar, sifted
- 1 teaspoon vanilla extract
For the Topping (Optional but Recommended):
- 1⁄2 cup fresh blueberries
- 1⁄2 cup fresh raspberries
Equipment Needed
- Large mixing bowls
- Electric mixer (handheld or stand mixer)
- Measuring cups and spoons
- Baking sheets
- Parchment paper or cooking spray
- Cookie scoop (approximately 1/4 cup size)
- Wire cooling racks
- Spatula or butter knife for spreading filling
Instructions
- Preheat and Prepare: Begin by preheating your oven to 350°F (175°C). Prepare your baking sheets by lining them with parchment paper or lightly spraying them with cooking spray. This ensures your delicate cookies won’t stick.
- Combine Cookie Ingredients: In a large bowl, combine all the cookie ingredients: the devil’s food cake mix, water, vegetable oil, eggs, red food coloring, and the chocolate instant pudding, and pie filling mix.
- Mix the Batter: Using your electric mixer, beat the cookie ingredients on low speed until they are just moistened. Once combined, increase the mixer speed to high and beat for 1 minute longer. This thorough mixing is key to achieving the perfect cookie texture.
- Portion the Dough: Drop 1/4 cupfuls of the batter onto the prepared baking sheets, ensuring they are spaced about 2 inches apart. A cookie scoop is ideal for consistent sizing, which helps with even baking.
- Bake to Perfection: Bake for 12 to 15 minutes, or until the edges are set and the centers are no longer wet. It’s crucial not to overbake these cookies, as they should remain soft and cake-like. Overbaked cookies will be dry and crumbly.
- Cool the Cookies: Once baked, let the cookies cool on the baking sheets for 2 minutes. Then, carefully remove them from the baking sheets to cooling racks. Allow them to cool completely, which typically takes about 15 minutes. Patience here is vital; attempting to fill warm cookies will result in a melted, messy filling.
- Prepare the Filling: While the cookies are cooling, prepare the luscious filling. In a large bowl, combine the softened butter (or margarine), marshmallow creme, sifted powdered sugar, and vanilla extract.
- Whip the Filling: Using your electric mixer on high speed, beat all the filling ingredients until the mixture is light and fluffy. This may take a few minutes, but the airy texture is what makes the whoopie pie so delightful.
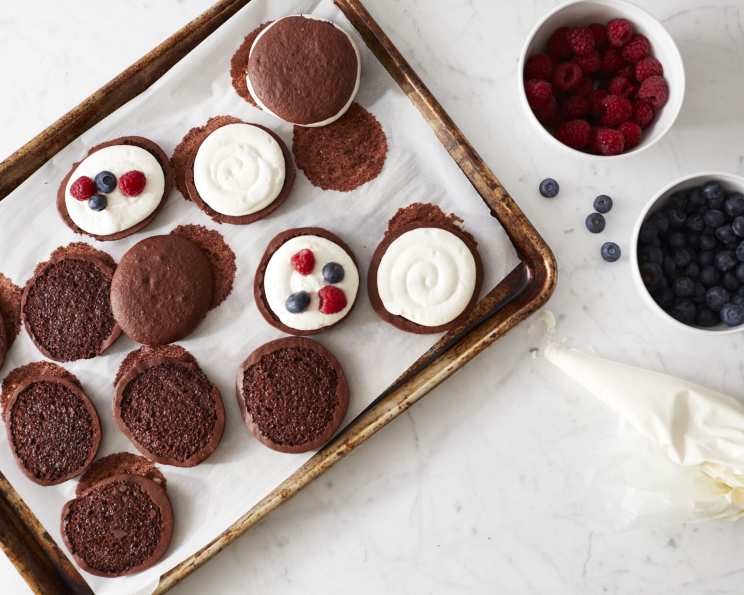
- Assemble the Whoopie Pies: Once the cookies are completely cool, it’s time for assembly. For each cookie pie, take one cooled cookie and spread approximately 1/4 cup of the prepared filling onto the bottom side.
- Add the Fruit (Optional): If you’re using the fresh berries, gently press some blueberries and raspberries into the filling. This adds a lovely burst of freshness and a beautiful contrast in color and flavor.
- Top it Off: Place a second cooled cookie on top of the filling and berries, bottom side down, to create your sandwich. Repeat with the remaining cookies and filling.
Expert Tips & Tricks
- Don’t Overmix: While beating the cookie batter for a minute on high is important, avoid overmixing once the ingredients are incorporated. Overmixing can lead to tough cookies.
- Sift Your Powdered Sugar: Sifting the powdered sugar for the filling is an essential step to ensure a smooth, lump-free texture.
- Room Temperature Ingredients: Ensure your butter (or margarine) for the filling is truly softened, not melted. This will help it cream properly with the marshmallow creme and powdered sugar.
- Consistent Scooping: Using a 1/4 cup cookie scoop will ensure all your cookies are roughly the same size, leading to even baking and a more professional presentation.
- Gel Food Coloring: For a more vibrant and concentrated red color, consider using gel food coloring. You may need less of it compared to liquid food coloring.
- Cool Completely: I cannot stress this enough: let your cookies cool completely before filling. Warm cookies will melt the filling, and the whoopie pies will not hold their shape.
Serving & Storage Suggestions
These Red Velvet Whoopie Pies are best served at room temperature, allowing the flavors and textures to be at their peak. They are a fantastic treat for parties, potlucks, or simply as an afternoon indulgence.
For storage, keep any leftover whoopie pies in an airtight container. They will remain fresh at room temperature for up to 2 days. If you need to store them for longer, place the airtight container in the refrigerator for up to 5 days. The chilling will firm up the filling slightly, which some people prefer. You can also freeze them for up to 2 months. To serve a frozen whoopie pie, allow it to thaw at room temperature for about 30 minutes.
Nutritional Information
| Nutrient | Amount per Serving | % Daily Value |
|---|---|---|
| Calories | 851.3 kcal | N/A |
| Calories from Fat | 392 kcal | N/A |
| Total Fat | 43.7 g | 67% |
| Saturated Fat | 17.1 g | 85% |
| Cholesterol | 116.2 mg | 38% |
| Sodium | 878.4 mg | 36% |
| Total Carbohydrate | 113.9 g | 37% |
| Dietary Fiber | 2.5 g | 9% |
| Sugars | 74 g | 296% |
| Protein | 6.5 g | 13% |
Note: Nutritional information is an estimate and can vary based on specific ingredients used.
Variations & Substitutions
- Dairy-Free: To make these red velvet whoopie pies entirely dairy-free, use dairy-free margarine for the filling and ensure your cake mix and pudding mix are also dairy-free. You might need to experiment with the amount of powdered sugar if using a different brand of margarine, as fat content can vary.
- Gluten-Free: While a true gluten-free version would require a gluten-free devil’s food cake mix and a compatible gluten-free chocolate pudding mix, be aware that the texture might vary slightly.
- Cream Cheese Filling: For a tangier, classic red velvet flavor, you can substitute half of the marshmallow creme with softened cream cheese. Ensure the cream cheese is well-drained if using any moisture-heavy varieties.
- No Fruit: If fresh berries aren’t your preference, you can omit them entirely for a simpler, richer filling experience. The chocolate and red velvet flavors will shine through even more.
- Mini Chocolate Chips: Fold in a few mini chocolate chips into the cookie batter before baking for an extra chocolatey surprise within the cookie itself.
FAQs
Q: Why is my red velvet cake mix batter so thick after adding the pudding mix?
A: The chocolate instant pudding, and pie filling mix is designed to absorb liquid and thicken the batter, giving the cookies their unique cake-like texture. This is normal.
Q: Can I use a different flavor of cake mix for these whoopie pies?
A: While a devil’s food cake mix is traditional for red velvet, you could experiment with a chocolate cake mix. However, you might need to adjust the red food coloring to achieve the desired hue.
Q: My filling seems too soft. What did I do wrong?
A: Ensure your butter (or margarine) was properly softened but not melted, and that you beat the filling ingredients until they were truly light and fluffy. Chilling the assembled whoopie pies can also help firm up a soft filling.
Q: How long will the whoopie pies stay fresh?
A: At room temperature, they are best consumed within 2 days. Refrigeration extends their freshness to about 5 days, and freezing is an option for up to 2 months.
Q: Can I make the cookie dough ahead of time?
A: It’s best to make the dough just before baking for the freshest cookie texture. However, you can prepare the cookie dough, cover it tightly, and refrigerate it for a few hours. Let it soften slightly at room temperature before scooping and baking.
A Sweet Finale
There’s a genuine joy in creating something that looks as spectacular as it tastes, and these Red Velvet Whoopie Pies certainly fit the bill. The vibrant color, the delightful texture contrast, and the sweet, creamy filling make them an irresistible treat for any occasion. Whether you’re baking for a special celebration or simply craving a moment of playful indulgence, I encourage you to give these a try. They’re sure to bring smiles to faces and a touch of delicious magic to your table. Pair them with a cold glass of milk, a cup of coffee, or even a glass of sparkling cider for an extra festive touch. Happy baking!