
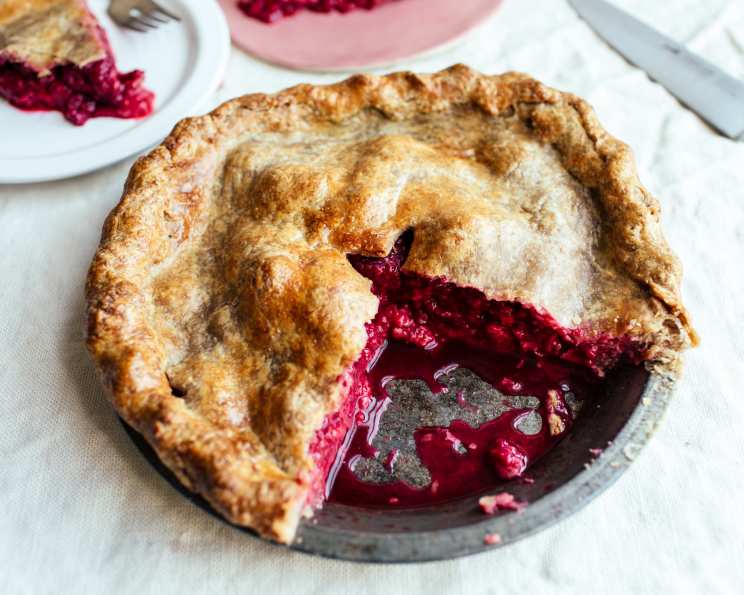
The Jewel-Toned Elegance of Raspberry Pie
There’s a particular magic in the air when raspberry season arrives in the Pacific Northwest, a vibrant promise of sun-warmed berries bursting with a perfect balance of tartness and sweetness. My earliest memories of this season are steeped in the memory of my grandmother’s kitchen, where the air would grow thick with the sweet perfume of simmering fruit. She’d have me carefully wash the ruby-red treasures, my small hands stained pink, before we’d transform them into the most magnificent raspberry pie. It wasn’t just a dessert; it was a celebration of the land, a taste of summer captured in a flaky crust.
Recipe Overview
- Prep Time: 15 minutes
- Cook Time: 1 hour
- Total Time: 1 hour 15 minutes
- Servings: 8
- Yield: 1 pie
- Dietary Type: Classic
Ingredients
To create this classic raspberry pie, you’ll need a few essential ingredients to showcase the star of the show: the raspberries themselves.
For the Filling:
- 1 quart raspberries, fresh
- 1 1⁄4 cups granulated sugar
- 8 teaspoons cornstarch
- 2 tablespoons quick-cooking tapioca
- 6 tablespoons water
- 4 tablespoons butter
For the Crust:
- 1 pastry for double-crust pie (your favorite homemade or store-bought recipe)
Equipment Needed
- 9-inch pie plate
- Large mixing bowl
- Measuring cups and spoons
- Pastry blender or fork (if making your own crust)
- Rolling pin (if making your own crust)
- Baking sheet
- Wire cooling rack
- Sharp knife or pastry wheel
Instructions
Crafting this beautiful raspberry pie is a straightforward process, allowing the natural flavor of the berries to shine.
- Prepare the Berry Mixture: In a large mixing bowl, gently combine the fresh raspberries, granulated sugar, cornstarch, and quick-cooking tapioca. Add the water to this mixture.
- Allow to Meld: Stir everything together carefully. Let this berry mixture sit while you prepare your pie crust. This resting period allows the tapioca and cornstarch to begin absorbing some of the berry juices, which will help thicken the filling as it bakes.
- Assemble the Pie: Line your 9-inch pie plate with the bottom crust of your pastry for double-crust pie. Gently pour the prepared raspberry filling into the lined pie plate.
- Add the Butter: Dot the top of the berry filling with the 4 tablespoons of butter, cut into four equal pieces. Distribute these pats of butter evenly over the surface of the filling.
- Top and Crimp: Place the second pie crust over the filling. Trim any excess dough from the edges. Crimp the edges of the top and bottom crusts together to seal them securely. This is a crucial step to prevent the filling from leaking during baking.
- Vent the Crust: Using a sharp knife or pastry wheel, cut several slits in the top crust. These vents allow steam to escape from the pie during baking, preventing the crust from becoming soggy and helping to achieve a beautifully golden finish.
- Initial Bake: Preheat your oven to 425 degrees F (220 degrees C). Place the pie on a baking sheet (this catches any potential drips and makes it easier to transfer). Bake for 15 minutes at this higher temperature. This initial blast of heat helps to set the bottom crust and start the baking process.
- Lower and Continue Baking: After 15 minutes, reduce the oven temperature to 350 degrees F (175 degrees C). Continue to bake for an additional 45 minutes. The total baking time is 1 hour. You’ll know the pie is ready when the crust is golden brown, and you can see the filling bubbling through the vents. If the crust starts to brown too quickly, you can loosely tent the pie with aluminum foil.
- Cool Completely: Once baked, carefully remove the pie from the oven and place it on a wire cooling rack. It is imperative to let the pie cool completely, which can take several hours. This allows the filling to set properly, ensuring clean slices when you serve it.
Expert Tips & Tricks
To elevate your raspberry pie from delicious to truly exceptional, consider these culinary insights:
- Berry Selection: While fresh berries are ideal, if you must use frozen, do not thaw them. Toss them directly with the sugar, cornstarch, and tapioca, and increase the baking time slightly, as frozen berries release more moisture.
- Tapioca’s Role: Quick-cooking tapioca is your friend here. It helps create a beautifully clear and slightly gelatinous filling that holds its shape without becoming gummy. If you only have regular tapioca pearls, you’ll need to soak them in water for at least 30 minutes before adding them to the berry mixture.
- Crust Perfection: For an extra flaky crust, ensure your butter and water are very cold when making homemade pastry dough. Don’t overwork the dough; handle it as little as possible to prevent toughness.
- Preventing a Soggy Bottom: Baking the pie on a preheated baking sheet helps to cook the bottom crust more effectively. Some chefs even advocate for blind-baking the bottom crust slightly before adding the filling, though for this recipe, the high initial baking temperature does a great job.
Serving & Storage Suggestions
This raspberry pie is a showstopper on its own, but it pairs beautifully with a dollop of freshly whipped cream or a scoop of vanilla bean ice cream. For a slightly more refined touch, a drizzle of crème anglaise is divine.
Storage: Once the pie has cooled completely, it can be stored at room temperature for up to 2 days, as long as your kitchen isn’t excessively warm. For longer storage, wrap the cooled pie tightly and refrigerate it for up to 4-5 days. To reheat a slice, you can gently warm it in a low oven (around 300°F or 150°C) for about 10-15 minutes. This pie is generally not recommended for freezing, as the texture of the berries and crust can be compromised upon thawing.
Nutritional Information
Here’s an approximate breakdown of the nutritional content per serving:
| Nutrient | Amount per Serving | % Daily Value |
|---|---|---|
| Calories | 467.7 kcal | |
| Calories from Fat | ||
| Total Fat | 21.7 g | 33% |
| Saturated Fat | 7.5 g | 37% |
| Cholesterol | 15.3 mg | 5% |
| Sodium | 317.6 mg | 13% |
| Total Carbohydrate | 66.6 g | 22% |
| Dietary Fiber | 4.8 g | 19% |
| Sugars | 36.9 g | 147% |
| Protein | 3.7 g | 7% |
Note: Nutritional values are estimates and can vary based on specific ingredients and preparation methods.
Variations & Substitutions
While this recipe is a classic for a reason, feel free to experiment:
- Mixed Berries: Swap half of the raspberries for blueberries, blackberries, or even chopped strawberries for a delightful “Summer Berry Pie.”
- Lemon Zest: Add the zest of half a lemon to the berry mixture for a bright, citrusy counterpoint to the sweetness.
- Almond Extract: A small dash of almond extract (about 1/2 teaspoon) can add a lovely subtle nuttiness that complements raspberries beautifully.
- Gluten-Free Crust: Use your favorite gluten-free pie crust recipe for a gluten-free version.
FAQs (Frequently Asked Questions)
Q: Why is my raspberry pie filling watery?
A: This can happen if the berries weren’t fresh or if there wasn’t enough thickener (cornstarch/tapioca). Ensuring proper baking time and complete cooling is also crucial for the filling to set.
Q: Can I use frozen raspberries instead of fresh?
A: Yes, you can. However, do not thaw them. Toss them directly with the other filling ingredients and be prepared for a slightly longer baking time, as they will release more moisture.
Q: My crust is browning too quickly, what should I do?
A: Loosely tent the pie with aluminum foil. This shields the crust from direct heat while allowing the filling to continue cooking.
Q: How do I know when the pie is fully baked?
A: The crust should be a deep golden brown, and you should see the filling bubbling thickly through the vents.
Q: Can I make this pie ahead of time?
A: Yes, the pie can be baked a day in advance and stored at room temperature. It’s often even better the next day as the flavors meld.
Final Thoughts
There’s a profound satisfaction in creating a raspberry pie from scratch, a testament to the simple beauty of fresh ingredients transformed by care and attention. Each slice is a burst of summer, a sweet-tart symphony that sings of sun-drenched days. I encourage you to embrace the vibrant allure of raspberries and bring this jewel-toned creation to your table. Share it with loved ones, savor each bite, and let the timeless magic of this classic dessert fill your home.