
Rachael Ray’s Speedy Rice Pilaf with Peas and Cheddar
I remember the first time I stumbled upon this recipe in one of Rachael Ray’s cookbooks, tucked away amongst glossy photos of more elaborate fare. What caught my eye was its sheer simplicity, a stark contrast to the multi-step extravaganzas often found in culinary magazines. Yet, there was an undeniable charm to its straightforward approach. I was a busy home cook then, much like many of you, juggling work, family, and the constant desire for delicious, home-cooked meals without an excessive time commitment. This rice pilaf promised just that – a flavorful, satisfying side that felt a little bit special without demanding hours in the kitchen. It’s become a go-to in my repertoire, a reliable friend on weeknights when inspiration is low but hunger is high.
Recipe Overview
- Prep Time: 10 minutes
- Cook Time: 20 minutes
- Total Time: 30 minutes
- Servings: 4
- Yield: 4 cups
- Dietary Type: Vegetarian
Ingredients
- 2 tablespoons olive oil
- 1 1⁄2 cups long grain white rice
- 3 1⁄2 cups chicken broth (vegetable broth can be substituted for a vegetarian option)
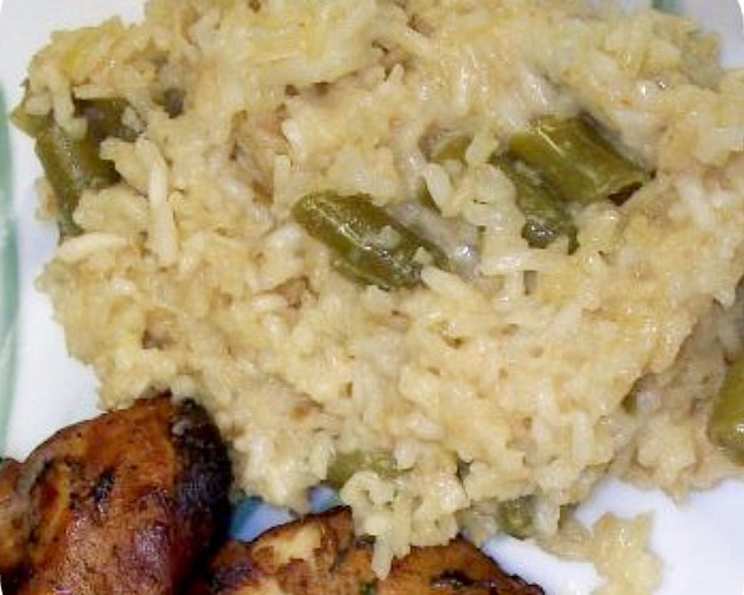
- 1 cup frozen peas, thawed
- 1 cup shredded sharp white cheddar cheese
Equipment Needed
- A deep skillet with a tight-fitting lid
- A spoon for stirring
Instructions
This rice pilaf is a masterclass in efficient flavor building. The key lies in toasting the rice before adding the liquid, a technique that imbues the grains with a nutty depth and helps prevent them from becoming mushy.
- Heat the Skillet and Oil: Place your deep skillet over medium heat. Add the 2 tablespoons of olive oil and allow it to shimmer slightly.
- Toast the Rice: Add the 1 1⁄2 cups of long grain white rice to the hot oil. Using your spoon, stir the rice continuously. You want to encourage all the grains to become coated in the oil and begin to turn a light brown color. This toasting process usually takes about 3 to 5 minutes. Keep a close eye on it, as rice can burn quickly if the heat is too high or if left unattended. The aroma will become noticeably nutty as it toasts.
- Add the Broth and Boil: Carefully pour in the 3 1⁄2 cups of chicken broth. Stir to combine with the toasted rice. Increase the heat slightly if needed to bring the mixture to a rolling boil.
- Simmer and Cover: Once boiling, cover the skillet tightly with its lid. Immediately reduce the heat to a low simmer. You want just enough heat to maintain a gentle bubbling.
- Cook the Rice: Allow the rice to cook undisturbed for 15 minutes. During this time, the rice will absorb most, if not all, of the liquid. Resist the urge to lift the lid during this crucial cooking period, as you want to trap the steam inside.
- Check for Liquid Absorption: After 15 minutes, carefully remove the lid. You should observe that the liquid has been almost entirely absorbed, and the rice appears tender. If there’s still a significant amount of liquid, cover again and cook for a few more minutes until it’s absorbed.
- Incorporate Peas and Cheese: Add the 1 cup of thawed frozen peas and the 1 cup of shredded sharp white cheddar cheese directly to the skillet.
- Stir and Finish: Stir well to distribute the peas and allow the cheese to melt into the hot rice. The residual heat will be enough to melt the cheese and warm the peas through. Continue to cook for an additional 2 to 3 minutes uncovered, stirring occasionally, until the cheese is fully melted and creamy, and the peas are heated through.
Expert Tips & Tricks
- Rice Quality Matters: While any long grain white rice will work, using a good quality Basmati or Jasmine rice can elevate the pilaf. These varieties tend to have a more distinct aroma and a fluffier texture.
- Don’t Skip the Toasting: This is the defining step that sets this pilaf apart from plain boiled rice. The toasted flavor is subtle but significant.
- Broth Temperature: While not explicitly stated, using warm or hot broth can speed up the boiling process and ensure more even cooking.
- Lid Fit: Ensure your skillet lid fits snugly. A loose-fitting lid will allow steam to escape, potentially leading to undercooked rice. If you don’t have a tight-fitting lid, you can place a piece of aluminum foil over the skillet before topping with the lid.
- Cheese Melting: If you find the cheese isn’t melting quickly enough, you can turn the heat to its lowest setting for the final 2-3 minutes, but be careful not to scorch the bottom of the rice.
Serving & Storage Suggestions
This rice pilaf is wonderfully versatile and shines as a side dish for a variety of main courses. Serve it hot, immediately after preparing, allowing the creamy cheddar to meld beautifully with the tender rice and sweet peas. It pairs exceptionally well with grilled chicken, pan-seared fish, pork chops, or even as a comforting vegetarian main course alongside a fresh salad.
Leftovers can be stored in an airtight container in the refrigerator for up to 3 days. To reheat, gently warm the pilaf in a skillet over low heat with a splash of water or broth to reintroduce moisture, or microwave it in short intervals, stirring in between, until heated through.
Nutritional Information
| Nutrient | Amount per Serving | % Daily Value |
|---|---|---|
| Calories | 488.1 kcal | 24% |
| Total Fat | 17.9 g | 23% |
| Saturated Fat | 7.4 g | 37% |
| Cholesterol | 29.7 mg | 10% |
| Sodium | 887.2 mg | 39% |
| Total Carbohydrate | 61.6 g | 22% |
| Dietary Fiber | 2.4 g | 9% |
| Total Sugars | 2.8 g | 6% |
| Protein | 18.1 g | 36% |
(Note: Nutritional values are approximate and can vary based on specific ingredients used.)
Variations & Substitutions
- Herbs: For an extra layer of freshness, stir in a tablespoon or two of finely chopped fresh parsley or chives along with the peas and cheese.
- Spices: A pinch of garlic powder or onion powder can be added with the rice during the toasting phase for a savory boost. For a touch of warmth, a whisper of paprika or a tiny pinch of cayenne pepper could be interesting.
- Cheese Swap: While sharp white cheddar is fantastic, feel free to experiment with other melting cheeses like Monterey Jack, Gruyère, or even a mild Provolone.
- Vegetable Additions: Beyond peas, consider adding thawed corn kernels, finely diced bell peppers (sautéed with the rice if desired), or blanched broccoli florets in the final minutes of cooking.
- Broth Variety: Experiment with different broths such as vegetable broth for a fully vegetarian dish or even a light mushroom broth for a deeper, earthier flavor.
FAQs
Q: Why do I need to toast the rice before cooking?
A: Toasting the rice in oil before adding liquid coats the grains, helping them maintain their shape and preventing them from becoming mushy. It also imparts a pleasant nutty flavor to the pilaf.
Q: Can I use a different type of rice?
A: This recipe is specifically designed for long grain white rice. Other types like brown rice or Arborio rice will require different liquid ratios and cooking times, so it’s best to stick to long grain white for this particular recipe.
Q: What if I don’t have a skillet with a lid?
A: If your skillet doesn’t have a tight-fitting lid, you can improvise by covering the skillet snugly with a piece of aluminum foil, ensuring it creates a good seal before you reduce the heat.
Q: Can I make this dish ahead of time?
A: While best served fresh, you can prepare the rice pilaf up to the point of adding the peas and cheese. Store the cooked rice separately and then gently reheat the rice before stirring in the peas and cheese and finishing as directed.
Q: Is it possible to make this without cheese?
A: Yes, you can omit the cheese entirely. The pilaf will still be flavorful from the toasted rice and chicken broth. You could add a tablespoon of butter at the end for richness if desired.
Final Thoughts
Rachael Ray’s Speedy Rice Pilaf is a testament to the fact that simple ingredients, thoughtfully prepared, can yield truly delightful results. It’s the kind of dish that fills your kitchen with a comforting aroma and lands squarely in the “weeknight winner” category. It’s proof that you don’t need a pantry full of exotic ingredients or hours of your time to create something delicious. I encourage you to give this recipe a try, especially on those evenings when you crave something satisfying and flavorful without the fuss. Serve it alongside your favorite protein or as the star of a light vegetarian meal. I’d love to hear how it turns out for you!