
Overnight Waffles: The Secret to Effortless Weekend Indulgence
There’s a special magic to weekend mornings, a gentle slowing down after the hurried weekdays. For me, that magic often starts with the aroma of something delicious wafting from the kitchen. I remember one particular Saturday, the sun just beginning to paint the sky in soft hues, when I decided to tackle my grandmother’s overnight waffle recipe. The anticipation as I stirred the batter the night before, knowing that all I had to do in the morning was a simple egg white whisk and a quick pour onto the waffle iron, felt like a culinary cheat code. And the result? Utter perfection. Crisp, golden-brown discs giving way to an impossibly airy interior, a testament to the slow fermentation that overnight batters so beautifully achieve. It’s a recipe that embodies ease without sacrificing an ounce of flavor or texture, a true gift to any home cook seeking a little weekend bliss.
Recipe Overview
- Prep Time: Approximately 10 minutes (the night before) + 5 minutes (in the morning)
- Cook Time: 3-5 minutes per waffle
- Total Time: 9 hours 5 minutes (includes overnight resting)
- Servings: 4-6
- Yield: Approximately 8-10 waffles (depending on waffle iron size)
- Dietary Type: Can be adapted for vegetarian (contains eggs)
Ingredients
This recipe relies on a simple yet effective leavening agent – yeast – which works its magic overnight to create a wonderfully light and airy batter.
-
For the Batter (Night Before):
- 1/2 teaspoon instant yeast
- 2 cups all-purpose flour
- 1 tablespoon sugar
- 1/2 teaspoon salt
- 2 cups milk
- 8 tablespoons melted butter, cooled
- 1/2 teaspoon vanilla extract (optional, but highly recommended for an extra layer of flavor)
-
For the Batter (Morning Of):
- 2 eggs, separated
-
For Cooking:
- Lite olive oil or vegetable oil, for brushing the waffle iron
Equipment Needed
To bring these delightful overnight waffles to life, you’ll need a few key pieces of equipment:
- A large mixing bowl for combining the batter.
- A whisk for blending dry ingredients and incorporating wet.
- A separate bowl for beating egg whites.
- A reliable waffle iron.
- A spatula or fork for gently folding the egg whites.
- A serving platter or a wire rack to keep cooked waffles warm.
Instructions
The beauty of overnight waffles lies in their simplicity and the incredible transformation that happens while you sleep. Follow these steps for guaranteed weekend perfection.
- The Night Before: Prepare the Base Batter: In your large mixing bowl, combine the instant yeast, all-purpose flour, sugar, and salt. Stir these dry ingredients together thoroughly.
- Incorporate Wet Ingredients: Pour in the milk and stir until just combined. It’s okay if there are a few small lumps; they will resolve overnight. Next, add the cooled melted butter and the vanilla extract (if using). Stir everything together until a uniform batter forms.
- The Overnight Rest: At this stage, the mixture will appear quite loose and thin. This is perfectly normal and exactly what you want for this recipe. Cover the bowl securely with plastic wrap or a lid, and let it sit undisturbed at room temperature overnight. The yeast will work its magic, creating a delightful tang and aeration. Important: Do NOT add the eggs the night before. They are added in the morning to ensure optimal texture.
- The Morning Of: Incorporate Egg Yolks: Once morning arrives, uncover the batter. You’ll notice it has likely increased slightly in volume and may have a few bubbles on the surface – a good sign! Separate your two eggs. Stir the egg yolks directly into the batter until well incorporated.
- Whip the Egg Whites: In a separate, clean bowl, beat the egg whites until they hold soft peaks. This means when you lift the whisk, the peaks stand up but gently curl over at the tips.
- Gently Fold: Now for the crucial step that lends incredible lightness: gently stir the beaten egg whites into the batter. Use a spatula or a large spoon and employ a folding motion. You want to incorporate the whites without deflating them too much. Some streaks of white are acceptable; the goal is a light and airy batter.
- Preheat Your Waffle Iron: Preheat your waffle iron according to the manufacturer’s instructions. Once heated, brush the top and bottom plates lightly with lite olive oil or vegetable oil.
- Cook the Waffles: Ladle your desired amount of batter onto the preheated waffle iron. Close the lid and bake until the waffles are golden brown and cooked through. This typically takes 3 to 5 minutes, but cooking times can vary depending on your waffle iron.
- Serve or Keep Warm: Remove the cooked waffle carefully and serve immediately with your favorite toppings. If you are baking multiple waffles, you can keep them warm on a wire rack in a single layer in a slightly warm oven (around 200°F/95°C) while you finish baking the rest.
Expert Tips & Tricks
To elevate your overnight waffle game even further, consider these professional insights:
- The Yeast is Key: Ensure your instant yeast is fresh. Stale yeast won’t activate properly, leading to a denser waffle.
- Butter Temperature: Letting the melted butter cool before adding it to the batter is important. Hot butter can affect the yeast’s activity.
- Don’t Overmix the Whites: When folding in the egg whites, be gentle. Overmixing will knock out the air you worked so hard to incorporate, resulting in a less fluffy waffle.
- Waffle Iron Consistency: If your waffle iron tends to stick, don’t be shy with the oil. A light brushing before each batch ensures easy release and beautiful browning.
- Warm Oven for Holding: If serving a crowd, placing cooked waffles on a wire rack in a low oven is the best way to keep them crisp. Avoid stacking them, as this will steam them and make them soggy.
Serving & Storage Suggestions
Overnight waffles are best enjoyed fresh off the iron, but they also offer flexibility for busy mornings.
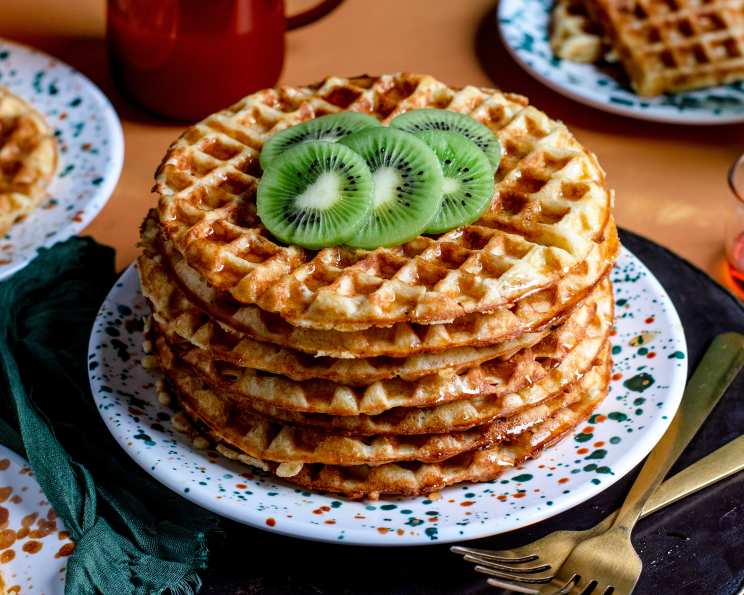
- Serving: These waffles are a blank canvas for your favorite toppings. Think classic maple syrup, fresh berries, a dollop of whipped cream, or even a sprinkle of powdered sugar. For a more savory start, serve them alongside crispy bacon, scrambled eggs, or smoked salmon.
- Storage: Cooked waffles can be stored in an airtight container in the refrigerator for up to 2-3 days. To reheat, place them in a toaster on a low setting or in a preheated oven (350°F/175°C) for a few minutes until warm and crisp again. Uncooked batter, if refrigerated overnight, might not yield the same results as the initial room temperature rest; it’s best to stick to the outlined overnight room temperature method for the batter.
Nutritional Information
Here’s an estimated nutritional breakdown for a serving of these delicious overnight waffles. Please note that these values can vary based on specific ingredients used and portion sizes.
| Nutrient | Amount per Serving | % Daily Value |
|---|---|---|
| Calories | 558.8 kcal | |
| Calories from Fat | 274 kcal | |
| Total Fat | 30.5 g | 46 % |
| Saturated Fat | 18.2 g | 91 % |
| Cholesterol | 171.1 mg | 57 % |
| Sodium | 590.3 mg | 24 % |
| Total Carbohydrate | 56.9 g | 18 % |
| Dietary Fiber | 1.8 g | 7 % |
| Sugars | 3.4 g | 13 % |
| Protein | 14 g | 28 % |
Variations & Substitutions
While this recipe is wonderful as is, feel free to experiment!
- Whole Wheat Twist: Substitute half of the all-purpose flour with whole wheat flour for a nuttier flavor and added fiber. You might need a touch more milk as whole wheat flour can absorb more liquid.
- Dairy-Free Delight: Use your favorite non-dairy milk (almond, soy, or oat) and vegan butter or a neutral oil for the melted fat.
- Citrus Zest: Add the zest of one lemon or orange to the dry ingredients the night before for a bright, refreshing hint of citrus.
- Spiced Up: Incorporate a pinch of cinnamon or nutmeg into the dry ingredients for a warming spice note.
FAQs
Q: Why is it crucial not to add the eggs the night before?
A: Adding eggs the night before can lead to a slightly metallic taste and a gummy texture in the finished waffle. The eggs are best incorporated in the morning for optimal leavening and texture.
Q: My batter seems too thin. Is that correct?
A: Yes, the overnight batter is intentionally thin. The yeast will work on this consistency to create a wonderfully airy waffle.
Q: Can I make the batter ahead of time and refrigerate it?
A: While you can refrigerate the batter, it’s not recommended for this specific overnight recipe. The room temperature rest is crucial for the yeast to develop flavor and texture properly.
Q: How do I get my waffles extra crispy?
A: Ensure your waffle iron is adequately preheated and don’t overcrowd it with batter. Cooking them to a deep golden brown and then holding them on a wire rack in a slightly warm oven will also enhance crispiness.
Q: Can I use active dry yeast instead of instant yeast?
A: If using active dry yeast, you’ll need to proof it first. Dissolve it in a small amount of warm milk (from the recipe) with a pinch of sugar and let it sit for 5-10 minutes until foamy before adding it to the dry ingredients.
Final Thoughts
There’s an undeniable satisfaction that comes from waking up to a batter that’s already done the hard work for you. These overnight waffles are a testament to the power of patience in the kitchen, turning simple ingredients into a weekend treat that feels both special and remarkably easy. The delicate balance of crisp exterior and light, airy interior is something truly to savor. So, the next time you’re planning a leisurely weekend morning, remember this simple yet profound method. Take a few minutes the night before, let time work its magic, and prepare to be rewarded with waffles that are nothing short of spectacular. I encourage you to try this recipe, experiment with your favorite toppings, and perhaps even share a plate with someone special. Enjoy every crispy, fluffy bite!