
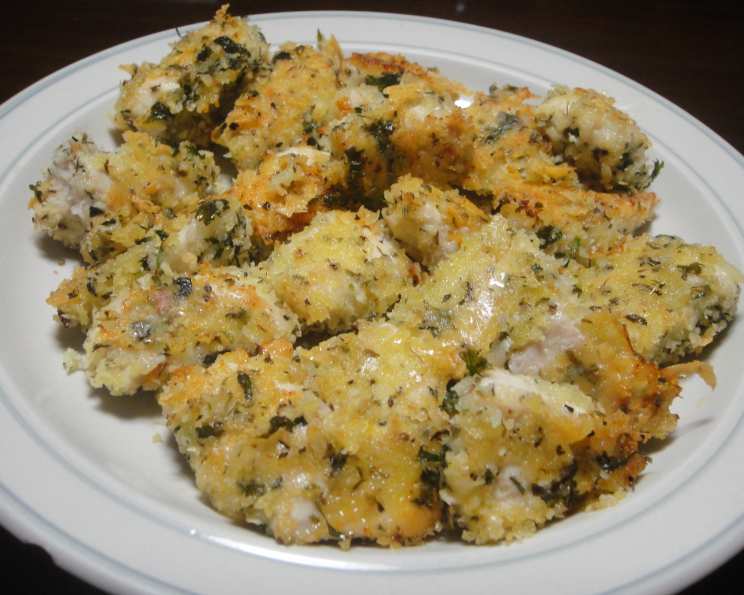
Oven Fried Garlic Chicken: A Crispy, Flavorful Classic
There’s a certain magic that happens when simple ingredients transform into something utterly craveable. For me, Oven Fried Garlic Chicken is one of those culinary conjurations. I remember my grandmother making this on lazy Sunday afternoons, the aroma of garlic and butter wafting from her kitchen, promising a feast of crispy skin and succulent meat. It wasn’t just a meal; it was an event, a warm embrace on a plate that always brought the family together. The beauty of this dish lies in its deceptive simplicity – a clever shortcut to that coveted fried chicken crunch without the mess or fuss of deep frying.
Recipe Overview
- Prep Time: 15 minutes
- Cook Time: 1 hour
- Total Time: 1 hour 15 minutes
- Servings: 4
- Yield: 1 Chicken dish
- Dietary Type: Not specified
Ingredients
This recipe relies on a straightforward assembly of pantry staples and fresh aromatics to create its signature flavor and texture.
- 2⁄3 cup breadcrumbs
- 2⁄3 cup grated Parmesan cheese
- 1⁄4 cup minced fresh parsley
- 1⁄4 teaspoon salt
- 1⁄8 teaspoon fresh ground pepper
- 5 tablespoons butter or 5 tablespoons margarine
- 3 garlic cloves, minced
- 3 lbs chicken, cut up
Equipment Needed
A few essential kitchen tools will ensure a smooth preparation process for this delightful chicken dish.
- Oven
- Shallow bowl
- Small saucepan
- Whisk or fork
- Foil-lined baking sheet
- Pastry brush or spoon for basting
Instructions
Achieving that perfect oven-fried crunch is a surprisingly simple process, requiring just a few thoughtful steps.
- Preheat your oven to 350°F (175°C). Ensuring your oven is at the correct temperature from the start is crucial for even cooking and achieving the desired crispiness.
- Prepare the breadcrumb mixture. In a shallow bowl, combine the breadcrumbs, grated Parmesan cheese, minced fresh parsley, salt, and fresh ground pepper. Stir these ingredients together thoroughly to ensure an even distribution of flavors. This mixture will form the flavorful, crispy coating for your chicken.
- Infuse the butter with garlic. In a small saucepan, melt the butter (or margarine) over very low heat. Add the minced garlic cloves to the melting butter. Allow the garlic to gently steep in the butter, infusing it with its aromatic essence. Be careful not to burn the garlic or the butter; the goal is a slow, gentle infusion.
- Remove the garlic butter from the heat. Once the butter has completely melted and the garlic has released its fragrance, take the saucepan off the heat. This prevents the garlic from becoming bitter.
- Coat the chicken with garlic butter. Using a pastry brush or a spoon, generously brush each piece of chicken with the infused garlic butter. Make sure to cover all sides of the chicken.
- Roll the chicken in the breadcrumb mixture. Immediately after basting with the garlic butter, carefully place each chicken piece into the breadcrumb mixture. Roll the chicken around to ensure it is thoroughly coated on all sides. Press gently if needed to help the coating adhere.
- Arrange the chicken on the baking sheet. Place the coated chicken pieces skin side up on a large foil-lined baking sheet. Lining the baking sheet with foil makes for much easier cleanup.
- Utilize any remaining mixture. If you have any remaining crumb mixture and butter left, you can mix them together and sprinkle this over the chicken pieces. This adds an extra layer of flavor and crunch.
- Bake the chicken. Place the baking sheet into the preheated oven. Bake for 1 hour. This duration allows the chicken to cook through completely and develop a wonderfully crispy coating.
Expert Tips & Tricks
Elevating this classic dish is all about understanding the nuances of heat and flavor.
- The Breadcrumb Blend: For an even crispier texture, consider using a combination of regular breadcrumbs and panko breadcrumbs. Panko, with its larger, flakier texture, tends to crisp up beautifully in the oven.
- Garlic Intensity: If you’re a true garlic lover, feel free to add an extra clove or two to the butter. Just be mindful of the heat, as over-infused garlic can turn bitter. A gentle simmer is key.
- Even Coating is Key: When rolling the chicken in the breadcrumb mixture, ensure each piece is evenly coated. This promotes consistent browning and a delightful crunch all around. Don’t be afraid to press the mixture onto the chicken gently to help it adhere.
- Foil-Lined Baking Sheet Advantage: The foil-lined baking sheet isn’t just for easy cleanup; it can also help reflect heat, contributing to a crispier bottom on your chicken pieces. For an extra crisp, you could even elevate the chicken on a wire rack set inside the baking sheet.
- Checking for Doneness: While the recipe calls for a specific baking time, ovens can vary. To ensure your chicken is perfectly cooked, an instant-read thermometer inserted into the thickest part of a chicken piece (avoiding bone) should register 165°F (74°C). The juices should also run clear.
Serving & Storage Suggestions
This Oven Fried Garlic Chicken is a versatile dish that pairs wonderfully with a variety of sides.
Serve it hot straight from the oven, allowing your guests to marvel at its golden-brown, crispy exterior. It’s fantastic alongside creamy mashed potatoes, a fresh green salad with a light vinaigrette, or roasted seasonal vegetables like broccoli or asparagus. A dollop of your favorite sauce, such as ranch or a honey mustard, makes for an excellent dipping companion.
Leftovers can be stored in an airtight container in the refrigerator for up to 3 to 4 days. To reheat and restore some of its crispiness, place the chicken on a baking sheet in a 350°F (175°C) oven for about 10-15 minutes, or until heated through. Microwaving is also an option, but it will result in a softer texture.
Nutritional Information
Here is an estimated nutritional breakdown for a serving of this Oven Fried Garlic Chicken. Please note that these values are approximate and can vary based on ingredient brands and exact portion sizes.
| Nutrient | Amount per Serving | % Daily Value |
|---|---|---|
| Calories | 720.2 kcal | |
| Calories from Fat | ||
| Calories from Fat (%) | 462 g | 64 % |
| Total Fat | 51.3 g | 78 % |
| Saturated Fat | 21.1 g | 105 % |
| Cholesterol | 208.1 mg | 69 % |
| Sodium | 781.8 mg | 32 % |
| Total Carbohydrate | 14.7 g | 4 % |
| Dietary Fiber | 1 g | 4 % |
| Sugars | 1.3 g | 5 % |
| Protein | 47.7 g | 95 % |
Variations & Substitutions
While the classic combination is hard to beat, there’s always room for a creative twist.
- Herbaceous Variations: Experiment with different fresh herbs in the breadcrumb mixture. Rosemary, thyme, or even a pinch of sage can add a lovely dimension to the flavor profile.
- Spicy Kick: For those who enjoy a bit of heat, add a pinch of cayenne pepper or red pepper flakes to the breadcrumb mixture.
- Gluten-Free Option: To make this recipe gluten-free, simply substitute the regular breadcrumbs with gluten-free breadcrumbs or finely ground almond flour. Ensure your Parmesan cheese is also gluten-free if necessary.
- Dairy-Free Adaptation: If you need a dairy-free version, use a good quality vegan margarine for melting and consider a nutritional yeast-based “Parmesan” substitute or simply omit the cheese from the breadcrumb mixture.
FAQs (Frequently Asked Questions)
Q: Can I use chicken breasts instead of cut-up chicken pieces?
A: Yes, you can use chicken breasts, but you may need to adjust the baking time as they are leaner and can cook faster. Ensure they reach an internal temperature of 165°F (74°C).
Q: Why is my chicken coating not sticking well?
A: Ensure the chicken is adequately brushed with the garlic butter. The butter acts as the “glue” for the breadcrumb mixture. Also, pressing the crumbs onto the chicken gently can help them adhere better.
Q: Is it necessary to line the baking sheet with foil?
A: While not strictly necessary for the cooking process, lining the baking sheet with foil makes cleanup significantly easier, as the breadcrumb mixture can sometimes stick to the pan.
Q: How can I make the chicken skin crispier?
A: For extra crispy skin, you can increase the oven temperature slightly during the last 10-15 minutes of baking, or briefly broil the chicken, watching it very carefully to prevent burning.
Q: Can I prepare the breadcrumb mixture ahead of time?
A: Yes, the breadcrumb mixture can be prepared a day or two in advance and stored in an airtight container at room temperature. Keep the garlic butter separate and prepare it just before coating the chicken.
Final Thoughts
This Oven Fried Garlic Chicken is a testament to how comforting and delicious home-cooked meals can be, even with minimal effort. It’s a recipe that’s sure to become a weeknight favorite, a reliable go-to for a satisfying family dinner. The blend of savory garlic, salty Parmesan, and crunchy breadcrumbs creates a harmonious symphony of flavors and textures that will have everyone reaching for seconds. Serve it alongside a crisp glass of Sauvignon Blanc or a refreshing iced tea, and enjoy the simple pleasure of a perfectly executed, classic dish. I encourage you to give this recipe a try and savor the delightful results.