
Oven Baked Tuna Fish Rolls: A Taste of Comfort, Decades in the Making
There are some dishes that, with a single aroma, can transport you back in time, to a specific kitchen, a particular afternoon, and a feeling of absolute contentment. For me, oven-baked tuna fish rolls are precisely that dish. My mother, a woman who could conjure magic from the most humble of ingredients, would whip these up for me, and the memory is etched in my mind: the comforting scent of baking dough mingling with savory tuna, the way she’d carefully seal each parcel, and the sheer joy of that first, warm bite. Forty-five years later, the recipe remains a cherished anchor, a testament to the enduring power of simple, home-cooked food. It’s a dish that’s seen me through childhood, through culinary school, and into my own kitchen, always delivering that same profound sense of comfort and satisfaction. It’s a recipe that’s as forgiving as it is delicious, easily adaptable to what you have on hand or what your family craves – a sentiment my wife wholeheartedly agrees with, often adding her own touch of finely chopped onion to the tuna filling.
Recipe Overview
Here’s a quick look at what you’ll need and how long this delightful dish will take:
- Prep Time: 15 minutes
- Cook Time: 25-30 minutes
- Total Time: 40-45 minutes
- Servings: 2
- Yields: 2 rolls
- Dietary Type: Oven-Baked
Ingredients
Gather your ingredients, and let’s begin this culinary journey. The beauty of this recipe lies in its simplicity and the readily available nature of its components.
- 1 (6 1/2 ounce) can tuna in water, drained thoroughly
- 1 large egg
- 1/4 cup finely chopped celery
- 1/4 cup fine dry breadcrumb
- 1 cup Bisquick baking mix
- 1 cup milk (you may not need all of it)
- 1 (10 1/2 ounce) can cream of mushroom soup
- 1/2 cup water (for the sauce)
Equipment Needed
You won’t need a complex arsenal for this recipe, just a few essential kitchen tools:
- Two medium-sized bowls
- A fork
- A whisk (optional, but helpful for the dough)
- A rolling pin
- A baking pan (greased)
- A saucepan
Instructions
Follow these steps carefully, and you’ll be rewarded with delicious, golden-brown tuna rolls enveloped in a creamy mushroom sauce.
- Preheat your oven to a robust 400 degrees Fahrenheit (200 degrees Celsius). This high heat is crucial for achieving that perfect golden crust on the dough.
- In your first bowl, combine the thoroughly drained tuna, the large egg, and the finely chopped celery. Mix these ingredients together completely until they are well incorporated.
- Now, it’s time to bring the tuna mixture together. Slowly add the breadcrumbs to the tuna mixture while stirring. Continue adding and stirring until the mixture binds together, forming a cohesive mass that holds its shape. You may need to adjust the amount of breadcrumbs slightly depending on the moisture content of your tuna; the goal is a texture that can be easily shaped. Set this bowl aside.
- In your second bowl, begin with the Bisquick baking mix. Stir it with a fork until it’s smooth.
- Gradually add the milk, stirring as you go, until a dough forms that is suitable for rolling. It’s important to note that you shouldn’t need all the milk. The dough should be pliable and not overly sticky. If it feels too wet, you can add more Bisquick to adjust the consistency. Aim for a dough that’s easy to handle without tearing.
- On a clean, lightly floured surface, roll out the dough until it’s thin. Aim for an even thickness to ensure it cooks through properly.
- Cut the rolled-out dough into two squares. The size of these squares will depend on how large you want your rolls, but ensure they are large enough to fully encase the tuna mixture.
- Place the tuna mixture in the middle of each dough square. Be generous but leave enough dough around the edges to allow for folding and sealing.
- Fold the corners of the dough over the tuna mixture, sealing the top and edges securely. The tuna mixture should be completely sealed in the dough to prevent any leakage during baking.
- Place the sealed rolls on a greased baking pan. This prevents them from sticking.
- Bake at 400 degrees Fahrenheit (200 degrees Celsius) until the top of the dough is golden brown. This typically takes about 25-30 minutes. Keep an eye on them in the final minutes to prevent over-browning.
- While the rolls are baking, prepare the mushroom sauce. In a saucepan, heat up the cream of mushroom soup. Add water a little at a time until you reach a nice consistency for pouring over the finished rolls. Be careful not to make it too thin; it should be a rich, pourable sauce.
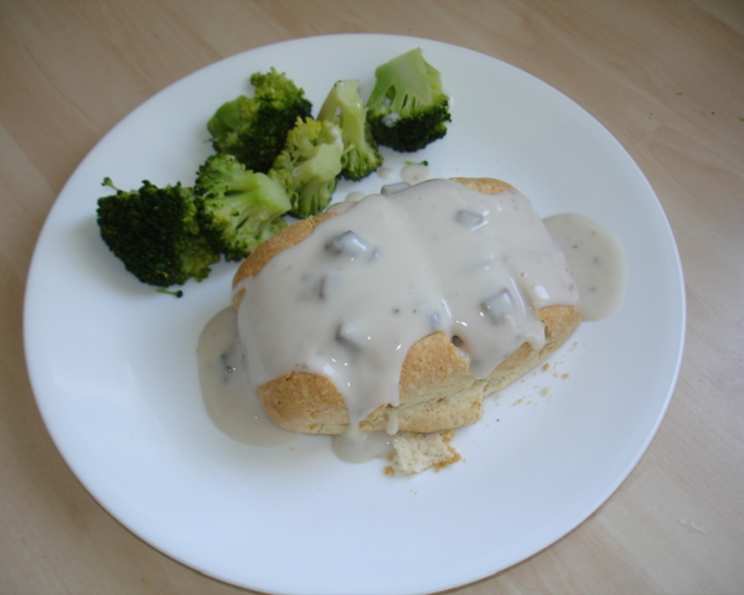
- Once the rolls have finished baking and are golden brown, serve them hot. Pour the prepared mushroom sauce over the top of each roll.
Expert Tips & Tricks
As a chef, I’ve learned a few little secrets that can elevate even the simplest of dishes. For these tuna rolls, consider these points:
- Draining the Tuna is Key: Ensure your tuna is very well drained. Excess moisture can lead to a soggy dough. Gently squeeze out any excess liquid before mixing.
- Dough Consistency: The Bisquick dough can be a little finicky. If it’s too dry and crumbly, a tiny splash more milk will help. If it’s too sticky, a sprinkle more Bisquick is your friend. The goal is a dough that’s pliable but not sticky to the touch.
- Sealing for Success: Take your time when sealing the rolls. A good seal ensures all that delicious tuna filling stays contained and cooks perfectly within the dough. Pinch the seams firmly.
- Sauce Consistency Control: When making the mushroom sauce, it’s always better to start with less water and add more gradually. You can always thin a sauce, but it’s harder to thicken it if you’ve added too much liquid. A slightly thicker sauce will cling beautifully to the rolls.
- For the Adventurous: If you enjoy a little extra flavor in your tuna filling, consider adding a pinch of dried dill or a small amount of finely minced onion or bell pepper, as my wife often does.
Serving & Storage Suggestions
These tuna fish rolls are best enjoyed piping hot, right out of the oven, with that luscious mushroom sauce generously spooned over the top. They make a hearty and satisfying meal on their own, or they can be paired with a simple side salad of crisp greens dressed with a light vinaigrette for a complete and balanced lunch or dinner.
If you happen to have any leftovers (which are rare in my house!), they can be stored in an airtight container in the refrigerator for up to 2 days. To reheat, I recommend gently warming them in a moderately heated oven (around 300°F / 150°C) for about 10-15 minutes, or until heated through. This helps maintain the crispness of the dough. Microwaving is an option, but it can sometimes make the dough a little soft.
Nutritional Information
Here’s an estimated nutritional breakdown for these delightful tuna fish rolls. Please note that these are approximate values and can vary based on specific ingredient brands and precise measurements.
| Nutrient | Amount per Serving | % Daily Value |
|---|---|---|
| Calories | 613.8 kcal | |
| Calories from Fat | ||
| Total Fat | 24.2 g | 37% |
| Saturated Fat | 7.9 g | 39% |
| Cholesterol | 164.6 mg | 54% |
| Sodium | 1814.2 mg | 75% |
| Total Carbohydrate | 58.9 g | 19% |
| Dietary Fiber | 2.1 g | 8% |
| Sugars | 9.3 g | 37% |
| Protein | 37.9 g | 75% |
Note: Daily Values are based on a 2,000 calorie diet. Your daily values may be higher or lower depending on your calorie needs.
Variations & Substitutions
The beauty of a well-loved recipe is its adaptability. While this classic version is fantastic, here are a few ways you can switch things up:
- For a Gluten-Free Option: While Bisquick has a gluten-free version, you could experiment with a homemade gluten-free baking mix or even a pie crust recipe that uses gluten-free flour blends. You might need to adjust the liquid ratios slightly.
- Spice it Up: For a touch of heat, add a pinch of cayenne pepper or a finely minced jalapeño to the tuna filling.
- Vegetable Boost: As mentioned, chopped onion or bell pepper are great additions to the tuna. You could also finely grate a carrot or zucchini into the mixture for added nutrients and moisture.
- Different Soup Base: If you’re not a fan of mushroom soup, try using cream of chicken or cream of celery soup for the sauce.
- Herbaceous Notes: Fresh or dried herbs like dill, parsley, or chives can be wonderfully incorporated into the tuna filling for an extra layer of flavor.
FAQs
Q: Can I make the tuna filling ahead of time?
A: Yes, you can prepare the tuna filling a few hours in advance and store it covered in the refrigerator. Just give it a quick stir before assembling the rolls.
Q: What kind of tuna is best to use?
A: Canned tuna packed in water is recommended for this recipe as it’s less oily and easier to drain thoroughly, which is crucial for the dough’s texture.
Q: Why is my dough not holding together?
A: This usually means it’s too dry. Try adding a little more milk, one tablespoon at a time, until it forms a cohesive dough that’s suitable for rolling.
Q: Can I freeze these tuna rolls?
A: It’s best to enjoy them fresh. While you could freeze the baked rolls, the dough might lose some of its desirable crispness upon reheating.
Q: How can I make the mushroom sauce less salty?
A: If you find canned soups too salty, opt for lower-sodium versions or make your own cream of mushroom sauce from scratch to control the salt content.
Final Thoughts
There’s a certain magic that happens when simple ingredients come together to create something truly comforting. These Oven Baked Tuna Fish Rolls are more than just a meal; they are a vessel for memories, a taste of home, and a reminder that the most delicious food often comes from the heart. I hope you’ll find as much joy in making and sharing these as I have for so many years. Give them a try, perhaps with a side of your favorite steamed vegetables or a crisp, refreshing salad, and savor every warm, savory bite. And if you discover your own delightful twist, please share it – the culinary world thrives on such shared passions.