
Oreo Party Pops: A Nostalgic Treat for Every Celebration
There’s something undeniably magical about a classic Oreo cookie, isn’t there? For me, these simple chocolate wafers sandwiching a sweet cream filling evoke a cascade of childhood memories. I can vividly recall hushed afternoons spent at my grandmother’s kitchen table, the air thick with the scent of warm cookies and anticipation, as she’d pull out a specially prepared batch of treats just for us. These Oreo Party Pops, born from a flicker of inspiration, capture that same unadulterated joy. They’re not just a dessert; they’re a portable hug, a burst of pure fun that transforms an ordinary cookie into a festive spectacle, perfect for birthdays, holidays, or just a spontaneous Tuesday. The simple act of inserting a stick and dipping them in chocolate feels like a delicious secret, a way to elevate a beloved snack into something truly special, ready to delight anyone lucky enough to receive one.
Recipe Overview
- Prep Time: 10 minutes
- Freezer Time: 10 minutes
- Chill Time: 60 minutes
- Total Time: 1 hour 20 minutes
- Servings: 20
- Yield: 20 Oreo Pops
- Dietary Type: Vegetarian (can be adapted for vegan with substitutions)
Ingredients
To craft these delightful Oreo Party Pops, you’ll need a few key ingredients:
- 20 Oreo Double Stuff cookies: It’s crucial to use the Double Stuff variety, as the extra cream filling provides the perfect anchor for the popsicle stick. Regular Oreos simply won’t hold the stick securely.
- 20 wooden popsicle sticks or lollipop sticks: Choose sturdy sticks that can comfortably hold the weight of the cookie and chocolate coating.
- 1 (12-ounce) package semi-sweet chocolate chips or white chocolate chips: Either will work beautifully. Semi-sweet offers a classic chocolatey contrast to the cookie, while white chocolate provides a sweeter, brighter canvas for decorations.
- 1 tablespoon vegetable oil: This is key to achieving a smooth, dippable consistency for your melted chocolate. Some also recommend using 1/4 block of paraffin wax, chopped, for a glossier finish and a harder shell, though vegetable oil is a more commonly available and accessible option.
- Optional Decorations:
- Chopped nuts: A classic choice for added crunch and flavor.
- Colored sprinkles: For a festive and vibrant touch.
- Shredded coconut: Adds a delicate chew and tropical flair.
- Miniature candies: Such as miniature M&M’s, chocolate candies, or Reese’s Pieces, for extra bursts of flavor and texture.
Equipment Needed
- Microwave-safe bowl or small saucepan: For melting the chocolate.
- Spatula or spoon: For stirring the chocolate.
- Waxed paper: To line a baking sheet for easy removal of the pops.
- Baking sheet: To hold the waxed paper and the pops while they set.
- Small freezer-safe container or plate: To chill the popsicles.
- Plastic wrap: For individual wrapping if desired.
- Ribbon or twine: For tying bows for gift-giving.
Instructions
Let’s get to creating these irresistible Oreo Party Pops! The process is straightforward, making it a fun activity for all ages.
-
Prepare the Oreos for Dipping: Begin by carefully separating your Oreo Double Stuff cookies. Hold both outer wafers firmly but gently. With a slight twist, slide a wooden popsicle stick or lollipop stick into the cream filling. Glide it in gently, ensuring it doesn’t go all the way through to the other side of the cookie. You want the stick to be securely embedded in the cream. If you find the cream a bit too firm, a helpful tip is to place the cookies on the defrost mode of your microwave for about 10 seconds before inserting the stick. This slightly softens the cream, making insertion easier.
-
Chill the Prepared Oreos: Once you have inserted the sticks into all 20 cookies, arrange them on a small freezer-safe plate or container. Place them in the freezer for 10 minutes. This chilling step is crucial; it solidifies the cream filling and helps the cookie adhere better to the chocolate coating.
-
Melt the Chocolate: While the Oreos are chilling, it’s time to prepare your chocolate coating. In a small saucepan over low heat, combine the chocolate chips (either semi-sweet or white chocolate) and the vegetable oil. Stir constantly until the chocolate is completely melted and smooth. Alternatively, you can melt the chocolate in the microwave. Place the chocolate chips and oil in a microwave-safe bowl. Microwave on 70% power for 1 minute, stir thoroughly, then microwave in additional 20-30 second intervals, stirring after each, until fully melted and smooth. Be careful not to overheat, as chocolate can seize.
-
Dip and Decorate: Remove the chilled Oreo pops from the freezer. Working with one at a time, dip each cookie into the melted chocolate, ensuring it’s coated evenly. You can use a spoon to help cover the entire cookie. Gently lift the dipped cookie and let any excess chocolate drip back into the bowl.
-
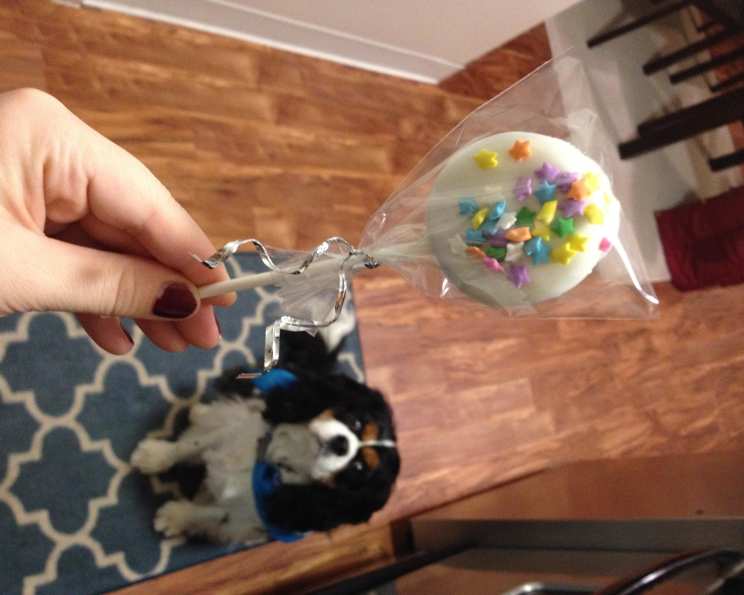
Decorate Immediately: While the chocolate is still wet, this is your moment to get creative with the decorations. Immediately sprinkle on your chopped nuts, colored sprinkles, shredded coconut, or arrange miniature candies onto the chocolate-covered cookie. You can also gently roll the bottom half of the dipped cookie in a small bowl of your chosen toppings.
-
Set the Pops: Place the decorated Oreo pops on a baking sheet lined with greased waxed paper. This prevents sticking and makes for easy removal later.
-
Chill to Set: Once all the pops are dipped and decorated, transfer the baking sheet to the refrigerator. Allow them to chill for at least an hour, or until the chocolate coating is firmly set.
-
Wrap for Gifting (Optional): If you’re planning to give these as gifts, once they are completely set, you can wrap each Oreo pop individually in plastic wrap. Tie with a festive bow or twine for a charming presentation.
Expert Tips & Tricks
- Double Dipping for a Thicker Coat: For an even more decadent and robust chocolate coating, you can let the first layer of chocolate set slightly in the refrigerator (about 15-20 minutes), then dip them a second time. This creates a thicker shell that’s less likely to crack.
- Temperature Control is Key: Ensure your melted chocolate is at a good dipping consistency. If it’s too thick, add another tiny bit of vegetable oil (1/2 teaspoon at a time). If it’s too thin, you might have a runny coating. For white chocolate, it tends to thicken faster, so work a bit more quickly or consider adding a touch more oil.
- The Right Foundation for Toppings: Apply your toppings immediately after dipping. The melted chocolate acts as the “glue.” If the chocolate starts to set before you add your decorations, they won’t stick properly.
- Batch Working for Efficiency: Melt your chocolate in batches if you’re making a very large quantity, as it can start to thicken while you’re working. Alternatively, you can keep it warm over a double boiler on very low heat, but be mindful of not scorching it.
- Clean Edges for a Professional Look: To achieve clean edges on your dipped pops, gently swirl the dipped cookie over the bowl to remove excess chocolate, then carefully scrape the bottom of the cookie against the rim of the bowl before placing it on the waxed paper.
Serving & Storage Suggestions
These Oreo Party Pops are best served chilled. Their portable nature makes them perfect for party favor bags, dessert tables, or simply enjoying as a delightful afternoon treat.
- Serving: Present them upright in a glass or vase, or lay them out artfully on a platter. For an extra touch, you can tie a small ribbon around the stick itself.
- Storage: Once the chocolate has fully set, the pops can be stored at room temperature for a short period, especially if the environment is cool. However, for optimal freshness and to prevent the chocolate from softening, it’s best to store them in the refrigerator. Place them in an airtight container or wrap them individually in plastic wrap. They will keep well in the refrigerator for up to 2 weeks. If you need to store them for longer, you can freeze them in a freezer-safe container, separated by layers of waxed paper, for up to 2 months. Thaw them in the refrigerator before serving.
Nutritional Information
(Please note: This is an estimated nutritional breakdown and can vary based on specific brands and types of chocolate and toppings used.)
| Nutrient | Amount per Serving | % Daily Value |
|---|---|---|
| Calories | 152.4 kcal | |
| Calories from Fat | 80 kcal | |
| Total Fat | 9 g | 13% |
| Saturated Fat | 3.8 g | 19% |
| Cholesterol | 0 mg | 0% |
| Sodium | 47.5 mg | 1% |
| Total Carbohydrate | 19.8 g | 6% |
| Dietary Fiber | 1.4 g | 5% |
| Sugars | 15.3 g | 61% |
| Protein | 1.3 g | 2% |
Variations & Substitutions
The beauty of Oreo Party Pops lies in their adaptability. Here are a few ideas to get your creative juices flowing:
- White Chocolate Wonderland: Use white chocolate for the coating and add a few drops of food coloring to achieve pastel hues perfect for baby showers or spring parties.
- Dark Chocolate Indulgence: Opt for dark chocolate chips for a richer, more sophisticated flavor profile.
- Fruity Fun: Mix freeze-dried fruit powders (like strawberry or raspberry) into melted white chocolate for a fruity twist.
- Peanut Butter Bliss: Try dipping in milk chocolate and then drizzling with melted peanut butter or vice versa.
- Gluten-Free Option: While not an exact substitution for the Oreo itself, if you have gluten-free chocolate sandwich cookies that are similar in structure, they could be used. However, the texture and cream-to-cookie ratio will differ.
- Vegan Adaptation: For a vegan version, use vegan chocolate sandwich cookies (many brands offer these) and vegan chocolate chips. Ensure your vegetable oil is plant-based.
FAQs
Q: Why must I use Double Stuff Oreos for this recipe?
A: The extra cream filling in Double Stuff Oreos provides a thicker, more stable base for the popsicle stick to be inserted into securely, preventing the cookie from breaking.
Q: How do I prevent the chocolate coating from cracking?
A: Ensure the Oreos are well-chilled before dipping and that your chocolate is melted smoothly. Avoid overheating the chocolate, as this can make it brittle.
Q: Can I use other types of cookies besides Oreos?
A: While this recipe is specifically designed for the structure of Oreos, you could experiment with other sandwich cookies. However, the results may vary in terms of how well the stick adheres.
Q: My chocolate coating looks dull. How can I make it shiny?
A: The addition of vegetable oil helps with shininess, but for an extra glossy finish, some cooks add a small amount of chopped paraffin wax to the melting chocolate.
Q: How long will these Oreo Party Pops last?
A: Stored properly in an airtight container in the refrigerator, they can last up to two weeks.
Final Thoughts
There you have it – a simple yet spectacular way to elevate a beloved cookie into a show-stopping treat. These Oreo Party Pops are more than just a dessert; they are an invitation to play, to create, and to share moments of pure, unadulterated joy. Whether you’re assembling them for a birthday bash, a holiday gathering, or simply a sweet surprise for loved ones, their charm is undeniable. So, grab your cookies, gather your toppings, and dive into the fun of making these delightful pops. I encourage you to experiment with different decorations and share your creations. I’d love to hear about your own Oreo Party Pop adventures!