
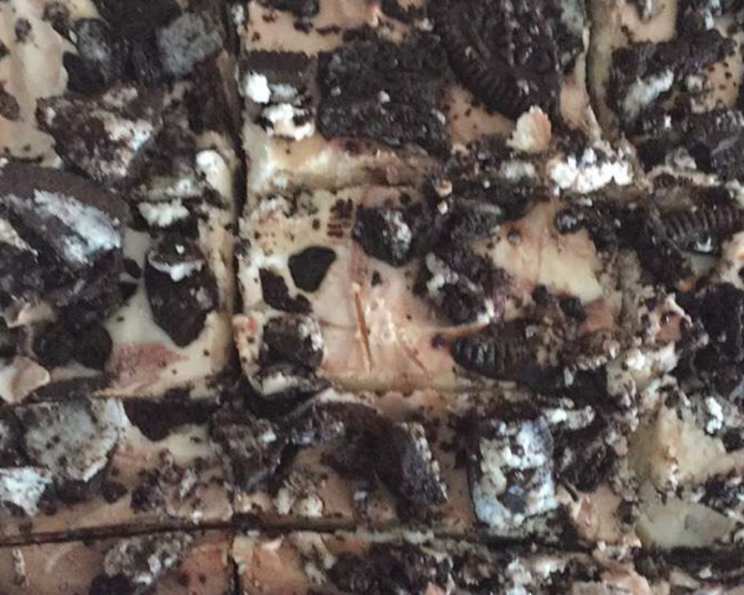
The Ultimate Oreo Dream Dessert: A No-Bake Symphony of Chocolate and Cream
There are certain desserts that transcend trends and become comforting anchors in our culinary memories. For me, the humble Oreo cookie holds a special place, a nostalgic whisper of childhood sleepovers and clandestine midnight snacks. I remember one particular occasion, a sweltering summer afternoon, when my grandmother, a woman whose kitchen was a magical realm of bubbling pots and enticing aromas, pulled out a chilled, impossibly dark dessert. It was layered, rich, and studded with those familiar black-and-white cookies. The sheer delight on everyone’s faces as we devoured it solidified its status as a true crowd-pleaser, a dessert that always, always disappears without a trace. This recipe is a faithful rendition of that cherished treat, a delightful twist on a beloved classic that’s guaranteed to bring smiles.
Recipe Overview
- Prep Time: 20 minutes
- Cook Time: 0 minutes (Chilling time is crucial for setting)
- Total Time: 1 hour 1 minute (Includes chilling time)
- Servings: 18
- Yield: 1 (9×13 inch) dessert
- Dietary Type: Vegetarian (Can be adapted for vegan with substitutions not detailed here)
Ingredients
This dessert is a testament to the magic that can be created with just a few, well-loved ingredients. The beauty lies in its simplicity, allowing the dominant flavors of chocolate and cream to shine.
For the Oreo Crust & Topping:
- 1 (20-ounce) package Oreo cookies, crushed
- (A note on crushing: For a finer crust, a food processor works wonders. For a more rustic texture, a zip-top bag and a rolling pin will do the trick! Remember to reserve about 1/2 cup of these crushed cookies for the final flourish.)
For the Creamy Filling:
- 1 (8-ounce) package cream cheese, softened
- (Ensure your cream cheese is truly at room temperature for the smoothest, most lump-free blend.)
- 1/2 cup sugar
- 1/2 cup milk
- 2 (12-ounce) containers Cool Whip
- (Thaw your Cool Whip according to package directions before incorporating.)
For the Chocolate Pudding Layer:
- 3 (3.5-ounce) packages instant chocolate pudding mix
- 5 1/2 cups milk
Equipment Needed
While this dessert requires no baking, a few key tools will make the process seamless:
- A 9×13 inch baking dish
- A large mixing bowl (for the cream cheese mixture)
- A separate mixing bowl (for the pudding)
- An electric mixer (handheld or stand mixer) for the cream cheese mixture.
- A whisk or electric mixer for the pudding.
- A spatula for spreading.
Instructions
The construction of this delightful dessert is straightforward, layer by delicious layer. Follow these steps precisely, and you’ll be rewarded with a show-stopping treat.
-
Prepare the Oreo Base: Begin by crushing your Oreo cookies. Aim for fine crumbs, and be sure to reserve about 1/2 cup of these crushed cookies for the topping later. Spread the remaining crushed Oreos evenly across the bottom of your 9×13 inch baking dish. This forms the foundational layer of pure Oreo bliss.
-
Craft the Cream Cheese Layer: In a large mixing bowl, combine the softened cream cheese and sugar. Mix them together using an electric mixer until the mixture is creamy and well-combined, ensuring no lumps of cream cheese remain.
-
Incorporate Milk into the Cream Cheese: Add 1/2 cup of milk to the cream cheese and sugar mixture. Continue to mix until this is thoroughly incorporated and the texture is smooth.
-
Fold in the Cool Whip: Gently add 1 container of Cool Whip to the cream cheese mixture. Mix until the entire concoction is smooth and creamy. This lightens the cream cheese base, making it wonderfully airy.
-
Assemble the First Layer: Carefully pour or spoon the cream cheese mixture over the Oreo crust in the baking dish. Use a spatula to spread it as evenly and carefully as you can. This creates the first luscious layer. Place the dish in the refrigerator for 30 minutes to allow this layer to chill and slightly firm up.
-
Prepare the Chocolate Pudding: While the cream cheese layer is chilling, prepare the chocolate pudding. In a separate mixing bowl, combine the 3 packages of instant chocolate pudding mix with 5 cups of milk. Mix them together until the pudding is smooth. Avoid over-mixing, which can sometimes lead to a gummy texture.
-
Add the Pudding Layer: Once the cream cheese layer has chilled for its 30 minutes, pour the prepared chocolate pudding over the cream cheese mixture in the pan. Spread it gently to cover the entire surface.
-
Chill to Set: Return the pan to the refrigerator and allow the pudding to set. This typically takes about 30 minutes. The pudding will thicken considerably during this time.
-
The Grand Finale: When the pudding has set, remove the dessert from the refrigerator. Top the entire surface with the remaining container of Cool Whip. Finally, sprinkle the reserved crushed Oreos generously over the top of the Cool Whip.
-
Serve or Chill: Your Oreo Dream Dessert is now ready to be served! Alternatively, you can return it to the fridge until serving time to keep it delightfully chilled.
Expert Tips & Tricks
- For the Perfect Oreo Crumble: If you don’t have a food processor, place your Oreos in a sturdy zip-top bag. Seal it tightly, removing as much air as possible. Then, use a rolling pin to gently (or not so gently, depending on your desired texture!) crush the cookies.
- Softened Cream Cheese is Key: I cannot stress this enough. Cold cream cheese will lead to a lumpy filling. Let it sit on the counter for at least an hour, or use the microwave for very short bursts (10-15 seconds at a time) to soften it without melting.
- Pudding Perfection: Always use instant pudding mix for this recipe. Regular pudding requires cooking on the stovetop, which is not part of this no-bake wonder. When mixing the pudding and milk, whisk until just combined and smooth. Over-whisking can incorporate too much air, leading to a foamy texture.
- Gentle Spreading: When spreading the cream cheese and pudding layers, use a light hand. Pressing too hard can disturb the layer beneath, leading to a muddy visual effect. A spatula or the back of a spoon works well.
- Make-Ahead Magic: This dessert is a fantastic make-ahead option! You can prepare it up to 24 hours in advance. Just be sure to add the final Cool Whip topping and Oreo crumbs just before serving to keep them looking their best.
Serving & Storage Suggestions
This Oreo Dream Dessert is best served chilled, its layers firm and refreshing. A scoop of this decadent treat is a perfect ending to any meal, from a casual barbecue to a more formal dinner party. It pairs wonderfully with a glass of cold milk, a rich coffee, or even a scoop of vanilla ice cream for an extra indulgence.
For storage, cover the 9×13 inch baking dish tightly with plastic wrap or transfer any leftovers to an airtight container. This dessert will keep well in the refrigerator for up to 3-4 days. The flavors actually meld and deepen overnight, making it even more delicious on the second day. This dessert is not intended for freezing, as the texture of the Cool Whip and cream cheese can be compromised upon thawing.
Nutritional Information
(Please note: Nutritional values are estimates and can vary based on specific ingredient brands and precise measurements used.)
| Nutrient | Amount per Serving (approx. 1/18th of recipe) | % Daily Value (approx.) |
|---|---|---|
| Calories | 443.6 kcal | |
| Calories from Fat | 207 g | |
| Total Fat | 23.1 g | 35 % |
| Saturated Fat | 14 g | 69 % |
| Cholesterol | 24.3 mg | 8 % |
| Sodium | 472.6 mg | 19 % |
| Total Carbohydrate | 55.3 g | 18 % |
| Dietary Fiber | 1.5 g | 6 % |
| Sugars | 35.7 g | 71 % (based on 2000 kcal diet) |
| Protein | 5.9 g | 11 % |
Variations & Substitutions
While this recipe is fantastic as is, the creative possibilities are endless!
- Chocolate Lovers Rejoice: For an even richer chocolate experience, use chocolate pudding mix instead of instant chocolate. You’ll need to follow the package instructions for cooking this type of pudding.
- White Chocolate Dream: Swap the instant chocolate pudding for instant white chocolate pudding mix for a lighter, sweeter flavor profile.
- Minty Magic: Add a few drops of peppermint extract to the cream cheese mixture for a refreshing twist, perfectly complementing the chocolate.
- Oreo Variations: Experiment with different Oreo flavors for the crust and topping! Double Stuf Oreos, Golden Oreos, or even seasonal flavors like Pumpkin Spice Oreos can offer exciting new dimensions.
- Dark Chocolate Indulgence: For a deeper chocolate flavor, fold in some mini chocolate chips into the cream cheese layer or sprinkle them over the pudding before adding the final Cool Whip.
FAQs
Q: Can I use homemade whipped cream instead of Cool Whip?
A: Yes, you can! Whip heavy cream with a touch of powdered sugar and vanilla extract until stiff peaks form. Gently fold this into the cream cheese mixture and use it as the final topping. Ensure it’s well-chilled before using.
Q: What’s the best way to crush Oreos for the crust?
A: A food processor is the quickest and most efficient method for achieving fine, even crumbs. If you don’t have one, place the Oreos in a sturdy zip-top bag, remove excess air, and crush them with a rolling pin.
Q: My cream cheese mixture looks a bit lumpy. What can I do?
A: Ensure your cream cheese is fully softened to room temperature. If it’s still lumpy after mixing with sugar, you can try gently warming the mixture slightly or using an electric mixer on a higher speed to break down any remaining lumps.
Q: How long does the pudding layer take to set?
A: The instant pudding typically sets within about 30 minutes in the refrigerator. For best results, ensure the dish is placed on a level surface and avoid opening the refrigerator door frequently during this time.
Q: Can I make this dessert in individual portions, like in parfait glasses?
A: Absolutely! Layer the crushed Oreos, cream cheese mixture, and pudding in individual glasses or jars. This makes for a beautiful and convenient presentation.
Final Thoughts
This Oreo Dream Dessert is more than just a recipe; it’s an invitation to create joy, to share sweetness, and to savor those simple moments of delight. It’s the kind of dessert that encourages second helpings and elicits gasps of pleasure with every bite. Whether you’re a seasoned baker or just starting your culinary journey, this no-bake marvel is incredibly forgiving and delivers spectacular results. Gather your ingredients, embrace the ease of its creation, and prepare to be adored. Serve it with pride, and watch as it becomes the undisputed star of your dessert table. I’d love to hear about your experiences and any creative variations you discover!