
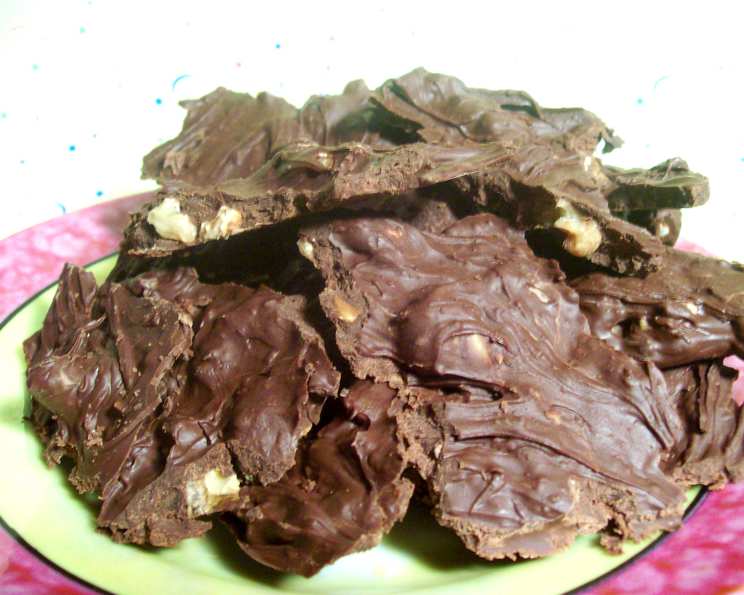
Orange Walnut Bark: A Symphony of Citrus and Crunch
There’s a certain magic that happens in my kitchen during the holiday season. It’s a time of joyful chaos, of flour dusting every surface, and the sweet, intoxicating aroma of baking filling every corner. My mom and I always had a tradition of transforming leftover ingredients from our cookie decorating marathons into something new and delightful. Often, this meant a simple, yet utterly satisfying, chocolate bark. It was our way of minimizing waste and maximizing joy, turning stray chocolate chips and forgotten nuts into edible treasures. This particular Orange Walnut Bark, a happy accident born from those festive endeavors, truly sings with the harmonious marriage of rich chocolate, the subtle warmth of toasted walnuts, and the bright, zesty perfume of candied orange peel. It’s a testament to how the simplest of creations can often be the most profound.
Recipe Overview
- Prep Time: 10 minutes
- Cook Time: 5 minutes (for melting chocolate) + Cooling Time: Approx. 30-60 minutes
- Total Time: Approximately 40-70 minutes (including cooling)
- Servings: 16 (approximately, depending on piece size)
- Yield: Approximately 1 pound of bark
- Dietary Type: Vegetarian
Ingredients
- 1 pound milk chocolate chips
- 1/3 – 1/2 cup walnut pieces, toasted
- 1/3 – 1/2 cup candied orange peel
Equipment Needed
- Baking sheet
- Parchment paper or Silpat mat
- Medium saucepan (for double boiler)
- Heatproof bowl (that fits snugly over the saucepan)
- Spatula or spoon for stirring
Instructions
The beauty of this Orange Walnut Bark lies in its simplicity, making it an ideal project for bakers of all levels, especially those who have a comfortable familiarity with working with chocolate. It’s a perfect way to use up those odds and ends that often linger in the pantry after a flurry of holiday baking.
-
Prepare Your Workspace: Before you begin melting the chocolate, ensure your workstation is ready. Line a baking sheet with parchment paper or a Silpat mat. You can optionally give the surface a very light coating of vegetable oil cooking spray, though this is not strictly necessary if using a Silpat. This will prevent the chocolate from sticking and make removal a breeze.
-
Set Up Your Double Boiler: To melt the chocolate gently and evenly, we’ll employ the tried-and-true double boiler method. Fill a medium saucepan with about an inch or two of water. Bring the water to a gentle simmer over medium-low heat. Place a heatproof bowl on top of the saucepan, ensuring the bottom of the bowl does not touch the simmering water. This creates a gentle, indirect heat source.
-
Melt the Chocolate (Part 1): Add two-thirds of the milk chocolate chips to the heatproof bowl. Stir regularly with a spatula or spoon. Allow the chocolate to melt slowly and smoothly. This process typically takes a minute or two. It’s crucial to avoid overheating the chocolate; if it gets too hot, it can seize and require tempering, which adds unnecessary complexity to this otherwise straightforward recipe. Keep the heat on the stovetop low, and let the steam do the work.
-
Melt the Chocolate (Part 2): Once the chocolate is mostly melted, smooth, and glossy, add the remaining third of the milk chocolate chips to the bowl. Continue to stir them into the warm chocolate for about 20 seconds. The residual heat from the melted chocolate will be enough to melt these last few chips, creating a perfectly smooth and tempered chocolate without any extra effort. This technique, known as “seeding,” is a baker’s secret to achieving a beautiful sheen and snap in melted chocolate.
-
Incorporate the Mix-ins: Now it’s time to add the delightful textures and flavors. Gently fold in the toasted walnut pieces and the candied orange peel. Stir just until everything is evenly distributed throughout the melted chocolate. Be careful not to overmix, as we want to maintain the integrity of the nuts and peel.
-
Spread and Cool: Pour the chocolate mixture onto the prepared baking sheet. Use your spatula to spread it out into an even layer. The thickness of the bark is entirely a matter of personal preference, so feel free to spread it as thinly or as thickly as you like. For a crisper, more delicate bark, aim for a thinner layer; for a more substantial, chewable bite, go thicker.
-
Allow to Set: Let the bark cool completely at room temperature. This process can take anywhere from 30 minutes to an hour, depending on the ambient temperature of your kitchen. Avoid the temptation to speed up the cooling process in the refrigerator, as this can sometimes cause the chocolate to bloom (develop a white, powdery appearance). Once the bark is firm and no longer sticky to the touch, it’s ready.
-
Break and Enjoy: Once fully cooled and hardened, break the Orange Walnut Bark into rustic, irregular pieces. This is part of its charm! The jagged edges are a hallmark of homemade bark.
Expert Tips & Tricks
- Toasting Your Walnuts: While you can use raw walnuts, toasting them significantly enhances their flavor and adds a delightful crunch. Spread your walnut pieces on a separate baking sheet and toast them in a 350°F (175°C) oven for 8-10 minutes, or until fragrant. Let them cool completely before adding them to the chocolate.
- Quality of Chocolate Matters: Since chocolate is the star here, opt for good quality milk chocolate chips. They will melt more smoothly and taste richer.
- The “Snap” Factor: For an extra crisp bark that has a satisfying snap when broken, ensure your chocolate is properly tempered. The seeding method described in step 4 helps achieve this. If your chocolate feels soft or bendy after cooling, it may not have been tempered correctly, but it will still taste delicious!
- Uniformity in Breakage: If you prefer more uniform pieces, you can gently score the surface of the bark with a knife while it’s still slightly soft, making it easier to break into more controlled sizes later.
Serving & Storage Suggestions
This Orange Walnut Bark is a versatile treat. Serve it as an elegant addition to a dessert platter, a sweet ending to a meal, or simply enjoy a piece with a cup of coffee or tea. It makes a wonderful homemade gift, especially when packaged in a decorative tin or cellophane bag tied with a festive ribbon.
To store, keep the bark in an airtight container at room temperature for up to 1 week. If your kitchen is particularly warm, you might consider storing it in the refrigerator to prevent it from softening, though this can sometimes dull its sheen. It can also be frozen for longer storage, up to 2 months, in a well-sealed container. If refrigerated or frozen, allow the bark to come to room temperature for about 10-15 minutes before serving for the best texture.
Nutritional Information
Here is an approximate nutritional breakdown per serving (assuming 16 servings):
| Nutrient | Amount per Serving | % Daily Value |
|---|---|---|
| Calories | 165 kcal | 8% |
| Total Fat | 9g | 12% |
| Saturated Fat | 4g | 20% |
| Cholesterol | 10mg | 3% |
| Sodium | 10mg | 0% |
| Total Carbohydrate | 20g | 7% |
| Dietary Fiber | 1g | 4% |
| Sugars | 18g | 36% |
| Protein | 2g | 4% |
Note: Nutritional values are estimates and can vary based on specific ingredients used.
Variations & Substitutions
The beauty of bark is its inherent adaptability. Feel free to experiment with different nuts, like pecans or almonds, or even a mix. For a bolder citrus flavor, you could add a touch of orange zest to the melted chocolate. If you’re not a fan of candied orange peel, try using dried cranberries or chopped dried apricots for a chewy, fruity element. For a more intense chocolate experience, you could use dark chocolate chips or a combination of milk and dark chocolate.
FAQs
Q: My chocolate melted but looks dull and not glossy. What went wrong?
A: This usually happens if the chocolate got too hot, or if there was any water introduced. For this recipe, the gentle melting method and seeding technique should prevent this, but if it happens, the bark will still taste good, just not look as appealing.
Q: Can I use regular orange zest instead of candied orange peel?
A: You can, but the flavor will be more subtle and the texture will be different. Fresh zest will add a lovely aroma but won’t provide the chewy texture of candied peel. Add it towards the end of melting the chocolate.
Q: How do I prevent the nuts and peel from sinking to the bottom?
A: Ensuring the chocolate is melted to a smooth, fluid consistency and then folding in the nuts and peel gently just before pouring will help distribute them evenly.
Q: I don’t have a double boiler. What’s another way to melt chocolate?
A: You can melt chocolate in the microwave in 30-second intervals, stirring well between each interval, until mostly melted. Then add the remaining chips and stir until smooth. Be very careful not to overheat when microwaving.
Q: Can I make this bark dairy-free?
A: To make this dairy-free, you would need to substitute the milk chocolate chips with high-quality dairy-free chocolate chips (often labeled as “vegan” or “dairy-free”). Ensure your chosen dairy-free chocolate contains cocoa butter for best melting results.
Final Thoughts
Orange Walnut Bark is more than just a sweet treat; it’s a little piece of edible nostalgia, a testament to the joy of simple ingredients transformed into something extraordinary. It’s the perfect way to capture a moment of festive indulgence and share it with loved ones, or simply to treat yourself. Whether you’re a seasoned baker or just starting out, this recipe is a delightful journey into the world of chocolate, proving that sometimes, the most memorable flavors come from the simplest of preparations. I encourage you to give it a try, and perhaps, discover your own personal traditions within its delightful crunch and citrusy aroma.