
Sunshine in a Bite: My Journey with Classic Orange Cookies
There are some flavors that just transport you back in time, aren’t there? For me, the bright, zesty aroma of fresh oranges immediately brings to mind crisp autumn afternoons spent in my grandmother’s kitchen. She had a way of coaxing sunshine out of the simplest ingredients, and these orange cookies were a prime example. They weren’t just a treat; they were a small, edible piece of happiness, often dusted with a snowy glaze that felt almost magical. The memory of rolling them into little mounds, the scent of citrus filling the air, and the pure joy of that first tender, flavorful bite is something I cherish, and it’s a feeling I hope to share with you through this recipe.
Recipe Overview
- Prep Time: 30 minutes
- Cook Time: 10 minutes per batch
- Total Time: Approximately 40 minutes (plus cooling)
- Servings: 36 cookies
- Yield: 36 cookies
- Dietary Type: Contains Dairy, Eggs, Gluten
Ingredients
Here’s what you’ll need to capture that delightful orange essence:
For the Cookies:
- 2/3 cup butter, softened to room temperature
- 1 cup granulated sugar
- 2 large eggs
- 1 large orange (you’ll need both the zest and the juice)
- 2 1/4 cups all-purpose flour
- 1/2 teaspoon salt
- 1/2 teaspoon baking soda
- 1/2 cup walnuts, finely chopped (optional, but adds a lovely texture)
For the Orange Glaze:
- 1 1/2 cups powdered sugar, sifted
- 3 tablespoons butter, softened to room temperature
- 1 1/2 tablespoons fresh orange juice
- 2 teaspoons orange peel, finely grated
Equipment Needed
To bring these cheerful cookies to life, you’ll want to have these on hand:
- Large mixing bowls
- Electric mixer (handheld or stand mixer) or a sturdy whisk and spatula
- Citrus zester or fine grater
- Juicer (for extracting orange juice)
- Measuring cups and spoons
- Baking sheets
- Parchment paper or silicone baking mats (optional, for easier cleanup)
- Wire cooling rack
- Small bowl or measuring cup for the glaze
Instructions
Follow these steps closely for perfectly cheerful orange cookies:
-
Preheat and Prepare: Begin by preheating your oven to 350 degrees F (175 degrees C). While the oven heats, grease your baking sheets thoroughly. If you prefer, you can also line them with parchment paper or silicone baking mats for an extra layer of non-stick insurance and easier cleanup.
-
Cream the Foundation: In a large mixing bowl, combine the softened butter and granulated sugar. Using your electric mixer or a strong whisk, cream them together until the mixture is light and fluffy. This process incorporates air, which is key to a tender cookie.
-
Incorporate Wet Ingredients: Next, stir in the eggs, one at a time, ensuring each is fully incorporated before adding the next. Now, take your large orange. Juice it to get about 2-3 tablespoons of fresh orange juice, and then grate the rind to get about 1-2 teaspoons of finely grated orange peel. Add both the fresh orange juice and the grated orange peel to the creamed butter and sugar mixture, and stir to combine.
-
Add the Dry Ingredients: In a separate, medium-sized bowl, whisk together the flour, salt, and baking soda. This helps to evenly distribute the leavening agent and salt throughout the flour. Gradually stir these dry ingredients into the wet ingredients in the large bowl. Mix just until the flour is incorporated and no dry streaks remain. Be careful not to overmix, as this can lead to tough cookies.
-
Fold in the Nuts (Optional): If you’re using the walnuts, stir them in now until they are evenly distributed throughout the dough.
-
Shape and Bake: Drop the dough by rounded spoonfuls onto your prepared baking sheets. Aim for cookies that are roughly the same size to ensure even baking. Bake for 10 minutes, or until the edges of the cookies are just beginning to turn golden brown. The centers should still look slightly soft; they will continue to set as they cool.
-
Cool the Cookies: Once baked, carefully remove the baking sheets from the oven and let the cookies cool on the sheets for a minute or two before transferring them to a wire cooling rack to cool completely. It’s important that they are fully cooled before glazing, otherwise the glaze will melt and slide off.
-
Prepare the Glaze: While the cookies are cooling, it’s time to make the delightful orange glaze. In a clean medium bowl, blend together the sifted powdered sugar, the softened butter, the fresh orange juice, and the finely grated orange peel. Mix until the glaze is smooth and free of lumps. If the glaze seems too thick, you can add a tiny bit more orange juice (just a teaspoon at a time). If it’s too thin, add a little more sifted powdered sugar.
-
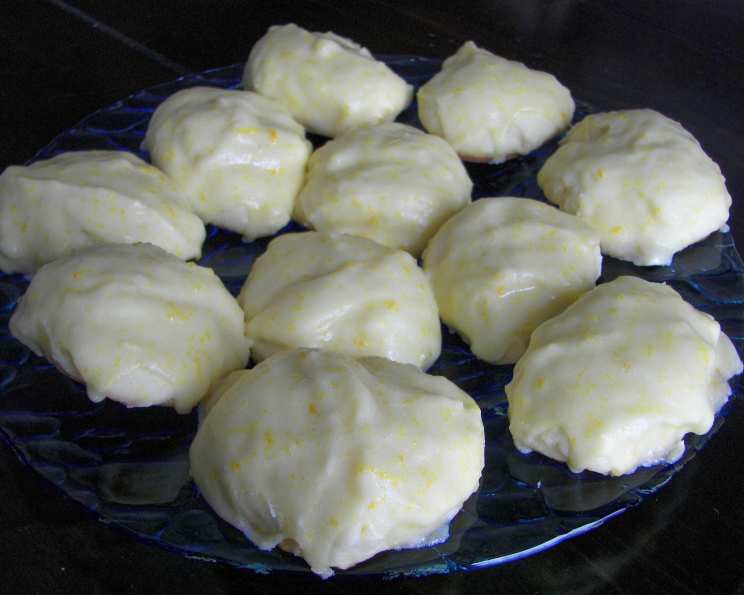
Glaze the Cookies: Once the cookies are completely cool, it’s time for the final, beautiful touch. Swirl the prepared glaze over the top of each cookie, covering the cookies completely. You can use a spoon or a small offset spatula for this. Allow the glaze to set completely before serving or storing.
Expert Tips & Tricks
- Room Temperature is Key: Ensure your butter for both the cookies and the glaze is truly at room temperature. This means it should be soft enough to indent with your finger easily, but not melted. This is crucial for achieving a creamy, well-emulsified mixture.
- Zest Wisely: When zesting the orange, aim to grate only the colorful outer peel, avoiding the bitter white pith underneath. A microplane grater is your best friend for achieving a fine, fragrant zest.
- Don’t Overbake: Orange cookies are meant to be tender. Keep a close eye on them during the last few minutes of baking. They should be lightly golden around the edges and still slightly soft in the center when you take them out. They’ll firm up considerably as they cool.
- Glaze Consistency: The consistency of the glaze is personal preference. Some like it thinner and more translucent, while others prefer a thicker, more opaque coating. Adjust the orange juice and powdered sugar by very small increments until you achieve your desired texture.
- Even Spooning: For consistent cookie sizes and baking times, consider using a small cookie scoop or two spoons to portion the dough.
Serving & Storage Suggestions
These delightful orange cookies are perfect served on their own with a cup of tea or coffee. They also pair wonderfully with a glass of milk or a sparkling orange beverage.
Storage: Once the glaze has fully set, store the cookies in an airtight container at room temperature. They will keep well for 3–4 days. If you find they start to lose their freshness, you can gently refresh them in a low oven (around 200°F or 95°C) for a few minutes, though this is rarely necessary if stored properly. Freezing is also an option; once glazed and set, freeze them in a single layer on a baking sheet until solid, then transfer to a freezer-safe container or bag for up to 2 months. Thaw at room temperature.
Nutritional Information
(Please note: This is an approximate nutritional breakdown and can vary based on specific ingredients and portion sizes.)
| Nutrient | Amount per Serving | % Daily Value |
|---|---|---|
| Calories | 114.8 kcal | – |
| Calories from Fat | 4.7 g | 7% |
| Saturated Fat | 2.9 g | 14% |
| Cholesterol | 21.9 mg | 7% |
| Sodium | 92.5 mg | 3% |
| Total Carbohydrate | 17.2 g | 5% |
| Dietary Fiber | 0.3 g | 1% |
| Sugars | 11.0 g | 22% |
| Protein | 1.3 g | 2% |
Variations & Substitutions
While this recipe is classic for a reason, feel free to explore these variations:
- Lemon Zing: Swap the orange for lemons for a bright, tangy lemon cookie. You’ll need the zest and juice of about 1 large lemon.
- Lime Kiss: For a subtle tropical twist, use lime zest and juice instead of orange.
- Spice It Up: Add a pinch of ground cinnamon or cardamom to the dry ingredients for a warmer, more complex flavor profile.
- Chocolate Drizzle: Instead of an orange glaze, consider a simple chocolate drizzle once the cookies have cooled. Melt some chocolate chips and drizzle them artfully over the cookies.
- Nut-Free: Simply omit the walnuts if you have nut allergies or simply prefer a nut-free cookie.
FAQs
Q: Can I make these cookies without fresh oranges?
A: While fresh orange zest and juice provide the best flavor, you can substitute with 1-2 teaspoons of good quality orange extract and adjust the liquid in the glaze accordingly if needed.
Q: My glaze is too thick. What should I do?
A: Add a teaspoon of fresh orange juice or water at a time, stirring well after each addition, until you reach your desired consistency.
Q: How can I get perfectly round cookies?
A: Using a small cookie scoop will help ensure all your cookies are uniformly sized, leading to even baking and a neater appearance.
Q: Can I make the dough ahead of time?
A: Yes, you can prepare the cookie dough up to 2 days in advance. Cover it tightly and refrigerate. Let it sit at room temperature for about 15-20 minutes before scooping and baking.
Q: What if I don’t have butter for the glaze?
A: While butter provides the best flavor and texture, you could try using a dairy-free butter alternative that’s suitable for baking. The consistency might vary slightly.
Final Thoughts
There’s a certain magic in crafting something so simple yet so profoundly delightful. These orange cookies are a testament to that – a small beacon of sunshine that can brighten any day. I encourage you to gather your ingredients, embrace the process, and let the vibrant aroma of citrus fill your kitchen. Share them with loved ones, savor each bite, and may they bring you as much joy as they have brought me over the years. Happy baking!