
Onolicious Brownies: A Chocolate Dream Worthy of Aloha
There are certain flavors that instantly transport me back to my childhood, to the sun-drenched kitchens of my Hawaiian family where laughter and the sweet scent of baking filled the air. These Onolicious Brownies are one of those rare treasures. I remember my Auntie Leilani, her hands dusted with flour, meticulously stirring this very batter, her humming a melody as old as the islands themselves. The anticipation of that first warm, fudgy bite was an event, a moment of pure, unadulterated joy that tasted of family, love, and the finest chocolate. Even now, the aroma as they bake is a comforting embrace, a reminder of those simpler, sweeter times.
Recipe Overview
- Prep Time: 15 minutes
- Cook Time: 30 minutes
- Total Time: 45 minutes
- Servings: 12-15
- Yield: 1 (10×14 inch) pan
- Dietary Type: Contains Dairy, Eggs, Gluten, Nuts (optional)
Ingredients
- 3/4 cup butter
- 3/4 cup Ghirardelli premium baking cocoa
- 3 teaspoons pure vanilla extract
- 3/4 cup sugar
- 1/2 cup light brown sugar, not packed
- 4 large eggs
- 1 1/4 cups all-purpose flour
- 1 teaspoon baking powder
- 1 teaspoon salt
- 1 cup nuts, chopped (pecans or macadamia nuts recommended, optional)
- 1/2 cup semi-sweet chocolate chips
- Confectioners’ sugar, for finishing (optional)
Equipment Needed
- Medium saucepan
- Medium bowl
- Whisk
- Spatula
- 10×14 inch baking pan (or a 9×13 inch pan, with adjustments)
- Parchment paper (recommended for easy cleanup)
- Wire cooling rack
Instructions
The magic of these Onolicious Brownies lies in their straightforward preparation, a testament to the idea that exceptional flavor doesn’t always require complicated steps. Let’s embark on this delightful journey together.
- Preheat your oven to a perfect 350 degrees F (175 degrees C). This foundational step ensures an even bake and that crucial golden-brown edge.
- In a medium saucepan, melt the butter over low heat. Patience is key here; we want the butter to melt gently without browning.
- Once the butter is fully melted, add the Ghirardelli premium baking cocoa. Stir until well mixed and the mixture is smooth and glossy. This step is where the deep chocolate flavor truly begins to develop.
- Remove the saucepan from the heat. Allowing it to cool slightly prevents the eggs from scrambling in the next step.
- To the warm cocoa mixture, add the pure vanilla extract and both the granulated sugar and the light brown sugar. Stir these in until they are thoroughly combined. The sugars will begin to dissolve, creating a rich, syrupy base.
- Now, it’s time for the eggs. Add the eggs to the mixture, one at a time. It’s important to mix each egg in thoroughly before adding the next. This ensures they are fully incorporated and contribute to the brownie’s characteristic fudgy texture. You’ll notice the mixture becoming smoother and more emulsified with each egg.
- In a separate medium bowl, whisk together the flour, baking powder, and salt. This dry mixture is responsible for the brownie’s structure. Whisking ensures that the baking powder and salt are evenly distributed, preventing pockets of either in your final bake.
- Gently fold the chopped nuts (if using) and semi-sweet chocolate chips into the chocolate-butter mixture. This ensures they are distributed throughout the batter, ready to provide delightful bursts of texture and flavor.
- Now, add the dry ingredients (the flour mixture) to the wet, chocolatey mixture. Fold them together until just combined. Be careful not to overmix; overmixing can develop the gluten in the flour, leading to tougher brownies. A few streaks of flour are perfectly acceptable at this stage.
- Prepare your baking pan. You can grease and flour the pan as a traditional method, but for ultimate ease of cleanup and foolproof removal, I highly recommend using parchment paper. Line the 10×14 inch baking pan with parchment paper, leaving some overhang on the sides to act as handles for lifting the brownies out later.
- Pour the brownie mixture into the prepared pan, making sure it is spread out evenly. Use your spatula to gently coax the batter into all the corners.
- Bake for approximately 30 minutes at 350 degrees F (175 degrees C). The baking time is crucial and can vary slightly based on your oven. To check for doneness, insert a toothpick into the center of the brownies. It should come out with moist crumbs attached, not completely clean (which would indicate overbaking and a cakey texture) and not with wet batter.
- Once baked, remove the pan from the oven and place it on a wire cooling rack. Allow the brownies to cool completely in the pan before slicing. This is essential for achieving that perfect fudgy consistency. Trying to slice them while warm will result in a messy, gooey situation.
- Once cooled, lift the brownies out of the pan using the parchment paper overhang. Slice into desired squares.
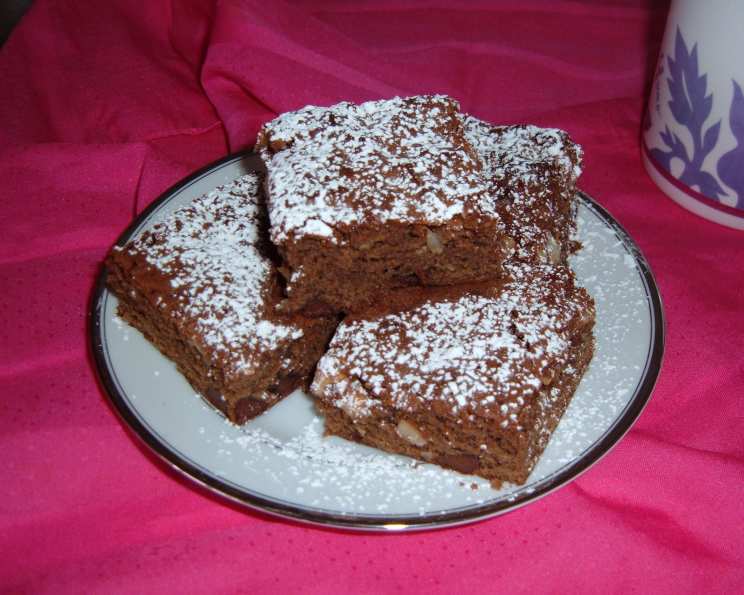
- For an extra touch of sweetness and visual appeal, you can sprinkle a bit of confectioners’ sugar over the top to give it a nice, elegant finish.
A Note on Pan Size: If you are using a 9×13 inch pan instead of the recommended 10×14 inch, your brownies will be thicker. This will likely affect the baking time. I estimate you’ll need to bake for an additional 5 minutes, but it’s always best to check for doneness with a toothpick.
Expert Tips & Tricks
To elevate your brownie game, here are a few insights from my years in the kitchen:
- Cocoa Quality Matters: The Ghirardelli premium baking cocoa is specified for a reason – it offers a depth of chocolate flavor that’s unparalleled. If you can’t find it, opt for another high-quality unsweetened cocoa powder.
- The Magic of Brown Sugar: Using light brown sugar, and importantly, not packing it, adds moisture and a subtle caramel note that complements the chocolate beautifully.
- Egg Technique: Incorporating the eggs one at a time is not just a suggestion; it’s vital for emulsifying the batter and creating that dense, fudgy texture. Resist the urge to dump them all in at once!
- Don’t Overbake! This is the golden rule of brownie baking. A slightly underbaked brownie is far more desirable than an overbaked one. Remember, they will continue to cook slightly as they cool.
- Cooling is Crucial: I cannot stress this enough – let them cool completely. This allows the structure to set and the fudgy goodness to fully develop. Patience will be rewarded!
- Parchment Paper is Your Friend: Seriously, it makes cleanup a breeze and ensures your beautiful brownies lift out of the pan without a single sticking point.
Serving & Storage Suggestions
These Onolicious Brownies are best served at room temperature, allowing their rich flavors to fully blossom. For an extra decadent experience, serve them slightly warmed with a scoop of vanilla bean ice cream or a dollop of freshly whipped cream. A dusting of confectioners’ sugar is a simple yet elegant finishing touch.
When it comes to storage, these brownies are remarkably forgiving. Store them in an airtight container at room temperature for up to 3 days. If you find yourself with a particularly abundant batch (or just can’t resist making them regularly!), they can be frozen for up to 2 months. Thaw them at room temperature or gently warm them in a low oven.
Nutritional Information
Here’s an approximate nutritional breakdown for these delightful brownies. Please note that these values are estimates and can vary based on specific ingredient brands and optional additions like nuts.
| Nutrient | Amount per Serving | % Daily Value |
|---|---|---|
| Calories | 305.6 kcal | – |
| Calories from Fat | – | 145 g |
| Total Fat | 16.1 g | 24% |
| Saturated Fat | 9.5 g | 47% |
| Cholesterol | 101 mg | 33% |
| Sodium | 334.9 mg | 13% |
| Total Carbohydrate | 39 g | 13% |
| Dietary Fiber | 2.5 g | 10% |
| Sugars | 25.5 g | 102% |
| Protein | 4.9 g | 9% |
Variations & Substitutions
While these brownies are perfection in their classic form, there’s always room for a touch of personal flair.
- Fruity Delight: As mentioned in the original recipe notes, feel free to add 1/2 cup of chopped dried cherries and 1/2 cup of dried cranberries to the batter in place of the nuts for a delightful tartness.
- Marshmallow Dream: For an extra gooey, chewy experience, gently fold 1-2 cups of mini marshmallows into the batter just before pouring it into the pan. They’ll create pockets of molten marshmallow bliss.
- Chocolate Lover’s Paradise: Double up on the chocolate by adding an extra 1/2 cup of milk chocolate chips or white chocolate chips along with the semi-sweet ones.
- Nutty Variations: While pecans and macadamia nuts are fantastic, walnuts are also a wonderful addition. If you have a nut allergy, simply omit them.
FAQs
Q: Can I make these brownies gluten-free?
A: Yes, you can substitute a good quality gluten-free all-purpose flour blend for the all-purpose flour. Ensure your blend contains a binder like xanthan gum.
Q: My brownies seem dry, what went wrong?
A: This is often a sign of overbaking or overmixing the batter. Be sure to bake only until moist crumbs cling to a toothpick and avoid over-stirring the flour into the wet ingredients.
Q: Can I add espresso powder to enhance the chocolate flavor?
A: Absolutely! Adding 1-2 teaspoons of instant espresso powder to the dry ingredients will deepen and intensify the chocolate flavor without making the brownies taste like coffee.
Q: How do I know if my baking powder is still good?
A: To test baking powder, add a teaspoon to a small bowl of hot water. If it fizzes vigorously, it’s still active and ready to use.
Q: I don’t have a 10×14 inch pan, what should I use?
A: A 9×13 inch pan will work, but as noted, it will result in thicker brownies and a slightly longer baking time. A lighter-colored metal pan is generally preferred for more even baking.
Final Thoughts
These Onolicious Brownies are more than just a dessert; they are a feeling, a memory, and a testament to the enduring power of simple, well-executed recipes. I encourage you to bake a batch, share them with loved ones, and savor each fudgy, chocolatey bite. Whether you enjoy them with a glass of cold milk, a hot cup of coffee, or simply on their own, I’m certain they will bring a taste of sunshine and aloha into your kitchen. Don’t hesitate to experiment with the variations – that’s part of the joy of baking! Let me know how yours turn out!