
The Speedy & Satisfying One-Hour Chili
There are few things more comforting on a chilly evening than a steaming bowl of chili. My own chili memories are deeply rooted in family gatherings, the air thick with the aroma of simmering spices and the happy chatter of loved ones. I recall one particular blustery autumn afternoon when, faced with an unexpected guest list and a rapidly shrinking pantry, I needed a miracle. Digging through my recipe box, I stumbled upon this one-hour wonder. It’s a testament to how a few thoughtful ingredients, combined with a little heat, can transform simple components into a rich, deeply flavored stew that tastes like it’s been simmering for hours. The magic, I discovered, lies in its clever use of ingredients like condensed tomato soup, which lends an incredible body and a subtle sweetness that perfectly balances the savory depth and spice.
Recipe Overview
- Prep Time: 15 minutes
- Cook Time: 45 minutes
- Total Time: 1 hour
- Servings: 8
- Yield: Approximately 3 quarts
- Dietary Type: Adaptable (Standard includes meat, can be made vegetarian)
Ingredients
This chili is built on a foundation of hearty vegetables, robust ground meat, and a symphony of spices, all brought together by a surprisingly effective secret ingredient.
- 1 tablespoon canola oil
- 1 cup onion, chopped
- 1/2 cup carrot, minced
- 1/2 cup celery, diced
- 1/2 cup green pepper, diced
- 1 1/2 lbs ground chuck
- 2 garlic cloves, minced
- 1 (10 ounce) can Rotel Tomatoes, diced
- 1 (11 ounce) can cream of tomato soup (condensed type)
- 1 (15 ounce) can dark red kidney beans
- 1 (15 ounce) can ranch style beans or (15 ounce) can chili hot beans
- 1 (12 ounce) bottle beer or 12 ounces water
- 1 tablespoon chili powder
- 1 tablespoon cumin powder
- 2 teaspoons oregano
- 1/2 cup cilantro, chopped (plus more for garnish)
- 1 tablespoon hot sauce (or more, to taste)
Equipment Needed
- Large, deep pot or Dutch oven
- Cutting board
- Chef’s knife
- Measuring cups and spoons
- Wooden spoon or sturdy spatula
Instructions
Crafting this remarkably flavorful chili is a straightforward process, designed to deliver maximum taste in minimal time. The key is to build layers of flavor from the very beginning.
-
Sauté the Foundation: Begin by heating the canola oil in a large, deep pot or Dutch oven over medium heat. Add the chopped onion, minced carrot, diced celery, and diced green pepper. Allow these vegetables to saute slowly for about 10 to 15 minutes. The goal here is to soften them considerably, coaxing out their natural sweetness and creating a tender vegetable base that will seem to melt into the chili. Stir occasionally to prevent sticking.
-
Brown the Meat: Once the vegetables have reached a desirable softness, add the ground chuck directly into the pot with the sautéed vegetables. Break up the meat with your spoon and brown it thoroughly, stirring as it cooks until all traces of pink have disappeared. This step is crucial for developing a rich, savory flavor in the chili. After the meat is browned, drain off any excess fat that has accumulated in the pot.
-
Infuse with Garlic: Add the minced garlic cloves to the pot with the browned meat and softened vegetables. Stir well and cook for an additional 1 to 2 minutes, just until the garlic becomes fragrant. Be careful not to burn the garlic, as this can impart a bitter taste.
-
Bring it All Together: Now, it’s time to introduce the rest of the ingredients that will transform this mixture into a hearty chili. Add the Rotel Tomatoes, the cream of tomato soup, the dark red kidney beans, the ranch style beans (or chili hot beans), and the beer (or water). Don’t forget to add the chili powder, cumin powder, and oregano. To ensure no flavor is lost, clean out the empty cans with a little of the liquid (water or beer) and add that liquid to the pot as well. Finally, stir in the chopped cilantro and the hot sauce.
-
Simmer to Perfection: Bring the chili to a gentle boil, then reduce the heat to low, cover the pot, and allow it to simmer for 30 minutes. This simmering period is where all the flavors meld and deepen, creating that rich, comforting taste we crave. Stir occasionally to prevent the bottom from sticking and to ensure even cooking.
-
Serve and Enjoy: After 30 minutes of simmering, your one-hour chili is ready! Ladle it into bowls and serve hot.
Expert Tips & Tricks
While this recipe is remarkably forgiving, a few chef’s touches can elevate it further. For an even deeper flavor, consider adding a pinch of cocoa powder along with the spices in Step 4; it adds a subtle complexity without making the chili taste like chocolate. If you prefer a thicker chili, you can remove the lid during the last 10-15 minutes of simmering to allow some of the liquid to evaporate. For a touch of smoky heat, a dash of smoked paprika can be a wonderful addition.
Serving & Storage Suggestions
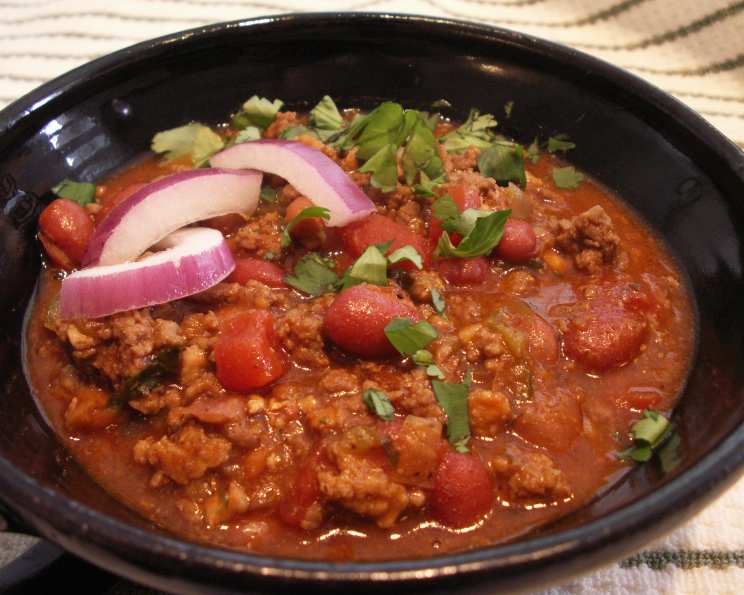
This chili is a versatile dish, perfect for a casual weeknight dinner or a more festive gathering. It’s traditionally served with a variety of toppings that allow each diner to customize their bowl.
Serving Suggestions:
Offer a selection of garnishes such as chopped onion, fresh cilantro, shredded cheddar cheese, and a dollop of sour cream or plain Greek yogurt. Cornbread, crackers, or even a simple side salad make excellent accompaniments.
Storage Suggestions:
Leftover chili stores beautifully. Allow it to cool completely before transferring it to an airtight container. It will keep in the refrigerator for up to 3-4 days. For longer storage, it freezes exceptionally well. Portion it into freezer-safe containers or bags and it can be kept in the freezer for up to 3 months. To reheat, thaw overnight in the refrigerator and then gently warm on the stovetop or in the microwave, adding a splash of water or broth if it has become too thick.
Nutritional Information
| Nutrient | Amount per Serving | % Daily Value |
|---|---|---|
| Calories | 302 kcal | 15% |
| Calories from Fat | 93 kcal | |
| Total Fat | 10.4 g | 16% |
| Saturated Fat | 3.1 g | 15% |
| Cholesterol | 56.8 mg | 18% |
| Sodium | 606.2 mg | 25% |
| Total Carbohydrate | 26.8 g | 8% |
| Dietary Fiber | 5.5 g | 21% |
| Sugars | 1.8 g | 7% |
| Protein | 22.8 g | 45% |
Nutritional information is an estimate and can vary based on specific ingredients used.
Variations & Substitutions
The beauty of chili lies in its adaptability. While this recipe offers a classic flavor profile, feel free to make it your own:
- Vegetarian/Vegan Option: Omit the ground chuck and increase the variety of beans. Consider adding plant-based crumbles or hearty vegetables like diced sweet potato or mushrooms for texture and flavor. Ensure your chosen beer is vegan if needed.
- Spice Level: Adjust the hot sauce to your preference. For a milder chili, use less or omit it entirely. For a spicier kick, add a pinch of cayenne pepper or a diced jalapeno pepper along with the other vegetables in Step 1.
- Bean Variety: Feel free to experiment with different types of beans such as pinto beans, black beans, or cannellini beans.
- Liquid Base: If you’re not a fan of beer, water works perfectly well. For a richer, more complex broth, you could substitute beef or vegetable broth for the water or beer.
FAQs
Q: Can I make this chili ahead of time?
A: Absolutely! Chili often tastes even better the next day as the flavors have more time to meld. Prepare it as directed, let it cool, and store it in the refrigerator.
Q: My chili seems a little bland, what can I do?
A: For an instant flavor boost, stir in a tablespoon of Worcestershire sauce or a pinch of smoked paprika. A squeeze of fresh lime juice just before serving can also brighten the flavors.
Q: What kind of ground meat is best for chili?
A: Ground chuck (80/20 lean-to-fat ratio) is ideal because the fat renders and adds richness and flavor to the chili. Leaner meats can be used, but you might need to add a bit more oil for sautéing.
Q: How can I thicken my chili if it’s too thin?
A: Simmering the chili uncovered for a while will help reduce the liquid. Alternatively, you can create a slurry by mixing 1-2 tablespoons of cornstarch with an equal amount of cold water, then stirring it into the simmering chili until thickened.
Q: Is the cream of tomato soup really necessary?
A: Yes! The condensed cream of tomato soup is a secret weapon in this recipe. It adds an incredible richness, a subtle sweetness, and a velvety texture that’s hard to achieve with other ingredients in such a short cooking time.
This One-Hour Chili is a testament to the fact that delicious, deeply satisfying meals don’t always require hours of simmering. It’s a recipe that proves you can have comforting, flavorful, and hearty food on the table with time to spare. So, gather your ingredients, embrace the simplicity, and enjoy a bowl of pure, unadulterated comfort. Happy cooking!