
Oma’s Dutch Pancakes: A Taste of Home, Thin and Delicious
Growing up, the aroma of Oma’s Dutch pancakes wafting from the kitchen was a sure sign of a special Sunday. They weren’t the thick, fluffy breakfast cakes I’d encounter elsewhere, but something far more ethereal – thin, delicate discs that were more akin to crepes, yet with a distinctly savory soul. Oma would always make a big batch, a golden stack growing on a plate, ready to be adorned with anything from a sprinkle of sugar to a hearty slice of ham. The way she’d expertly swirl the batter in the pan, creating those perfectly thin edges, was pure kitchen magic I tried, and often failed, to replicate as a child. These pannakoeken, as we call them in Dutch, are a cornerstone of comfort food in my family, a testament to simple ingredients transformed into something truly extraordinary.
Recipe Overview
- Prep Time: 15 minutes
- Cook Time: 30 minutes
- Total Time: 45 minutes
- Servings: 4
- Yields: 12–16 pancakes
- Dietary Type: Adaptable (Standard recipe is not vegetarian/vegan, but easily modified)
Ingredients
This recipe for Oma’s Dutch Pancakes relies on a few pantry staples, creating a wonderfully versatile base.
- 1 ½ cups flour
- 2 teaspoons sugar
- 1 teaspoon baking powder
- 1 teaspoon baking soda
- 3 eggs
- 1 tablespoon oil (plus more for greasing the pan)
- 2 ¼ cups milk
Equipment Needed
While simple, having the right tools will make the process much smoother.
- Large mixing bowl
- Whisk
- Measuring cups and spoons
- Frying pan or griddle (a non-stick pan is highly recommended)
- Spatula for flipping
- Plate or platter for serving
Instructions
The magic of Dutch pancakes lies in their simplicity and the technique used to achieve their characteristic thinness. Be patient, and trust the process!
- Begin by mixing the dry ingredients together in a large mixing bowl. This means adding the flour, sugar, baking powder, and baking soda. Give them a good whisk to ensure they are evenly distributed. This step is crucial for an even rise and texture.
- Next, add the oil and eggs to the dry mixture.
- Now, it’s time to introduce the milk. Slowly add the milk to the bowl while whisking continuously. The goal is to achieve a very thin consistency, much thinner than traditional American pancakes. Keep whisking until there are very few lumps remaining. The batter should be pourable and smooth.
- Heat your frying pan or griddle over medium-high heat. It needs to be quite hot to cook the pancakes quickly and achieve the desired thinness. Spray the hot frying pan with Pam or your preferred cooking spray. You’ll only need to grease the pan intermittently as you continue to cook the pancakes.
- Pour about ½ cup of the batter into the hot, greased pan. Immediately spread the batter thinly by tipping the pan in a circular motion. The thinner the pancake, the better – this is what defines an authentic Dutch pancake.
- Fry the pancake until the top surface appears dry. This usually takes a minute or two. Keep an eye on it to prevent burning.
- Once the top is dry, flip the pancake over using a spatula.
- Fry the second side until it is quite brown on the bottom. This browning contributes significantly to the flavor.
- Remove the cooked pancake from the pan and place it on a plate. You can keep the stack warm in a low oven (around 200°F / 95°C) while you continue to cook the remaining batter.
- Repeat the greasing and pouring process for the rest of the batter. These take some practice to master, but are absolutely worth the effort!
Expert Tips & Tricks
As a seasoned cook, I’ve learned a few things that can elevate your Dutch pancake game.
- Batter Consistency is Key: Don’t be tempted to add more flour if the batter seems too thin. That’s exactly what you want for these pancakes! A thin batter spreads easily and cooks into delicate layers. If, by chance, it becomes too thick after sitting, a splash more milk will do the trick.
- Pan Temperature Control: Getting the pan temperature just right is crucial. Too cool, and the pancake won’t cook quickly enough and might become gummy. Too hot, and it will burn before it cooks through. You’re looking for a steady sizzle when the batter hits the pan. Adjust your heat as needed.
- The Swirl Technique: Practice the wrist action of tilting and swirling the pan to distribute the batter evenly and thinly. It’s a dynamic process. Don’t overwork the batter in the pan; let gravity and centrifugal force do the work.
- Embrace the Browning: The characteristic brown spots on the bottom are not a sign of burning but a hallmark of a well-cooked Dutch pancake. This caramelization adds a depth of flavor that is simply delightful.
- Make-Ahead Batter: You can technically make the batter ahead of time and store it in the refrigerator for up to 24 hours. However, Dutch pancakes are best cooked fresh, so I recommend mixing it just before you plan to cook. If you do store it, you might need to whisk it again as some separation can occur.
Serving & Storage Suggestions
The beauty of Oma’s Dutch Pancakes lies in their versatility. They are a blank canvas for a myriad of delicious toppings.
Traditionally, these pancakes are enjoyed with a drizzle of stroop (Dutch syrup), which is a sweet, dark syrup. However, the possibilities are endless. Serve them warm with:
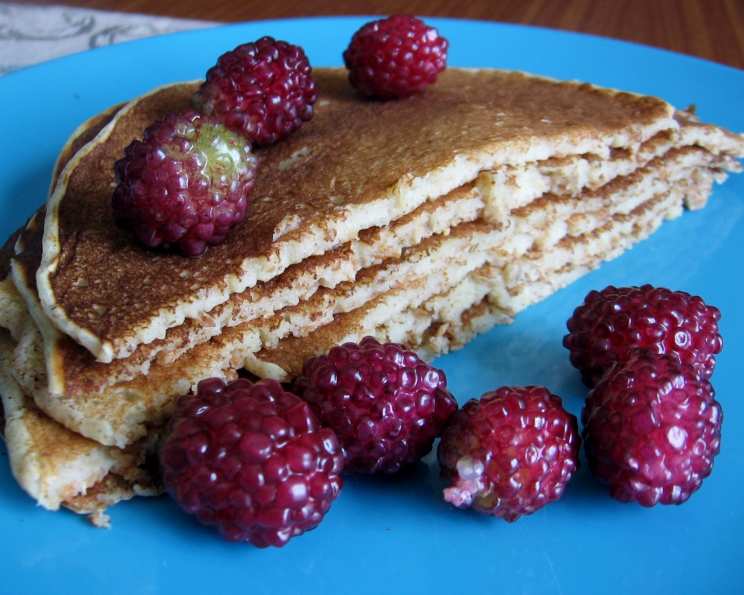
- Sweet toppings: Powdered sugar, fresh fruit, jam, applesauce, or a dollop of whipped cream.
- Savory toppings: A slice of ham, cheese (Gouda or Edam are wonderful), or even topped with an egg cooked to your liking.
Leftover pancakes can be stored in an airtight container in the refrigerator for up to 2 days. Reheat them gently in a skillet over low heat or in a toaster oven until warmed through. Be aware that they may lose some of their crispness when reheated. It’s best to enjoy them fresh from the pan for the optimal experience.
Nutritional Information
Here’s an estimated nutritional breakdown per pancake, assuming 16 pancakes are made from the recipe. Please note that this is an approximation and can vary based on exact ingredient brands and portion sizes.
| Nutrient | Amount per Serving | % Daily Value |
|---|---|---|
| Calories | 115 kcal | 6% |
| Total Fat | 4.1 g | 5% |
| Saturated Fat | 1.6 g | 8% |
| Cholesterol | 53 mg | 18% |
| Sodium | 176 mg | 8% |
| Total Carbohydrate | 14.9 g | 5% |
| Dietary Fiber | 0.4 g | 1% |
| Sugars | 2.4 g | 5% |
| Protein | 4.7 g | 9% |
(Note: This nutritional information is a general estimate. Values can vary significantly based on specific ingredients used and portion sizes.)
Variations & Substitutions
While the classic recipe is wonderful, feel free to experiment!
- Gluten-Free: Substitute the all-purpose flour with a gluten-free blend. You might need to adjust the liquid slightly to achieve the correct thin consistency.
- Dairy-Free: Use unsweetened almond milk, soy milk, or oat milk instead of dairy milk. For the oil, a neutral vegetable oil like canola or sunflower is perfect.
- Savory Twist: Omit the sugar from the batter for a purely savory pancake. Add a pinch of salt and perhaps some finely chopped herbs like chives or parsley to the batter.
- Richer Batter: For a slightly richer pancake, you can substitute half of the milk with heavy cream or half-and-half.
FAQs
Q: Why is my Dutch pancake batter so thin?
A: This is intentional! The thin batter is what allows them to cook into delicate, crepe-like pancakes. It spreads easily and cooks quickly.
Q: How do I prevent my pancakes from sticking to the pan?
A: Ensure your pan is adequately heated before adding the batter and use a good quality non-stick pan or grease it well and intermittently with cooking spray or oil.
Q: My pancakes are cooking too quickly and burning on the bottom.
A: Your pan might be too hot. Reduce the heat slightly and adjust as you cook. It takes a little practice to find the perfect temperature for your stove.
Q: Can I make sweet Dutch pancakes like crepes?
A: While these are traditionally less sweet and often served with savory toppings, you can certainly omit the baking powder and baking soda, and increase the sugar for a sweeter, more crepe-like result.
Q: How do I get my pancakes to be perfectly round?
A: The key is the swift swirling motion of the pan as soon as the batter is poured. Practice makes perfect, and even slightly uneven pancakes are delicious!
Final Thoughts
There’s a certain satisfaction that comes from mastering a recipe that has been a family tradition for generations. Oma’s Dutch Pancakes are more than just food; they are a connection to memories, to family, and to the simple joy of creating something delicious with your own hands. Whether you choose to adorn them with sweet fruit and syrup or a savory slice of ham and cheese, I encourage you to embrace the simplicity and the delicious outcome. Give these pannakoeken a try – I’m confident they’ll find a warm spot in your culinary repertoire, just as they have in mine. And when you do, I’d love to hear about your favorite toppings and how your Oma Dutch Pancakes turned out!