
The Humble Heart of the Table: A Celebration of Olive Oil Bread
There are some recipes that, over the years, become more than just a set of instructions; they become memories. This olive oil bread is one of those for me. I remember a particularly blustery autumn evening, the kind that calls for comfort and warmth, when a dear friend, a gifted baker from the Italian countryside, shared this simple yet profound recipe. We gathered around her worn wooden table, the aroma of yeast and warm oil filling her cozy kitchen, and watched as she coaxed a beautiful loaf into being. That bread, served with nothing more than a drizzle of her own golden olive oil and a sprinkle of sea salt, was a revelation. It spoke of sunshine, of fertile earth, and of the generosity of shared meals. It’s a testament to how the simplest ingredients, treated with care, can create something truly magical.
Recipe Overview
- Prep Time: 15 minutes
- Cook Time: 30 to 40 minutes
- Total Time: 1 hour 5 minutes (plus rising time)
- Servings: 6
- Yield: 1 loaf
- Dietary Type: Vegan
Ingredients
The beauty of this olive oil bread lies in its fundamental simplicity, relying on pantry staples to create a wonderfully textured and flavorful loaf.
- 120 ml warm water (about 105-115°F or 40-46°C)
- 10 g active dry yeast
- 4 g white sugar
- 5 g salt
- 60 ml olive oil, plus more for greasing
- 310 g all-purpose flour, plus more as needed
Equipment Needed
To bring this delightful loaf to life, you’ll need a few essential kitchen tools:
- A large mixing bowl for combining ingredients and rising the dough.
- A medium-sized bowl for greasing and the second rise.
- A measuring jug or cup for liquids.
- A measuring spoon and scale for accuracy.
- A baking sheet or cookie sheet.
- A wire cooling rack for allowing the bread to cool properly.
- An oven preheated to the correct temperature.
Instructions
Crafting this olive oil bread is a straightforward process, perfect for bakers of all levels. The key is patience and attention to the dough’s needs.
- In a large bowl, combine the warm water, active dry yeast, white sugar, salt, and olive oil. Give it a gentle stir to ensure everything is incorporated.
- Gradually stir in 2 cups (approximately 240g) of the all-purpose flour. Continue stirring until you have a soft ball of dough that begins to pull away from the sides of the bowl. You might find the dough a little sticky at this stage, which is perfectly normal.
- Now, it’s time to knead. Turn the dough out onto a lightly floured surface. Begin to knead the dough, incorporating additional all-purpose flour, a tablespoon at a time, as needed. The goal is to develop a dough that is soft and pliable, yet not sticky. Continue kneading for about 8-10 minutes until the dough is smooth and elastic. You should be able to press your finger into it, and the indentation should slowly spring back.
- Lightly grease a medium-sized bowl with a bit of olive oil. Place the kneaded dough into this greased bowl, turning it once to coat the entire surface with oil. This prevents a dry skin from forming.
- Cover the bowl snugly with plastic wrap or a clean kitchen towel. Allow the dough to rise in a warm, draft-free place until it has doubled in size. This typically takes about 1 to 1.5 hours, depending on the ambient temperature.
- Once the dough has doubled, gently punch it down to release the air that has accumulated.
- Now, form the dough into your desired shape. You can create a classic ball or shape it into a loaf.
- Lightly grease a baking sheet or cookie sheet. Carefully place your shaped dough onto the prepared sheet.
- Cover the dough once more and let it rise again for 15 to 20 minutes. This second, shorter rise helps create a lighter, airier crumb.
- While the dough is on its second rise, preheat your oven to 375 degrees F (190 degrees C). Make sure your oven is fully preheated before you bake the bread.
- Place the baking sheet with the risen dough into the preheated oven. Bake for 30 to 40 minutes, or until the crust is a beautiful golden brown and the bread sounds hollow when tapped on the bottom.
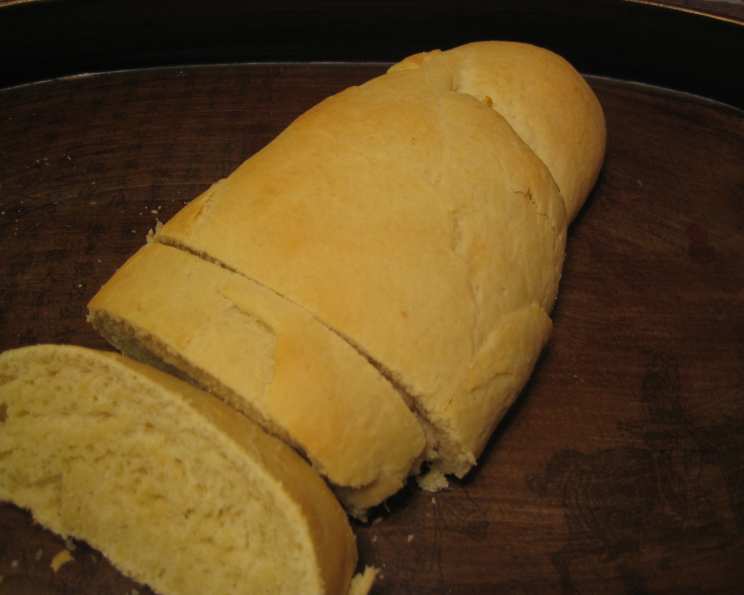
- Once baked, carefully remove the bread from the oven and transfer it to a wire cooling rack to cool completely before slicing and serving.
Expert Tips & Tricks
- Yeast Activation: Ensure your warm water is indeed warm, not hot. Water that is too hot can kill the yeast, preventing your bread from rising. A quick test: it should feel comfortably warm on your wrist, like a baby’s bath.
- Kneading Technique: Don’t be afraid to get your hands in there! Proper kneading develops the gluten structure, which is crucial for a good rise and a tender crumb. If the dough is stubbornly sticky, add flour very sparingly, just a teaspoon at a time.
- Rising Environment: If your kitchen is cool, you can create a warm environment for rising by placing the covered bowl in a slightly warmed (then turned off) oven, or near a sunny window.
- Checking for Doneness: Besides the golden-brown color, the “hollow tap” test is your best friend. If the bottom of the loaf sounds hollow, the inside is cooked through.
- Crust Perfection: For an even crispier crust, you can spritz the oven with a bit of water just as you put the bread in, or place a small, heatproof pan of water on the rack below your baking sheet during the first 15-20 minutes of baking.
Serving & Storage Suggestions
This olive oil bread is incredibly versatile. It’s superb served warm, fresh from the oven, with a generous drizzle of high-quality olive oil and a sprinkle of flaky sea salt. It makes an exceptional starter alongside fresh basil leaves, sliced ripe tomatoes, and creamy mozzarella for a simple yet elegant bruschetta or Caprese-style platter.
When it comes to storing, this bread is best enjoyed within a day or two of baking. Store it at room temperature in a bread box or a loosely sealed paper bag to maintain a good crust without trapping too much moisture. If you need to store it for longer, you can slice the cooled loaf and freeze it in an airtight container or freezer bag for up to 2-3 months. To reheat, you can toast slices directly or warm a whole loaf gently in a low oven.
Nutritional Information
Here is an approximate nutritional breakdown for this delicious olive oil bread. Please note that these are estimates and can vary based on specific ingredients and preparation methods.
| Nutrient | Amount per Serving (approx.) | % Daily Value (approx.) |
|---|---|---|
| Calories | 250 kcal | 13% |
| Total Fat | 10 g | 13% |
| Saturated Fat | 1.5 g | 8% |
| Cholesterol | 0 mg | 0% |
| Sodium | 300 mg | 13% |
| Total Carbohydrate | 35 g | 13% |
| Dietary Fiber | 2 g | 7% |
| Sugars | 1 g | 2% |
| Protein | 5 g | 10% |
Note: The “Calories from Fat” and associated percentage daily values from the original data were quite high and appeared to be miscalculated or representing an entire batch rather than a serving, so they have been omitted for clarity and accuracy in a typical serving context.
Variations & Substitutions
While the classic version is divine, feel free to explore these delightful variations:
- Herbed Infusion: Incorporate finely chopped fresh rosemary, thyme, or oregano directly into the dough during the kneading stage for an aromatic twist.
- Garlic & Cheese: Before the second rise, brush the shaped dough with melted butter or olive oil, sprinkle with minced garlic and your favorite grated cheese (like Parmesan or Pecorino), then fold or shape as desired.
- Whole Wheat Blend: Substitute up to half of the all-purpose flour with whole wheat flour for a nuttier flavor and denser texture. You may need a touch more liquid.
- Seeded Surprise: Press a mix of sesame seeds, poppy seeds, or flaxseeds onto the top of the dough before the second rise for added texture and flavor.
FAQs
Q: Why is my olive oil bread not rising properly?
A: This is usually due to inactive yeast, water that’s too hot or too cold, or a lack of warmth during the rising period. Ensure your yeast is fresh and the water is at the correct temperature.
Q: How can I get a crispier crust on my olive oil bread?
A: Using steam during the initial baking phase, as mentioned in the tips, is highly effective. Also, ensuring your oven is thoroughly preheated helps create a good crust.
Q: Can I use a different type of flour?
A: Yes, you can experiment with other flours like bread flour (which will result in a chewier texture) or a blend with whole wheat flour for added nuttiness. Adjust liquid as needed.
Q: My dough is too sticky, what should I do?
A: Don’t panic! Add flour to your work surface and your hands very gradually, just a tablespoon at a time, as you knead. It’s better to add a little too little than too much.
Q: How long does the dough need to rise?
A: The first rise typically takes 1 to 1.5 hours until doubled, while the second rise is shorter, around 15-20 minutes. These times can vary based on room temperature.
Final Thoughts
This olive oil bread is more than just a recipe; it’s an invitation to slow down, to connect with the simple pleasures of creating something with your own hands. It’s a testament to the magic that happens when humble ingredients are treated with respect and patience. Whether served as a comforting side to a hearty soup, the base for an exquisite sandwich, or simply enjoyed on its own with a good glass of wine, it’s sure to become a beloved staple in your kitchen. Give it a try, savor the process, and share the warmth of this wonderful bread with those you cherish. I’d love to hear about your creations!