
Old-Fashioned Peanut Butter Chocolate Chip Cookies: A Nostalgic Bite of Heaven
There are some flavors that, with a single whiff, transport you instantly back to cherished moments. For me, it’s the aroma of baking peanut butter cookies, especially when those little pockets of melted chocolate are involved. My grandmother, bless her soul, had a knack for making these cookies that was almost magical. They weren’t just treats; they were edible memories, little parcels of warmth and comfort that symbolized rainy afternoons, shared laughter, and the sweet simplicity of childhood. The moment I pull a batch of these out of the oven, the scent fills my kitchen, and I’m right back there, a small child with flour dusting my nose, eagerly awaiting the warm, gooey perfection.
Recipe Overview
- Prep Time: 15 minutes
- Cook Time: 8-10 minutes per batch
- Total Time: Approximately 1 hour (including chilling)
- Servings: Approximately 42 cookies
- Yield: 42 cookies
- Dietary Type: Classic Dessert
Ingredients
Here’s what you’ll need to capture that classic taste:
- 1 ½ cups all-purpose flour
- 1 teaspoon baking soda
- 1 cup butter or 1 cup margarine, softened
- ½ cup peanut butter
- ½ cup granulated sugar
- ½ cup packed brown sugar
- 1 teaspoon vanilla extract
- 1 large egg
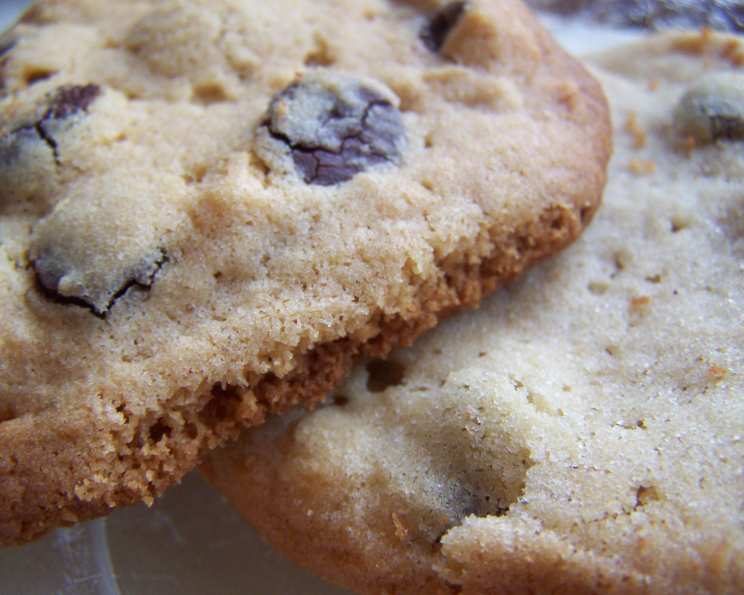
- 1 (11.5 ounce) package milk chocolate chips
Equipment Needed
To bring these delightful cookies to life, you’ll want to have the following on hand:
- Mixing bowls (at least two)
- Electric mixer (handheld or stand mixer)
- Measuring cups and spoons
- Baking sheets
- Parchment paper (optional, for easier cleanup)
- Wire cooling racks
- A small glass (for pressing down the dough balls)
Instructions
Crafting these old-fashioned gems is a straightforward journey, but attention to detail ensures a truly exceptional outcome.
- In a medium-sized bowl, whisk together the 1 ½ cups of flour and 1 teaspoon of baking soda. Set this dry mixture aside.
- In a separate, larger mixing bowl, cream together the 1 cup of softened butter (or margarine), ½ cup of peanut butter, ½ cup of granulated sugar, ½ cup of packed brown sugar, and 1 teaspoon of vanilla extract. Beat these ingredients until the mixture is wonderfully creamy and well combined. This is where the foundational flavor begins to build.
- Next, beat in the 1 large egg. Ensure it’s fully incorporated before moving to the next step.
- Gradually add the flour mixture to the wet ingredients, beating on low speed until just combined. Be careful not to overmix here; we want tender cookies, not tough ones.
- Gently stir in the milk chocolate chips. Distribute them evenly throughout the dough.
- Now, for a crucial step that impacts texture: refrigerate the cookie dough, covered, for approximately 1 hour. This allows the fats to firm up, which prevents excessive spreading during baking and results in thicker, chewier cookies.
- Preheat your oven to 375 degrees F (190 degrees C). Line your baking sheets with parchment paper if desired, or ensure they are ungreased.
- Drop the chilled dough by rounded tablespoons onto the prepared baking sheets. Leave a little space between each dough ball, as they will spread slightly.
- Using the bottom of a glass, press down each dough ball slightly. This classic touch helps create those perfectly even, slightly crisp edges.
- Bake in the preheated oven for 8 to 10 minutes. Keep a close eye on them. You’re looking for the edges to be lightly golden brown, while the centers still appear slightly soft. They will continue to cook and set as they cool.
- Once baked, cool the cookies on the baking sheets for 4 minutes. This short resting period allows them to firm up enough to be moved without breaking.
- After the initial cooling on the sheets, carefully remove the cookies to wire racks to cool completely. This ensures they achieve the perfect texture all the way through.
Expert Tips & Tricks
- Softened Butter is Key: Ensure your butter is truly softened – yielding to gentle pressure, not melted or greasy. This is vital for achieving that creamy texture in step 2.
- Don’t Overmix: Overmixing the flour can develop the gluten too much, leading to tough cookies. Mix until just combined.
- Chilling is Crucial: That hour in the refrigerator isn’t just a suggestion; it’s a game-changer for cookie texture. It prevents them from spreading too thin and becoming crispy all the way through.
- Oven Variations: Ovens can be finicky! If you know your oven runs hot or cool, adjust the baking time accordingly. The key is those lightly golden edges and slightly soft centers.
- Uniformity: For cookies that bake evenly, try to make your dough balls as close to the same size as possible.
Serving & Storage Suggestions
These old-fashioned peanut butter chocolate chip cookies are best enjoyed at room temperature, allowing their flavors to fully meld. They are magnificent on their own, a perfect accompaniment to a tall glass of cold milk, or even as a delightful end to a meal.
For storage, allow the cookies to cool completely before sealing them in an airtight container. They will stay fresh at room temperature for up to 3-4 days. If you find yourself with an abundance (which is never a bad thing!), they also freeze beautifully. Place cooled cookies in a freezer-safe bag or container, separated by parchment paper, for up to 2-3 months. To reheat, simply let them thaw at room temperature, or briefly warm them in a low oven (around 300°F/150°C) for a few minutes to recapture that fresh-baked warmth.
Nutritional Information
(Note: Nutritional values are estimates and can vary based on specific ingredients used.)
| Nutrient | Amount per Serving | % Daily Value |
|---|---|---|
| Calories | 136 kcal | 7% |
| Total Fat | 8.4 g | 11% |
| Saturated Fat | 4.6 g | 23% |
| Cholesterol | 17.8 mg | 6% |
| Sodium | 91.3 mg | 4% |
| Total Carbohydrate | 13.6 g | 5% |
| Dietary Fiber | 0.6 g | 2% |
| Sugars | 9.2 g | 10% |
| Protein | 2 g | 4% |
Variations & Substitutions
While this recipe is a classic for a reason, you can certainly play with it:
- Peanut Butter Choice: Feel free to experiment with crunchy peanut butter for added texture, or even a flavored peanut butter like honey or chocolate.
- Chocolate Chip Swap: While milk chocolate is traditional and provides a special sweetness, dark chocolate or semi-sweet chips offer a richer, more intense chocolate flavor. White chocolate chips are also a fun option for a different profile.
- Additions: For a little extra flair, consider stirring in a handful of chopped peanuts, a pinch of sea salt on top before baking, or even some toffee bits.
FAQs
Q: Why are my cookies spreading too much?
A: This is often due to the butter being too soft or melted, or the dough not being chilled adequately. Ensure your butter is softened and don’t skip the chilling step.
Q: Can I use all-purpose flour if I don’t have cake flour?
A: Yes, this recipe specifically calls for all-purpose flour, so you’re all set!
Q: How can I make these cookies softer and chewier?
A: Ensure you slightly underbake them – the centers should look a bit gooey when you take them out. Also, packing more brown sugar than granulated sugar can contribute to chewiness.
Q: My dough seems too stiff after chilling. What should I do?
A: This can happen if the dough is left in the fridge for too long. Let it sit at room temperature for about 10-15 minutes, and it should become more pliable for dropping and pressing.
Q: Can I make this recipe gluten-free?
A: To make this recipe gluten-free, you would need to substitute the all-purpose flour with a high-quality gluten-free all-purpose baking blend that contains xanthan gum.
Final Thoughts
There’s a profound comfort in revisiting recipes that have stood the test of time, and these old-fashioned peanut butter chocolate chip cookies are a perfect example. They are a testament to simple, quality ingredients coming together to create something truly magical. I encourage you to bake a batch, gather your loved ones, and share in the joy that these humble cookies bring. Don’t be surprised if they become a new family tradition. Happy baking!