
Old Fashioned Pan Rolls: A Taste of Childhood Nostalgia
Growing up, the aroma of freshly baked bread was a constant and comforting presence in our home. Among the many treats my grandmother would conjure from her kitchen, these old-fashioned pan rolls held a special place in my heart. They weren’t just bread; they were little clouds of warmth, perfect for sopping up gravy or simply enjoyed with a generous smear of butter. The memory of pulling them apart, the steam escaping and carrying that yeasty, buttery scent, is etched in my mind, a simple pleasure that still brings a smile to my face.
Recipe Overview
- Prep Time: 15 minutes
- Cook Time: 25-30 minutes
- Total Time: ~2 hours 30 minutes (including rising time)
- Servings: 24
- Yield: 1 pan of rolls
- Dietary Type: Standard (can be adapted)
Ingredients
- 1 cup milk, scalded
- ½ cup butter, cut into pieces
- 2 packages active dry yeast
- ½ cup warm water (105 – 115°F)
- ¼ teaspoon sugar (for yeast mixture)
- ½ cup sugar (for dough)
- 3 eggs, lightly beaten
- 1 ½ teaspoons salt
- 6 – 6 ½ cups all-purpose flour
- ¼ cup butter, melted (for brushing)
Equipment Needed
- Large mixing bowl
- Medium saucepan (for scalding milk)
- Measuring cups and spoons
- Whisk or fork
- Clean kitchen towel or plastic wrap
- Lightly floured surface (for kneading)
- 9 x 1 ½ inch round baking pan
- Wire cooling rack
- Pastry brush
Instructions
-
Begin by scalding the milk. In a medium saucepan, gently heat the milk over medium-low heat until it just begins to simmer around the edges. Do not boil. Remove from heat and pour the hot milk into a large mixing bowl. Add the ½ cup of butter, cut into pieces, to the hot milk. Stir occasionally until the butter is completely melted and incorporated into the milk. This process helps to create a tender dough.
-
While the milk and butter mixture cools slightly, it’s time to activate the yeast. In a small bowl, combine the warm water with ¼ teaspoon of sugar and sprinkle the active dry yeast over the top. Let this mixture stand for about 5 minutes, or until it becomes foamy and bubbly. This is a sign that your yeast is alive and ready to work its magic.
-
Once the yeast mixture is foamy, stir the remaining ½ cup of sugar, the lightly beaten eggs, and the salt into the milk and butter mixture in the large bowl. Whisk gently to combine. Then, pour in the foamy yeast mixture and stir everything together.
-
Gradually add 4 cups of the all-purpose flour to the wet ingredients. Stir until the mixture is smooth. You’ll notice it will still be quite wet at this stage.
-
Now, begin adding the remaining all-purpose flour, about ½ cup at a time, stirring until a soft dough begins to form. You may not need all of the flour, or you might need a little more, depending on the humidity and your flour. The goal is a soft, slightly sticky dough that is manageable.
-
Cover the bowl with a clean kitchen towel or plastic wrap and let the dough rest for 10 minutes. This short resting period allows the flour to hydrate, making the dough easier to handle.
-
Turn the dough out onto a lightly floured surface. Begin to knead the dough. This is a crucial step for developing gluten, which gives the rolls their structure and chew. Knead for 8-10 minutes, or until the dough is smooth, elastic, and no longer sticky. Add as little extra flour as possible during kneading; too much flour will result in dry, dense rolls.
-
Once kneaded, divide the dough in half. Place one half of the dough into a lightly greased bowl. Turn the dough to coat its surface with the grease, then cover and refrigerate this portion. This chilled dough can be shaped and baked later, offering flexibility in your baking schedule.
-
Take the remaining half of the dough and shape it into 12 evenly sized balls, approximately 2 inches in diameter. Arrange these dough balls in a greased 9 x 1 ½ inch round baking pan, leaving a little space between them as they will expand.
-
Cover the pan with a clean kitchen towel or plastic wrap and let the dough rise in a warm place, free from drafts, until it is almost doubled in size. This usually takes about 55 minutes, but the exact time can vary depending on the ambient temperature.
-
Preheat your oven to 375°F (190°C).
-
Bake the rolls in the preheated oven for 25-30 minutes, or until they are beautifully golden brown on top and cooked through.
-
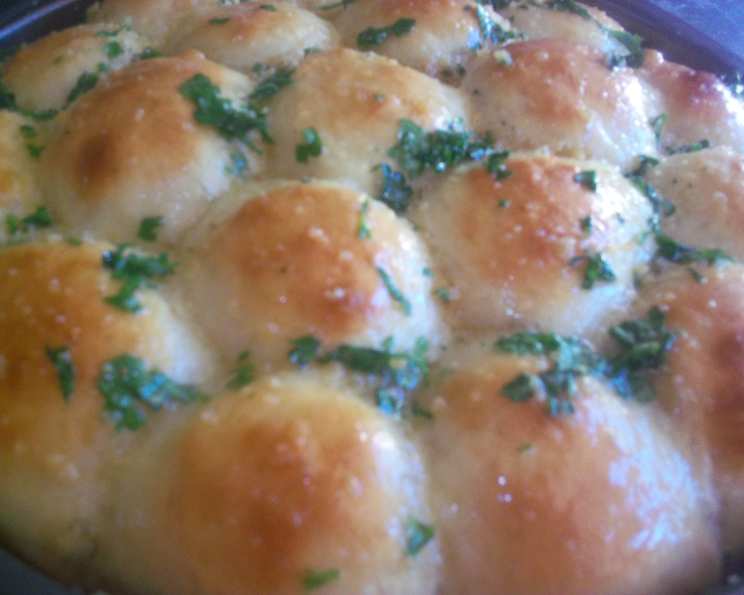
As soon as the rolls come out of the oven, brush the tops generously with the ¼ cup of melted butter. This adds a lovely sheen and a rich flavor.
-
Allow the rolls to cool slightly in the pan for a few minutes before transferring them to a wire cooling rack to cool completely.
-
To bake the refrigerated dough: Follow the shaping, rising, and baking instructions as outlined above. However, allow about 1 hour and 45 minutes for this portion of the dough to rise, as it will be cooler.
Expert Tips & Tricks
- Milk Temperature is Key: Ensure your milk isn’t too hot when you add the butter, or it could curdle the butter. Let it cool down to a warm, not scalding, temperature before proceeding.
- Don’t Overwork the Dough: While kneading is important, over-kneading can make your rolls tough. Stop when the dough is smooth and elastic.
- The “Warm Place” for Rising: A slightly warm oven (turned off, with the light on) can be an ideal spot for dough to rise, as it creates a consistent, draft-free environment.
- Testing for Doneness: Besides the golden-brown color, you can gently tap the bottom of a roll. If it sounds hollow, it’s likely cooked through.
- Butter Brush for Shine: Brushing with melted butter right out of the oven not only adds flavor but also gives the rolls that irresistible shine. Don’t skip this step!
Serving & Storage Suggestions
These old-fashioned pan rolls are best served warm, shortly after baking. They are wonderfully versatile, perfect alongside a hearty stew, as a base for your favorite sandwich fillings, or simply enjoyed with a dollop of butter and jam.
Leftovers can be stored at room temperature in an airtight container or bread bag for 1-2 days. For longer storage, wrap them tightly in plastic wrap and then in aluminum foil, and they will keep in the freezer for up to 2-3 months. To reheat, gently warm them in a low oven (around 300°F or 150°C) until they are heated through.
Nutritional Information
This nutritional information is an estimate and can vary based on specific ingredients and portion sizes.
| Nutrient | Amount per Serving | % Daily Value |
|---|---|---|
| Calories | 198.1 kcal | |
| Calories from Fat | 73.7 | |
| Total Fat | 7.1 g | 10% |
| Saturated Fat | 4.1 g | 20% |
| Cholesterol | 39.9 mg | 13% |
| Sodium | 211 mg | 8% |
| Total Carbohydrate | 28.8 g | 9% |
| Dietary Fiber | 1 g | 4% |
| Sugars | 4.3 g | 17% |
| Protein | 4.7 g | 9% |
(Note: The percentage of Daily Value is based on a 2,000 calorie diet.)
Variations & Substitutions
- Whole Wheat Twist: For a slightly nuttier flavor and added fiber, substitute up to half of the all-purpose flour with whole wheat flour. You may need to adjust the liquid slightly as whole wheat flour can absorb more.
- Sweet Rolls: If you prefer a sweeter roll, increase the sugar in the dough by ¼ cup and add a pinch of cinnamon. After baking and brushing with butter, you could even drizzle with a simple powdered sugar glaze.
- Herbed Rolls: Incorporate finely chopped fresh herbs like rosemary, thyme, or chives into the dough before the final kneading.
FAQs
Q: Why is my yeast not foaming?
A: Your yeast may be expired, or the water temperature was too hot or too cold. Ensure your water is between 105-115°F (40-46°C) and try using fresh yeast.
Q: Can I use instant yeast instead of active dry yeast?
A: Yes, you can use instant yeast. You can typically add it directly to the dry ingredients without proofing it first, and you might be able to slightly reduce the rising time.
Q: My rolls are dense, what did I do wrong?
A: This is often due to adding too much flour during kneading, or not letting the dough rise sufficiently. Aim for a soft, slightly sticky dough and ensure it has ample time to double in size.
Q: Can I make these rolls ahead of time?
A: Yes, the recipe allows for refrigerating half the dough, which can be baked later. You can also bake the entire batch and freeze them once cooled.
Q: What kind of pan is best for these rolls?
A: A 9 x 1 ½ inch round pan is specified, which creates lovely, slightly compressed rolls. You can also use a 9×13 inch pan for slightly less dense rolls, or individual muffin tins if you prefer.
Final Thoughts
There’s a profound satisfaction in crafting bread from scratch, and these old-fashioned pan rolls are a testament to that simple joy. They’re a recipe that honors tradition, offering a comforting taste of home with every bite. Gather your ingredients, embrace the process, and I have no doubt you’ll create something truly special. Share them with loved ones, pair them with your favorite meal, or simply savor them with a cup of tea – these rolls are a delightful reminder of life’s simple pleasures.