
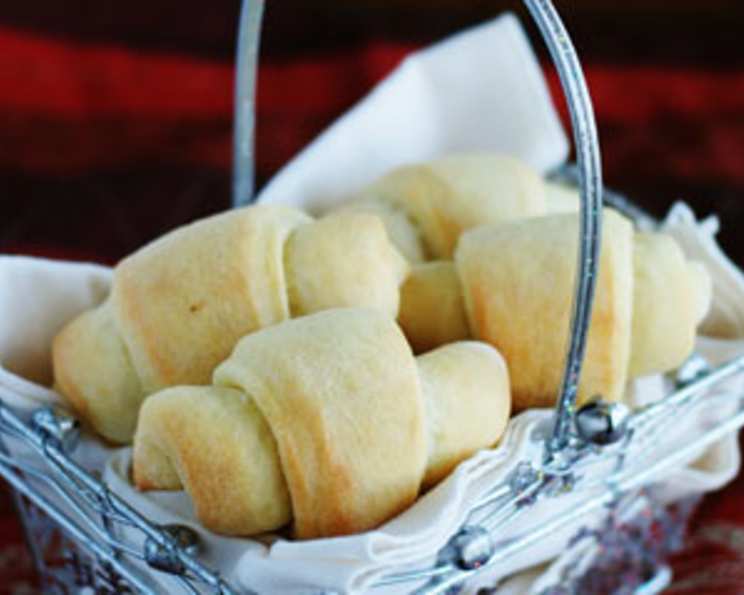
Old Fashioned Buttermilk Dinner Rolls: A Taste of Nostalgia
There are certain aromas that just transport you. For me, it’s the scent of yeast blooming, mingling with the subtle tang of buttermilk, all promising a transformation in the oven into something truly magical. These old-fashioned buttermilk dinner rolls have that power. They remind me of my grandmother’s kitchen, a place where flour dust was a badge of honor and the clinking of mixing bowls was the soundtrack to love. While I haven’t personally baked this exact recipe from Cooking Pleasures Magazine yet, the thought of it, stored away for safekeeping, fills me with a delightful anticipation of that pure, comforting, homemade goodness.
Recipe Overview
- Prep Time: 1 hour 10 minutes (includes rising time)
- Cook Time: 17 to 20 minutes
- Total Time: 1 hour 27 minutes to 1 hour 30 minutes (plus additional rising time if making ahead)
- Yields: 16 rolls
- Servings: 16
- Dietary Type: Vegetarian
Ingredients
- Warm water, 3/4 cup, divided
- 1 (1/4 ounce) package active dry yeast
- Buttermilk, 1/2 cup, warm
- 1 large egg, beaten
- 2 tablespoons unsalted butter, melted
- 2 tablespoons sugar
- 1 1/2 teaspoons salt
- 3 1/2 cups bread flour, plus up to 1/4 cup more if needed
Equipment Needed
- Small bowl
- Large bowl
- Measuring cups and spoons
- Whisk
- Baking sheet
- Parchment paper
- Plastic wrap
- Kitchen towel
- Oven
Instructions
- Begin by preparing the yeast. In a small bowl, measure out 1/4 cup of the warm water. Sprinkle the active dry yeast over the surface and let it stand undisturbed for 10 minutes, or until the yeast is fully dissolved and a foamy layer has formed on top. This blooming process is crucial for ensuring your yeast is alive and active.
- While the yeast is blooming, turn your attention to the wet ingredients. In a large bowl, whisk together the remaining 1/2 cup of warm water, the warm buttermilk, the beaten egg, the melted unsalted butter, the sugar, and the salt. Whisk until these ingredients are well combined.
- Once the yeast mixture is foamy, add it to the wet ingredients in the large bowl. Whisk briefly to incorporate the yeast mixture into the liquid base.
- Now it’s time to introduce the flour. Slowly stir in 3 1/2 cups of bread flour. You can begin by stirring with a spoon or spatula, but as the dough thickens, it’s best to switch to using your hands to fully incorporate the flour and form a soft dough.
- If the dough still feels too sticky and is clinging excessively to the sides of the bowl, slowly add up to an additional 1/4 cup of bread flour, a tablespoon at a time, until a soft dough forms that just begins to pull away from the sides of the bowl. The goal is a dough that is pliable but not overly sticky.
- Turn the dough out onto a lightly floured surface. Begin to knead the dough for 7 to 10 minutes. This is a vital step for developing the gluten structure, which will give your rolls their characteristic soft and elastic texture. Continue kneading until the dough is smooth and elastic to the touch.
- Lightly butter a large bowl. Place the kneaded dough into the buttered bowl and turn it gently to coat all sides with the butter. This prevents the dough from drying out as it rises.
- Cover the bowl tightly with plastic wrap, then drape a kitchen towel over the plastic wrap. Find a warm, draft-free spot in your kitchen and let the dough rise until doubled in size, which typically takes about 1 hour.
- While the dough is rising, prepare your baking sheet. Line a baking sheet with parchment paper. This will prevent the rolls from sticking and make for easy cleanup.
- Once the dough has doubled, gently punch down the dough to release the trapped air. Turn the dough out onto a lightly floured surface once more.
- Divide the dough in half. Then, cut each half into 8 equal pieces. This will give you a total of 16 rolls.
- Shape each piece of dough into your desired roll shape. They can be simple rounds, or you can roll them into little logs and tuck the ends under. Place the shaped rolls onto the prepared baking sheet, leaving a little space between them as they will expand further.
- To cover the shaped rolls for their second rise, spray a piece of plastic wrap with cooking spray. This prevents the plastic wrap from sticking to the delicate surface of the rolls. Cover the rolls with the greased plastic wrap.
- Place the covered rolls back into a warm place to rise for another 30 to 40 minutes, or until they have doubled in size again.
- To make these rolls ahead of time: After shaping the rolls and placing them on the baking sheet, cover them with the greased plastic wrap. Refrigerate them for 4 hours or overnight. When you are ready to bake, remove the rolls from the refrigerator and let them stand at room temperature for 30 minutes before proceeding with the baking instructions.
- Preheat your oven to 375°F (190°C).
- Bake the rolls for 17 to 20 minutes, or until they are a light golden brown and sound hollow when tapped on the bottom.
Expert Tips & Tricks
- Buttermilk Temperature: Ensure your buttermilk is warm, not hot. Too hot and it can kill the yeast, too cold and it won’t activate it properly. Aim for around 105-115°F (40-46°C). If you don’t have buttermilk, you can make a quick substitute by adding 1 tablespoon of white vinegar or lemon juice to 1 cup of milk and letting it sit for 5 minutes.
- Kneading Technique: If you find kneading by hand a bit strenuous, use the heel of your hand to push the dough away from you, then fold it over and repeat. A stand mixer with a dough hook attachment can also be a great time-saver.
- Warm Rising Spot: A slightly warmed oven (turned off, of course!) or placing the bowl near a sunny window can create the perfect environment for rising.
- Judging Doneness: The color is a good indicator, but if you’re unsure, gently lift a roll with a spatula. If the bottom is golden brown and it feels light, it’s likely ready.
Serving & Storage Suggestions
Serve these warm, fresh-from-the-oven buttermilk dinner rolls with a generous swirl of butter. They are the perfect accompaniment to any meal, from a hearty stew to a light salad. For storage, allow the rolls to cool completely on a wire rack. Once cooled, store them in an airtight container or a resealable plastic bag at room temperature for up to 2-3 days. To reheat, you can gently warm them in a 300°F (150°C) oven for a few minutes until they are soft again. They also freeze beautifully; wrap them tightly in plastic wrap and then in foil, and freeze for up to 3 months. Thaw overnight at room temperature and reheat as desired.
Nutritional Information
| Nutrient | Amount per Serving | % Daily Value |
|---|---|---|
| Calories | 127.3 kcal | |
| Calories from Fat | 18% | |
| Total Fat | 2.1 g | 3% |
| Saturated Fat | 1.1 g | 5% |
| Cholesterol | 15.8 mg | 5% |
| Sodium | 231.8 mg | 9% |
| Total Carbohydrate | 23 g | 7% |
| Dietary Fiber | 0.9 g | 3% |
| Sugars | 2 g | 8% |
| Protein | 3.7 g | 7% |
(Nutritional values are approximate and can vary based on specific ingredients used.)
Variations & Substitutions
- Herbed Rolls: Gently fold in 1-2 tablespoons of finely chopped fresh herbs like chives, parsley, or rosemary into the dough just before the first rise.
- Cheesy Rolls: Incorporate 1/4 cup of grated sharp cheddar or Parmesan cheese into the dough during the kneading process for a savory twist.
- Sweet Rolls: Increase the sugar to 3-4 tablespoons and add a pinch of cinnamon for a slightly sweeter roll.
FAQs
Q: Why are my rolls not rising?
A: This is usually due to inactive yeast, water that was too hot or too cold, or a lack of warmth in the rising environment. Ensure your yeast is fresh and that your water is at the correct temperature.
Q: What’s the difference between bread flour and all-purpose flour for rolls?
A: Bread flour has a higher protein content, which develops more gluten, resulting in a chewier and more elastic texture in your rolls. All-purpose flour can be used, but the texture might be slightly softer.
Q: Can I use milk instead of buttermilk?
A: Yes, you can substitute whole milk for the buttermilk. For a slight tang, add 1 tablespoon of lemon juice or white vinegar to 1/2 cup of milk and let it sit for 5 minutes before using.
Q: My rolls are tough. What did I do wrong?
A: Tough rolls can result from over-kneading or adding too much flour. Aim for a soft, pliable dough and avoid adding excessive amounts of flour during kneading.
Q: How do I get golden brown, crusty rolls?
A: The baking temperature and time are key. Ensure your oven is accurately preheated. For a slightly more golden hue, you can brush the tops with a little melted butter or an egg wash (egg beaten with a tablespoon of water) before baking.
Final Thoughts
There’s a profound satisfaction in creating something so fundamental and comforting from scratch. These old-fashioned buttermilk dinner rolls are more than just a recipe; they are an invitation to slow down, to engage with the process, and to create something truly delicious that nourishes both body and soul. I encourage you to give them a try, fill your home with that irresistible aroma, and savor every soft, tender bite. Whether you’re sharing them at a family dinner or enjoying them with a quiet cup of tea, these rolls are sure to become a beloved staple. Don’t hesitate to share your baking adventures with me!