
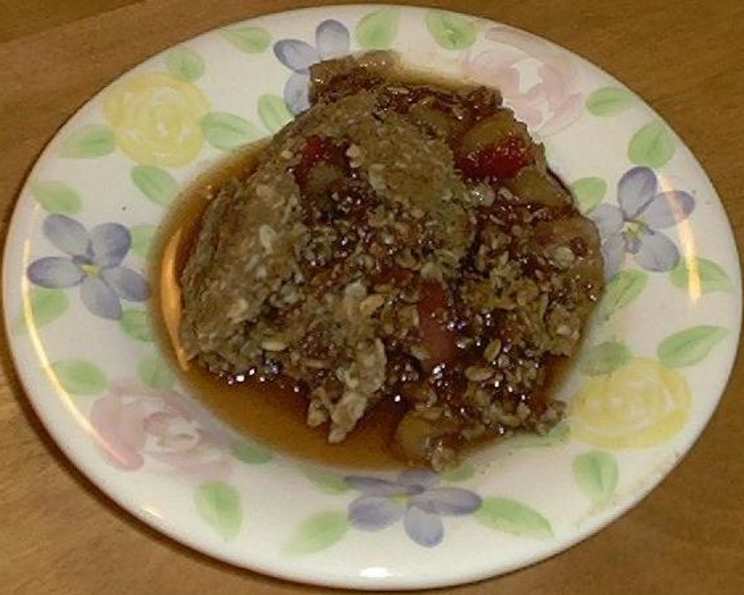
Old Fashioned Apple Crisp: A Hug in a Baking Dish
There’s a certain magic that happens when the kitchen fills with the scent of warm apples and cinnamon, a fragrance that instantly transports me back to my mother’s bustling kitchen. It wasn’t the fancy, complicated desserts that held my attention as a child, but rather the humble, comforting creations like this apple crisp. I can still vividly recall peering over the counter, mesmerized by the bubbling fruit beneath a golden, crumbly blanket, the promise of sweet, tender apples and a crisp topping a reward for any minor chore I’d “helped” with. This dish, born from a cherished family tradition, is more than just a dessert; it’s a warm embrace, a reminder of simple joys and the enduring power of home-cooked goodness.
Recipe Overview
- Prep Time: 15 minutes
- Cook Time: 30-35 minutes
- Total Time: 45-50 minutes
- Servings: 4-6
- Yield: 1 8×8 inch baking dish
- Dietary Type: Vegetarian
Ingredients
This classic apple crisp relies on a handful of simple ingredients, highlighting the natural sweetness of the apples and the comforting texture of the topping.
For the Filling:
- 4 cups sliced peeled tart apples (Granny Smith or Honeycrisp are excellent choices for their balance of sweetness and tartness, holding their shape well during baking.)
For the Topping:
- 3/4 cup packed light brown sugar (The packing ensures an accurate measurement, and the brown sugar lends a lovely caramel note.)
- 1/2 cup all-purpose flour
- 1/2 cup rolled oats (Old-fashioned rolled oats provide the best texture; instant oats can become too mushy.)
- 1 teaspoon ground cinnamon
- 1/2 teaspoon ground allspice
- 1/2 cup cold butter, cut into small cubes (Using cold butter is key to achieving a crumbly, delightful topping.)
For Serving (Optional but Highly Recommended):
- Vanilla ice cream (A scoop of creamy vanilla ice cream melting into the warm crisp is pure bliss.)
Equipment Needed
To bring this delightful apple crisp to life, you’ll want to have these essential kitchen tools on hand:
- An 8×8 inch baking pan or similar-sized oven-safe dish.
- A large mixing bowl for preparing the topping.
- A medium mixing bowl for tossing the apples, if desired (though not strictly necessary for this recipe as the topping is sprinkled directly).
- A measuring cup set and measuring spoon set.
- A peeler and knife for preparing the apples.
- A pastry blender or your fingertips for cutting in the butter.
- An oven.
Instructions
Crafting this Old Fashioned Apple Crisp is wonderfully straightforward, making it an ideal dessert for bakers of all levels. The process is designed to deliver maximum flavor and texture with minimal fuss.
- Preheat your oven to 375°F (190°C). This consistent temperature is crucial for ensuring the apples cook through to a tender consistency while the topping achieves its signature golden crispness.
- Prepare your baking pan: Lightly grease an 8×8 inch baking pan with nonstick cooking spray. This step prevents the apples from sticking to the pan and makes for easier serving and cleanup.
- Arrange the apples: Evenly distribute the sliced peeled tart apples on the bottom of the prepared pan. Aim for a relatively even layer so they cook uniformly.
- Prepare the crumb topping: In a medium mixing bowl, combine the 3/4 cup packed light brown sugar, 1/2 cup flour, 1/2 cup rolled oats, 1 teaspoon cinnamon, and 1/2 teaspoon allspice. Stir these dry ingredients together until they are well combined.
- Cut in the butter: Add the 1/2 cup cold butter, cut into small cubes, to the dry ingredients. Using a pastry blender, a fork, or your fingertips, work the butter into the dry ingredients until the mixture resembles coarse crumbs. You want some larger, pea-sized pieces of butter to remain, as these will create pockets of richness and help the topping crisp up beautifully.
- Assemble the crisp: Sprinkle the prepared crumb mixture evenly over the apples in the baking pan. Ensure the entire surface of the apples is covered.
- Bake to perfection: Place the baking pan in the preheated oven. Bake at 375°F (190°C) for 30-35 minutes, or until the apples are tender when pierced with a fork and the topping is golden brown and bubbling. The aroma filling your kitchen at this stage will be simply irresistible.
- Serve warm: Once baked, carefully remove the apple crisp from the oven. Allow it to cool slightly for a few minutes before serving.
Expert Tips & Tricks
To elevate your Old Fashioned Apple Crisp from simply delicious to truly extraordinary, consider these chef-inspired insights:
- Apple Selection is Key: While tart apples like Granny Smith are traditional and provide a wonderful counterpoint to the sweetness of the topping, don’t be afraid to mix varieties. A combination of Granny Smith for tartness and a sweeter, softer apple like Honeycrisp or Gala can offer a more complex flavor and texture profile.
- Don’t Overwork the Topping: When cutting in the butter, resist the urge to blend it in completely. The presence of larger butter pieces is what creates those delightful pockets of buttery goodness and ensures a crumbly, not doughy, texture.
- The Power of Cold Butter: Always ensure your butter is very cold when making the topping. This prevents it from melting too quickly in the oven, allowing it to create steam and lift the crumb topping, resulting in a lighter, crispier texture.
- Uniform Apple Slices: Try to slice your apples to a relatively uniform thickness. This ensures they cook evenly. If you have very thick slices and very thin slices, the thin ones could turn to mush while the thick ones remain undercooked.
- Oven Variations: Ovens can vary! Keep an eye on your crisp during the last 10-15 minutes of baking. If the topping is browning too quickly, you can loosely tent the pan with aluminum foil. If the apples aren’t tender by the 35-minute mark, continue baking for an additional 5-10 minutes, checking for tenderness.
Serving & Storage Suggestions
This Old Fashioned Apple Crisp is at its absolute best served warm, straight from the oven. The contrast between the tender, fragrant apples and the slightly crisp, buttery topping is simply divine. The traditional and arguably most delightful way to serve it is with a generous scoop of vanilla ice cream. As the ice cream melts into the warm crisp, it creates a luscious, creamy sauce that perfectly complements the fruit. A dollop of whipped cream or a drizzle of caramel sauce are also welcome additions for an extra touch of indulgence.
Leftovers can be stored, covered, in the refrigerator for up to 3 days. While it’s wonderful served cold, reheating is highly recommended to revive its glorious texture and aroma. To reheat, you can place individual portions in a microwave-safe dish and heat in the microwave for 30-60 seconds, or for a crisper topping, reheat in a 350°F (175°C) oven for about 10-15 minutes, or until warmed through.
Nutritional Information
The following nutritional information is an estimate and can vary based on specific ingredients and portion sizes.
| Nutrient | Amount per Serving | % Daily Value |
|---|---|---|
| Calories | 521.9 kcal | |
| Calories from Fat | 41% | |
| Total Fat | 24.1 g | 37% |
| Saturated Fat | 14.8 g | 73% |
| Cholesterol | 61 mg | 20% |
| Sodium | 181.8 mg | 7% |
| Total Carbohydrate | 76.8 g | 25% |
| Dietary Fiber | 4.8 g | 19% |
| Sugars | 52.9 g | 211% |
| Protein | 3.8 g | 7% |
Variations & Substitutions
While this recipe is a beautiful classic, there’s always room for personal touches and creative adaptations:
- Nutty Crunch: For added texture and flavor, consider adding 1/2 cup of chopped pecans or walnuts to the crumb topping mixture. They toast beautifully in the oven and offer a satisfying crunch.
- Spiced Up: Feeling adventurous? Add a pinch of ground nutmeg, ground ginger, or even a whisper of cardamom to the dry ingredients for the topping.
- Seasonal Fruits: While apples are the star here, you could also experiment with a blend of apples and pears, or even add a handful of fresh or frozen berries (like cranberries or blueberries) to the filling for a tart counterpoint. If using frozen berries, be sure to thaw and drain them well to avoid excess moisture.
- Gluten-Free Option: To make this gluten-free, simply substitute the all-purpose flour with your favorite gluten-free all-purpose flour blend that contains xanthan gum. Ensure your oats are also certified gluten-free.
FAQs (Frequently Asked Questions)
Q: What type of apples should I use for the best results?
A: Tart apples like Granny Smith are ideal because their tartness balances the sweetness of the topping and sugar. You can also mix them with softer, sweeter apples like Honeycrisp or Gala for added complexity.
Q: My topping looks too wet or too dry. What did I do wrong?
A: Ensure your butter is very cold and cut into small cubes. For too wet, you may have used melted butter or too much liquid. For too dry, you might need a touch more butter. Aim for a crumbly texture with some pea-sized pieces of butter.
Q: Can I make this ahead of time?
A: You can prepare the apple filling and the crumb topping separately and store them in the refrigerator. Assemble and bake just before serving for the best texture.
Q: Why is my apple crisp not bubbling around the edges?
A: This could indicate the oven temperature is too low, or the apples may have released less moisture than expected. Ensure your oven is accurately preheated and consider baking a few minutes longer if needed, checking for tender apples.
Q: Can I make this vegan?
A: To make this recipe vegan, substitute the butter in the topping with a high-quality vegan butter substitute. Ensure it’s firm and cold, just like dairy butter, for the best results.
Final Thoughts
There’s a profound satisfaction in recreating a dish that evokes such cherished memories, and this Old Fashioned Apple Crisp is a perfect example. It’s a testament to the fact that the most memorable desserts are often the simplest, crafted with quality ingredients and a touch of love. This recipe is a reliable friend in the kitchen, always delivering comfort and delight. I encourage you to gather your ingredients, embrace the warmth of your oven, and let the aromas of cinnamon and apple fill your home. Share it with loved ones, savor each spoonful, and perhaps, create a new cherished memory of your own. Serve it warm with that classic scoop of vanilla ice cream – it’s a pairing that never fails to impress.