
Old Fashion’ Buttermilk Pancakes: A Taste of Nostalgia
The aroma of perfectly cooked pancakes is, for me, the very essence of comfort. It’s a scent that instantly transports me back to childhood mornings, filled with sunshine and the promise of a lazy weekend. My connection to these particular Old Fashion’ Buttermilk Pancakes runs deep, steeped in the memory of a bustling, beloved diner from my youth. It was a small, unassuming place where the owner, a wonderfully gruff but secretly kind Norwegian gentleman named Andy, presided over a kitchen that churned out simple, honest food. He taught me the profound importance of technique, especially when it came to pancakes, imparting wisdom that I carry with me to this day. This recipe is a direct descendant of those cherished mornings, a testament to the magic that happens when simple ingredients are treated with respect and a touch of old-school know-how.
Recipe Overview
- Prep Time: 15 minutes
- Cook Time: 30 minutes
- Total Time: 45 minutes
- Servings: 10-12
- Yield: 1 large bowl of batter
- Dietary Type: Vegetarian
Ingredients
- 6 large eggs
- 1⁄2 cup sugar
- 2 teaspoons vanilla extract (clear vanilla is preferred for a pristine white color, but any good quality vanilla will do)
- 1 tablespoon baking soda
- 1 teaspoon baking powder
- 1 teaspoon salt
- 1 quart buttermilk
- 2 1⁄2 cups unbleached flour (plus a little more, if needed, to achieve desired batter consistency)
- 1⁄4 lb butter, melted and cooled
Equipment Needed
- Large mixing bowl
- Whisk
- Small saucepan or microwave-safe bowl (for melting butter)
- Griddle or large non-stick frying pan
- Spatula for flipping
- Wire rack (optional, for keeping pancakes warm)
- Ladle or measuring cup for portioning batter
Instructions
The secret to truly exceptional pancakes lies not in complicated techniques, but in understanding a few fundamental principles. First and foremost, resist the urge to overmix. Overmixing develops the gluten in the flour, resulting in tough, chewy pancakes. We’re aiming for tender, fluffy discs that practically melt in your mouth, and that starts with a lumpy batter.
- Begin by melting the butter. You can do this gently in a small saucepan over low heat or in a microwave-safe bowl in short bursts, stirring in between. Once melted, set it aside to cool. It should be cool enough to handle but still liquid – not hardened or solidified.
- In a large mixing bowl, combine the eggs, sugar, baking powder, baking soda, vanilla extract, and salt. Using a whisk, mix these ingredients together until they are well blended and the sugar begins to dissolve.
- Pour in the buttermilk and stir until the mixture is smooth and thoroughly combined.
- Now, it’s time to add the flour. Start by adding about 1 cup of the unbleached flour and stir until just incorporated. Then, add the flour in ½ cup increments, stirring only until each addition is just moistened. The key here is to stop mixing as soon as you no longer see large pockets of dry flour. You should have a batter that is medium-thick, with a pleasing number of lumps. This is precisely what we want!
- Gently, but thoroughly, stir in the cooled, melted butter. Ensure it is fully incorporated into the batter. Again, be mindful not to overmix; a few small streaks of butter are perfectly fine.
- Heat your griddle or non-stick frying pan over medium heat. It’s important to have a properly heated surface for even cooking. You can test if it’s ready by flicking a few drops of water onto it; they should sizzle and evaporate quickly.
- Ladle the batter onto the hot griddle to your desired pancake size. For classic diner-style pancakes, I like to aim for about ¼ cup of batter per pancake.
- Cook the pancakes until you see bubbles forming all over the surface and the edges begin to look set. This usually takes about 2-3 minutes.
- Once the bubbles appear, it’s time to flip. Use a wide spatula to carefully lift and flip each pancake.
- Cook the second side for an additional 2-3 minutes. For a beautiful, slightly glazed finish, you can then flip one more time and cook for just 10-15 seconds. This short burst on the first side again helps create that lovely texture.
- Serve immediately on a warm platter. These pancakes are best enjoyed fresh off the griddle.
Expert Tips & Tricks
For those mornings when time is of the essence, know that this batter does not keep well. It’s designed to be used as soon as it’s made. However, you can certainly prepare your dry ingredients ahead of time. Measure out the flour, sugar, baking soda, baking powder, and salt into a bowl, whisk them together, and store in an airtight container. When you’re ready to make the pancakes, simply add the wet ingredients to the dry.
Serving & Storage Suggestions
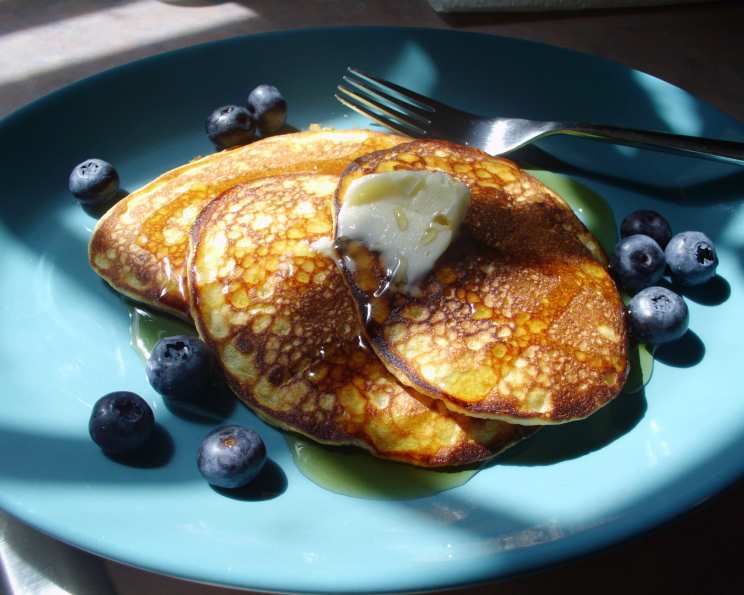
These Old Fashion’ Buttermilk Pancakes are a celebration in themselves, so serve them with generosity. A warm platter is essential to keep them at their peak. The classic accompaniments are, of course, real maple syrup – the richer the better – and a generous pat of butter that slowly melts into every nook and cranny. For those who crave something more, consider a dollop of whipped cream, a scattering of fresh berries, or even a drizzle of chocolate sauce.
As for storage, it’s important to note that this batter is best used immediately. It will lose its leavening power and texture if left to sit for too long. If, by some miracle, you have leftover cooked pancakes, they can be stored in an airtight container in the refrigerator for 1-2 days. Reheat them gently in a toaster, a dry skillet over low heat, or in a warm oven until they are heated through.
Nutritional Information
(Please note: This is an estimated nutritional breakdown and can vary based on specific ingredients and portion sizes.)
| Nutrient | Amount per Serving (approx.) | % Daily Value (approx.) |
|---|---|---|
| Calories | 318.6 kcal | |
| Calories from Fat | 119 kcal | |
| Total Fat | 13.2 g | 20% |
| Saturated Fat | 7.3 g | 36% |
| Cholesterol | 139.9 mg | 46% |
| Sodium | 871.9 mg | 36% |
| Total Carbohydrate | 39 g | 12% |
| Dietary Fiber | 0.8 g | 3% |
| Sugars | 15 g | 59% |
| Protein | 10.3 g | 20% |
Variations & Substitutions
While this recipe is a cherished classic, feel free to play with it! For a richer flavor, you can substitute half of the buttermilk with heavy cream for an extra decadent treat. If you’re seeking a slightly healthier twist, consider using whole wheat pastry flour or a blend of unbleached and whole wheat flour, though this may slightly alter the texture. Adding a teaspoon of lemon zest to the batter can impart a bright, fresh note that pairs beautifully with fruit toppings.
FAQs
Q: Why is it important NOT to use electric mixers for this pancake batter?
A: Electric mixers can easily overmix the batter, leading to tough pancakes. The gentle stirring recommended for this recipe ensures a tender, fluffy texture.
Q: My pancakes are sticking to the griddle. What am I doing wrong?
A: Ensure your griddle is properly heated to medium heat and is well-greased, even if it’s non-stick. Allowing the batter to rest for a moment after adding the butter can also help.
Q: Can I make this batter ahead of time?
A: No, this batter is best used immediately after mixing. The leavening agents are most effective when the batter is fresh.
Q: What is the ideal batter consistency?
A: You want a medium-thick batter that has a pleasing number of lumps. It should not be runny, but also not thick enough to be unpourable.
Q: How do I know when to flip the pancakes?
A: Look for bubbles that form all over the surface of the pancake and edges that appear set. This indicates the underside is cooked and ready to be flipped.
Final Thoughts
There’s a profound satisfaction in creating something simple yet utterly delicious, a dish that evokes warmth and cherished memories. These Old Fashion’ Buttermilk Pancakes are precisely that. They are more than just a breakfast item; they are a connection to the past, a reminder of the simple pleasures that make life sweet. I encourage you to gather your ingredients, embrace the lumpy batter, and bring a little bit of that old-school magic into your kitchen. Share them with your loved ones, pour over some real maple syrup, and savor every fluffy bite. I’d love to hear about your experiences and any delightful toppings you discover!