
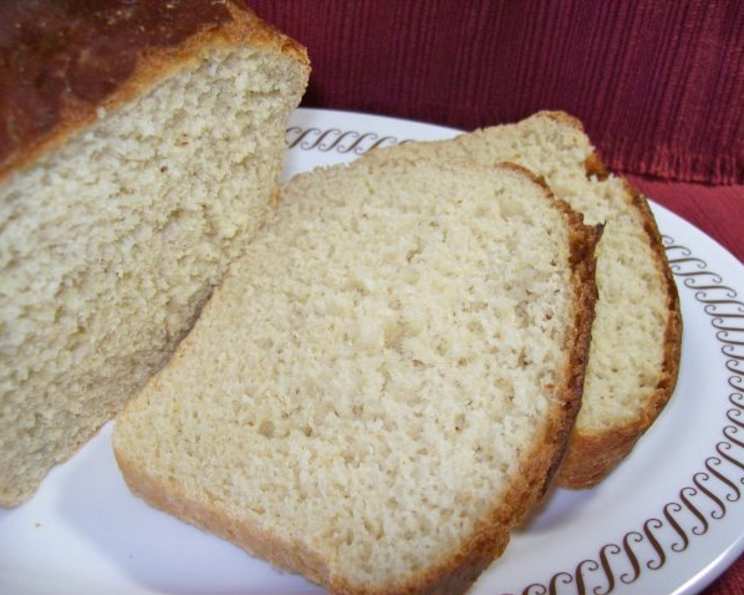
The Comfort of Home: Mastering Oatmeal Bread in Your Bread Machine
There’s a particular aroma that signals pure, unadulterated comfort to me – the warm, slightly nutty scent of freshly baked bread, especially one infused with the wholesome goodness of oats. I remember my grandmother’s kitchen, a place where the hum of her trusty bread machine was as much a part of the atmosphere as the sunlight streaming through the window. She’d often make this oatmeal bread when the days grew shorter and a chill settled in the air, the golden loaf a promise of warmth and shared moments. It was more than just a recipe; it was a ritual, a tangible expression of love baked into every slice, a simple joy that never failed to bring everyone to the table.
Recipe Overview
- Prep Time: Approximately 1 hour (for bread machine dough cycle)
- Cook Time: 45-50 minutes
- Total Time: Approximately 2 hours 30 minutes
- Servings: 10
- Yield: 1 loaf
- Dietary Type: Vegetarian
Ingredients
For this wonderfully rustic and satisfying oatmeal bread, you’ll need a straightforward list of ingredients that come together beautifully. The combination of flours provides a delightful balance, while the oats lend a tender crumb and a subtle, nutty depth.
- 3/4 cup water
- 1/2 cup buttermilk (or, if you don’t have buttermilk on hand, a simple substitute is 1/2 cup milk mixed with 1/2 tablespoon lemon juice, left to sit for a few minutes)
- 1/8 cup oil (vegetable, canola, or a light olive oil work well)
- 1/4 cup honey (or maple syrup for a slightly different sweetness)
- 1/2 cup old-fashioned oats (rolled oats, not instant)
- 1 1/2 cups white flour (all-purpose flour is perfect here)
- 1 1/2 cups wheat flour (whole wheat flour for that extra wholesome flavor; if you prefer a milder taste, you can substitute with more white flour)
- 1 1/2 teaspoons salt
- 1/4 teaspoon baking soda
- 1 tablespoon yeast (active dry or instant yeast)
Equipment Needed
To bring this delightful loaf to life, you’ll primarily rely on your bread machine. However, a few common kitchen tools will also come in handy:
- Bread Machine (with dough cycle and bake cycle, or just dough cycle)
- Measuring cups and spoons
- Lightly greased bread pan (if shaping the dough by hand)
- Pastry brush (optional, for finishing)
- Wire cooling rack
Instructions
Using a bread machine simplifies the process considerably, allowing you to achieve excellent results with minimal hands-on effort. The dough cycle handles the kneading and initial rise, leaving you with the fun part of shaping and baking.
- Load the Bread Machine: Begin by adding your ingredients to the bread machine pan in the precise order listed above. This specific order is often crucial for bread machines to ensure the yeast activates correctly and the ingredients combine properly.
- Select the Dough Cycle: Secure the pan in your bread machine and select the dough cycle. This cycle typically involves mixing, kneading, and a primary rise, usually lasting around one hour.
- Monitor Dough Consistency: During the kneading phase of the dough cycle, peek inside your bread machine. You’re looking for a cohesive dough ball that is smooth and elastic, pulling away from the sides of the pan. If the dough appears too dry and crumbly, add water a teaspoon at a time. If it seems too wet and sticky, incorporate flour a teaspoon at a time until you achieve that perfect ball.
- End of Dough Cycle: Once the dough cycle is complete, the dough should have risen nicely within the machine’s pan.
- Shape the Loaf: Carefully remove the dough from the bread machine pan and gently punch it down to release any large air pockets. Shape it into your desired loaf form and place it into a lightly greased bread pan.
- Second Rise: Cover the bread pan with a clean kitchen towel or plastic wrap. Allow the dough to rise in a warm, draft-free place for approximately 45 minutes to 1 hour, or until it has visibly doubled in size.
- Preheat the Oven: While the dough is on its second rise, preheat your oven to 350°F (175°C).
- Bake the Bread: Once the dough has completed its second rise and the oven is preheated, carefully place the bread pan into the center of the oven. Bake for 45-50 minutes. The exact baking time can vary depending on your oven, so keep an eye on it. The loaf is done when it’s a deep golden brown on top and sounds hollow when tapped on the bottom.
- Optional Finishing Touch: As soon as the bread comes out of the oven, you can optionally brush the top crust with a little melted butter using a pastry brush. This adds a lovely sheen and an extra layer of flavor, making the loaf even more inviting.
- Cooling: Transfer the baked loaf to a wire cooling rack immediately after removing it from the oven. This allows air to circulate around the entire loaf, preventing the bottom crust from becoming soggy. Allow it to cool completely before slicing to ensure the best texture.
Expert Tips & Tricks
- Oat Toasting Trick: For an even richer, nuttier flavor from your oats, lightly toast them in a dry skillet over medium heat for a few minutes until fragrant before adding them to the bread machine. Be sure to let them cool slightly before adding them to the other ingredients.
- Flour Power: The ratio of white to wheat flour is a suggestion. If you’re new to whole wheat flour, start with a 2:1 ratio of white to wheat and adjust as you become more comfortable. You can also experiment with different types of wheat flour, like white whole wheat for a milder flavor.
- Buttermilk Substitute Magic: If you’re caught without buttermilk, the milk-and-lemon-juice trick is a fantastic stand-in. Let it sit for at least 5-10 minutes to curdle slightly, mimicking the acidity and richness of true buttermilk.
- Oven Watch: Ovens can be fickle! If you know your oven tends to run hot or cold, use an oven thermometer and adjust the baking time accordingly. A 45-minute bake is a good starting point, but trust your senses – the color and sound of the bread are the best indicators of doneness.
- No Bread Machine? No Problem! If you don’t have a bread machine, you can certainly make this bread by hand. Combine the wet ingredients, then gradually mix in the dry ingredients until a shaggy dough forms. Turn the dough out onto a lightly floured surface and knead for about 8-10 minutes until it’s smooth and elastic. Then, proceed with the second rise and baking steps as outlined.
Serving & Storage Suggestions
This oatmeal bread is wonderfully versatile. It’s absolutely divine sliced thick and served warm with a generous slathering of butter. It also makes an excellent base for your favorite jams, honey, or even a dollop of cream cheese. For a more savory experience, consider toasting slices and topping them with avocado or a poached egg.
To store your freshly baked loaf, allow it to cool completely before wrapping it tightly in plastic wrap or placing it in an airtight container or bread bag. At room temperature, it will stay fresh for about 2-3 days. For longer storage, you can freeze the bread. Wrap individual slices or the entire loaf tightly in plastic wrap and then in aluminum foil or a freezer bag. It will keep in the freezer for up to 2-3 months. To reheat, you can thaw frozen slices at room temperature or toast them directly from frozen. Reheating a whole loaf can be done in a 300°F (150°C) oven for about 10-15 minutes, or until warmed through.
Nutritional Information
Here’s an estimated breakdown of the nutritional content per serving of this oatmeal bread.
| Nutrient | Amount per Serving | % Daily Value |
|---|---|---|
| Calories | 203.4 kcal | |
| Calories from Fat | ||
| Total Fat | 3.8 g | 5% |
| Saturated Fat | 0.6 g | 2% |
| Cholesterol | 0.5 mg | 0% |
| Sodium | 395.6 mg | 16% |
| Total Carbohydrate | 38.1 g | 12% |
| Dietary Fiber | 3.2 g | 12% |
| Sugars | 7.7 g | 30% |
| Protein | 5.8 g | 11% |
Note: Nutritional values are approximate and can vary based on specific ingredient brands and substitutions.
Variations & Substitutions
While this recipe is delightful as is, feel free to get creative!
- Sweetness Adjustment: If you prefer a less sweet bread, you can reduce the honey to 2 tablespoons. For an even more pronounced oat flavor, you can increase the oats to 3/4 cup.
- Nutty Addition: Fold in 1/2 cup of chopped nuts, such as walnuts or pecans, along with the flour for added texture and flavor.
- Seed Boost: Incorporate 1/4 cup of seeds like sunflower, pumpkin, or flax seeds into the dough for extra nutrition and a delightful crunch.
- Herbal Infusion: For a savory twist, add 1-2 tablespoons of dried herbs like rosemary or thyme to the dry ingredients.
- Flour Swap: If you’re looking to go completely whole grain, you can try using all whole wheat flour, but be aware that the texture might be denser. You might need to slightly adjust the liquid content.
FAQs
Q: Can I use instant oats instead of old-fashioned oats?
A: While you can, old-fashioned oats provide a better texture and chew in this bread. Instant oats might break down too much during the kneading process.
Q: My bread machine’s dough cycle is shorter than an hour. Will that affect the recipe?
A: Most bread machine dough cycles are designed to be sufficient for the initial rise. As long as your machine completes its kneading and rising phases, you should be fine.
Q: Why is the order of ingredients important in a bread machine?
A: The order typically ensures that wet ingredients are at the bottom, preventing the yeast from coming into contact with salt or sugar prematurely, which can hinder its activation.
Q: Can I use milk instead of buttermilk without the lemon juice trick?
A: While you can, the buttermilk or the milk-lemon juice mixture adds a slight tang and tenderness to the bread that regular milk alone won’t provide.
Q: How do I know if my yeast is still active?
A: If your yeast has been in the pantry for a while, you can test its activity by dissolving it in warm water (around 105-115°F or 40-46°C) with a pinch of sugar. If it becomes foamy within 5-10 minutes, it’s active.
Final Thoughts
Baking this oatmeal bread is an act of simple, honest goodness. It’s a reminder that some of the most profound comforts come from the most straightforward sources. Whether you’re using the convenience of a bread machine or kneading the dough by hand, the aroma that fills your kitchen will be a testament to the joy of homemade. I encourage you to try this recipe, to taste the wholesome flavor of oats and flour, and to share its warmth with those you love. It pairs beautifully with a steaming mug of coffee or a glass of cold milk – a perfect companion for any moment of the day. Let me know how your loaf turns out!