
The Ultimate Shortcut: Easy Rotisserie Chicken Enchiladas
There’s a certain magic in the aroma that wafts from a grocery store rotisserie chicken – a promise of immediate comfort and minimal effort. For me, that scent is intrinsically linked to busy weeknights and a desire to conjure something deeply satisfying without spending hours in the kitchen. I remember one particular evening, juggling a demanding project deadline and a rumbling family tummies. The usual dinner dilemma loomed, but then my gaze landed on that golden-skinned chicken, pre-cooked and waiting. It was a culinary epiphany: this humble rotisserie bird could be the hero of a truly delectable and surprisingly quick enchilada feast. And thus, my go-to Easy Rotisserie Chicken Enchiladas were born, a testament to how a little pre-cooked convenience can transform into something truly special.
Recipe Overview
- Prep Time: 15 minutes
- Cook Time: 35 minutes
- Total Time: 50 minutes
- Servings: 6
- Yield: 1 (9×13 inch) baking dish
- Dietary Type: Gluten-Free
Ingredients
The beauty of this recipe lies in its elegant simplicity, allowing the star ingredient – that tender rotisserie chicken – to shine.
- 1 rotisserie chicken, meat removed from bones (discard skin) and chopped or shredded
- 1 large sweet onion, chopped
- 14-16 small corn tortillas
- 1 cup shredded cheese, of choice (a blend of jack and cheddar is highly recommended for that perfect melty pull)
- 1 (15 ounce) can tomato sauce
- 1 (6 ounce) can tomato paste
- 1/2 cup water
- 1/2 cup light sour cream
- 1/2 teaspoon black pepper
- 1/2 teaspoon salt
- 1/2 teaspoon onion powder
- 1/2 teaspoon red chili pepper flakes (adjust to your spice preference)
- 1 teaspoon chili powder
- 1 teaspoon vinegar
Equipment Needed
While this recipe is wonderfully straightforward, having a few key pieces of equipment will make the process even smoother:
- A 9×13 inch baking dish
- A medium saucepan for the enchilada sauce
- A large bowl for mixing the chicken and onion
- A whisk for combining the sauce ingredients
- Cooking spray for preparing the baking dish
- Aluminum foil for covering the enchiladas during baking
Instructions
Let’s transform that store-bought marvel into a restaurant-worthy, weeknight-friendly dinner that will have everyone asking for seconds.
- Preheat and Prep: Begin by preheating your oven to 350 degrees Fahrenheit (175 degrees Celsius). Lightly coat your 9×13 inch baking dish with cooking spray. This crucial step ensures your enchiladas won’t stick, making for a much cleaner serving experience.
- Prepare the Chicken and Onion: Carefully remove all the meat from the bones of your rotisserie chicken. Discard the skin. Chop or shred the chicken into small, bite-sized pieces and place it into a large bowl. Next, chop your sweet onion and add it to the bowl with the chicken.
- Whip Up the Enchilada Sauce: In a medium saucepan, combine the tomato sauce, tomato paste, water, and light sour cream. Add the black pepper, salt, onion powder, red chili pepper flakes, chili powder, and vinegar. Whisk all the ingredients together until thoroughly combined and smooth. Place the saucepan over medium heat and bring the sauce to a gentle simmer, stirring occasionally. Let it simmer for about 5 minutes to allow the flavors to meld beautifully.
- Assemble the Enchiladas: This is where the magic truly happens. Take each corn tortilla and, using a spoon, add a portion of the chicken and onion mixture down the center. Then, spoon a little of the simmering enchilada sauce over the filling. Carefully roll up the tortilla, enclosing the filling. Place each rolled enchilada into your prepared baking dish, seam-side down. Continue this process, arranging the enchiladas snugly in the dish, until you’ve used all the tortillas and filling.
- Sauce and First Bake: Once your baking dish is filled with beautifully rolled enchiladas, pour the remaining enchilada sauce evenly over the top, ensuring all the enchiladas are well-covered. Lightly cover the baking dish with aluminum foil. Place the dish in the preheated oven and bake for 20 minutes. This initial baking period allows the enchiladas to heat through and the flavors to begin their delicious marriage.
- The Cheesy Grand Finale: After 20 minutes, carefully remove the baking dish from the oven and remove the foil. Sprinkle your chosen shredded cheese evenly over the top of the enchiladas. Return the dish to the oven, uncovered, and bake for an additional 15 minutes, or until the cheese is fully melted, bubbly, and gorgeously golden brown.
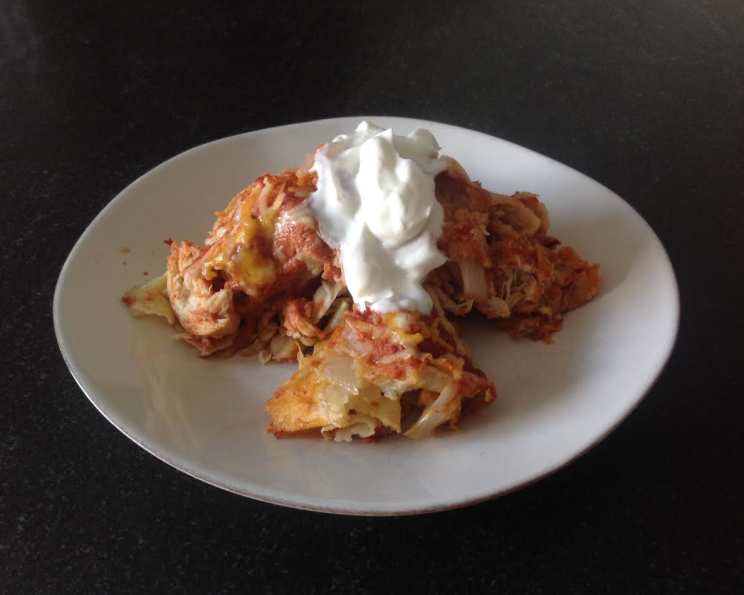
- Rest and Garnish: Once the cheese is perfectly melted and irresistible, remove the enchiladas from the oven. Allow them to rest for a few minutes before serving. This brief resting period helps the enchiladas set slightly, making them easier to serve. If desired, garnish with a dollop of extra sour cream.
Expert Tips & Tricks
As a chef, I’m always looking for ways to elevate even the simplest dishes. Here are a few tricks to make your Easy Rotisserie Chicken Enchiladas even more spectacular:
- Warm Your Tortillas: For more pliable corn tortillas that are less likely to crack when rolled, warm them briefly before filling. You can do this by quickly dipping them in hot oil, warming them on a dry skillet for a few seconds per side, or even microwaving them for a few seconds wrapped in a damp paper towel. Just be careful not to overcook them.
- Boost the Flavor: Don’t hesitate to add a minced clove of garlic to the onion mixture for an extra layer of aromatic depth. A pinch of cumin in the sauce can also add a lovely subtle warmth.
- Spice Control: The red chili pepper flakes provide a nice kick. If you prefer milder enchiladas, reduce or omit them. For those who love heat, a pinch of cayenne pepper can be added to the sauce.
- Cheesy Perfection: While jack and cheddar are classic, feel free to experiment with other melting cheeses like Monterey Jack, Pepper Jack (for extra heat!), or even a bit of crumbled cotija sprinkled on top after baking for a salty, crumbly finish.
- Sauce Consistency: If your enchilada sauce seems a little too thick, you can add an extra tablespoon or two of water while it’s simmering to reach your desired consistency.
Serving & Storage Suggestions
These enchiladas are a complete meal on their own, but they also pair wonderfully with a simple side salad, some refried beans, or Mexican rice. For an attractive presentation, serve them directly from the baking dish, allowing guests to help themselves.
Storage: Leftover enchiladas can be stored in an airtight container in the refrigerator for up to 3-4 days. To reheat, simply place a portion in the microwave and heat until warmed through, or for a crispier texture, reheat them in a 350°F (175°C) oven until heated through and the cheese is re-melted.
Nutritional Information
While precise nutritional values can vary based on specific ingredient brands and exact measurements, here’s an estimated breakdown for one serving of these delicious enchiladas:
| Nutrient | Amount per Serving | % Daily Value |
|---|---|---|
| Calories | 427 kcal | |
| Calories from Fat | 180 kcal | |
| Total Fat | 20 g | 30% |
| Saturated Fat | 7.8 g | 38% |
| Cholesterol | 75.5 mg | 25% |
| Sodium | 1080.3 mg | 45% |
| Total Carbohydrate | 40.1 g | 13% |
| Dietary Fiber | 6.5 g | 26% |
| Sugars | 8.2 g | 32% |
| Protein | 24.2 g | 48% |
Note: Percent Daily Values are based on a 2,000 calorie diet. Your daily values may be higher or lower depending on your calorie needs.
Variations & Substitutions
The beauty of a recipe like this is its inherent adaptability.
- Vegetarian Delight: Swap the rotisserie chicken for a can of black beans (rinsed and drained) or a mix of sautéed vegetables like zucchini, bell peppers, and corn.
- Spicier Kick: If you love heat, substitute the jack and cheddar cheese with Pepper Jack. You could also add a finely diced jalapeño pepper to the chicken and onion mixture.
- Creamier Sauce: For a richer sauce, you can substitute the light sour cream with full-fat sour cream or even a dollop of Greek yogurt.
- Different Tortillas: While corn tortillas are traditional and gluten-free, you can also use small flour tortillas if gluten is not a concern. They will yield a slightly different texture.
FAQs
- Q: Can I make this recipe ahead of time?
A: Yes! You can assemble the enchiladas (up to the point of adding the final cheese layer) and refrigerate them. When ready to bake, add the sauce, cover, and bake as directed, adding an extra few minutes to the initial baking time if the enchiladas are cold from the refrigerator. - Q: My corn tortillas are breaking when I roll them. What can I do?
A: To prevent tortillas from breaking, warm them slightly before filling. This can be done by briefly heating them on a dry skillet, warming them in the microwave (wrapped in a damp paper towel), or quickly dipping them in warm oil. - Q: Can I use a different type of chicken?
A: Absolutely. If you don’t have a rotisserie chicken, you can boil or bake chicken breasts or thighs until cooked through, then shred or chop them. - Q: How spicy are these enchiladas?
A: The spice level is moderate, thanks to the red chili pepper flakes. You can easily adjust the heat by increasing or decreasing the amount of flakes used, or by omitting them entirely. - Q: Is this recipe truly gluten-free?
A: Yes, as long as you use 100% corn tortillas, this recipe is naturally gluten-free. Always check the labels of your ingredients to be sure.
Final Thoughts
This recipe is a testament to the power of simple ingredients and clever shortcuts. It’s a dish that brings comfort and joy without demanding hours of your precious time. The tender rotisserie chicken, embraced by a flavorful, homemade-style enchilada sauce and topped with gooey melted cheese, creates a symphony of flavors and textures that is utterly irresistible. So, the next time you’re short on time but craving something deeply satisfying, reach for that rotisserie chicken. You might just discover your new favorite weeknight wonder. I encourage you to try it, share your culinary triumphs, and perhaps even pair it with a crisp margarita for the perfect celebratory meal. Happy cooking!