
The Humble Hero: Mastering the Art of Onigiri
There’s a certain comfort that washes over me every time I think about onigiri. It’s not just food; it’s a culinary hug, a portable piece of home that transcends generations. I remember my grandmother, her hands always smelling faintly of rice and the sea, meticulously shaping these little treasures for our family picnics. The anticipation of unwrapping one, the slight resistance of the nori giving way to the warm, perfectly seasoned rice, and then that burst of flavor – be it savory salmon or a tangy umeboshi – it’s a sensory journey I’ve cherished since childhood. These aren’t just rice balls; they are edible memories, a testament to the simple beauty of good ingredients handled with care.
Recipe Overview
- Prep Time: 30 minutes (plus 30 minutes for salmon salting)
- Cook Time: 15-20 minutes (for salmon)
- Total Time: 1 hour 15 minutes
- Servings: 4
- Yield: 8 rice balls
- Dietary Type: Pescatarian (can be adapted to vegetarian by omitting salmon)
Ingredients
Here’s what you’ll need to craft these delightful onigiri:
- 4 cups steamed Japanese-style rice, cooked and still warm
- 1 tablespoon sesame seeds, toasted for extra flavor
- 2 sheets dried nori, cut into 8 equally sized rectangular strips (approximately 2 inches by 4 inches)
- 1 slice salmon
- Salt, to taste, for seasoning the salmon and for hands
Equipment Needed
You won’t need a lot of fancy gadgets for this classic dish. The essentials are:
- A medium-sized bowl for mixing the rice
- A small bowl for water (to prevent rice from sticking to hands)
- A baking sheet or a skillet for cooking the salmon
- A plate or serving platter
Instructions
Crafting onigiri is an exercise in gentle precision. Follow these steps carefully, and you’ll be rewarded with perfect rice balls every time.
-
Prepare the Salmon: Begin by generously sprinkling the slice of salmon with salt on both sides. Let it sit for at least 30 minutes. This step draws out moisture and seasons the fish from within.
-
Cook the Salmon: While the salmon is salting, you can toast your sesame seeds in a dry skillet over medium heat until fragrant, being careful not to burn them. Once the salmon has rested, grill or fry it until the edges are slightly browned and the fish is cooked through. The goal here is to create a slightly crisped exterior and tender, flaky interior.
-
Flake the Salmon: Once the cooked salmon has cooled enough to handle, flake it into small, bite-sized pieces. Remove any bones or skin you find. Set the flaked salmon aside.
-
Prepare the Nori: Take your dried nori sheets and cut them into 8 equally sized, rectangular strips. These strips will be used to wrap around the onigiri, adding a touch of oceanic flavor and a convenient way to hold them.
-
Combine Rice and Fillings: In a medium-sized bowl, place the warm, steamed Japanese-style rice. Add the toasted sesame seeds and the flaked salmon to the rice. Gently mix everything together. You can add a tiny pinch of salt to the rice mixture if you feel it needs it, but remember the salmon is already seasoned.
-
Shape the Onigiri: This is where the magic happens! Prepare a small bowl of water. Dip your hands lightly in the water, then sprinkle a pinch of salt onto your palms. This salt will season the outside of the rice ball and, crucially, prevent the sticky rice from adhering to your hands. Take about a 1/2 cup of the rice mixture and place it in your salted, wet hands.
-
Form the Rice Balls: Gently press the rice between your palms, rotating it to form it into your desired shape. The most traditional shapes are either round (like a ball) or triangular. Use light, firm pressure. Avoid squeezing too hard, as this can make the rice dense and gummy. The idea is to shape it into a compact, cohesive form that holds its structure.
-
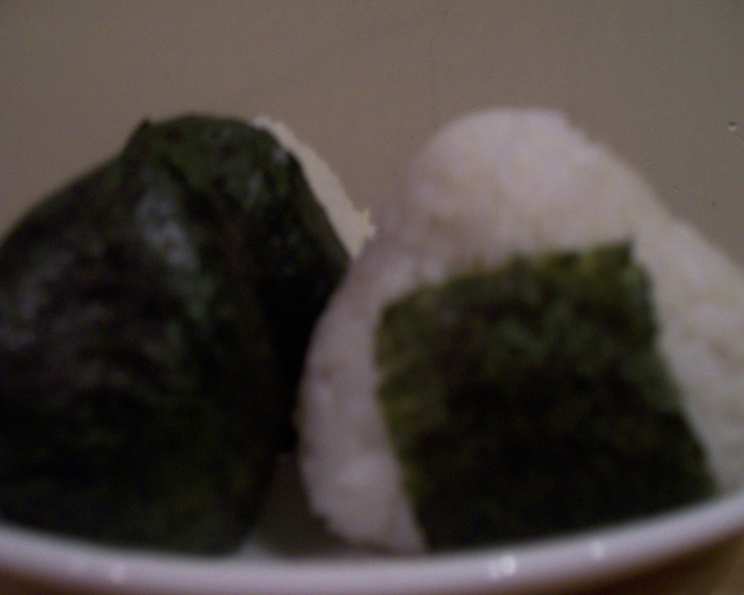
Wrap with Nori: Once you have shaped each rice ball, wrap one of the prepared strips of nori around each rice ball. You can place the nori along the bottom or side of the onigiri. The moisture from the rice will help the nori stick.
Expert Tips & Tricks
To elevate your onigiri game from good to exceptional, consider these insights:
- Rice is Key: The quality of your rice truly matters. Japanese short-grain rice is ideal due to its stickiness, which is essential for holding the onigiri shape. Ensure it’s cooked perfectly – neither too mushy nor too firm.
- Warm Rice is Your Friend: Working with warm, but not scalding hot, rice makes it much easier to shape. It allows the starches to be more pliable.
- Seasoning is Subtle: Don’t over-salt the rice mixture itself. The primary seasoning should come from the fillings and a light touch of salt on your hands.
- Nori Matters: For a crisper nori texture, you can toast the nori sheets very lightly over a low flame or in a toaster oven just before cutting them. Be very quick, as they can burn easily.
- Beyond Salmon: While salmon is a classic and delicious filling, don’t be afraid to experiment! Tuna mayonnaise, seasoned kombu (kelp), grilled chicken, or even just plain salt (shio musubi) are wonderful options.
- Making Ahead: Onigiri are best enjoyed fresh. However, if you need to make them ahead, store them in an airtight container at room temperature for a few hours. Refrigeration can make the rice hard, so it’s best avoided if possible.
Serving & Storage Suggestions
Onigiri are wonderfully versatile. They make a fantastic light lunch, a satisfying snack, or a great addition to a bento box. Serve them as they are, perhaps with a side of pickled ginger or a small dish of soy sauce for dipping.
For storage, onigiri are at their peak freshness within a few hours of being made. If you must store them, place them in an airtight container at room temperature for up to 4-6 hours. Avoid refrigerating them, as the rice can become hard and dry. If refrigeration is absolutely necessary, wrap them tightly in plastic wrap, but be prepared for a change in texture upon reheating. To reheat, you can gently warm them in a microwave for 15-20 seconds, or for a slightly crisper texture, place them in a toaster oven for a few minutes.
Nutritional Information
Here’s an estimated nutritional breakdown for one salmon and sesame seed onigiri:
| Nutrient | Amount per Serving | % Daily Value |
|---|---|---|
| Calories | 348.7 kcal | |
| Calories from Fat | ||
| Total Fat | 9 g | 12% |
| Saturated Fat | 1.5 g | 8% |
| Cholesterol | 30 mg | 10% |
| Sodium | 250 mg | 11% |
| Total Carbohydrate | 55 g | 20% |
| Dietary Fiber | 3 g | 11% |
| Sugars | 1 g | 1% |
| Protein | 12 g | 24% |
Note: Nutritional values are estimates and can vary based on specific ingredients and portion sizes.
Variations & Substitutions
The beauty of onigiri lies in its adaptability. Here are a few ideas to inspire your creativity:
- Vegetarian Onigiri: Omit the salmon and instead incorporate finely chopped pickled plums (umeboshi), seasoned kombu (seaweed), or stir-fried shiitake mushrooms into the rice.
- Spicy Tuna Onigiri: Mix canned tuna (drained) with mayonnaise and a dash of sriracha or chili paste for a zesty filling.
- Teriyaki Chicken Onigiri: Use finely diced cooked teriyaki chicken as your filling.
- Furikake: For an instant flavor boost without a distinct filling, mix furikake (Japanese rice seasoning) directly into the warm rice.
- Sesame Oil: A tiny drizzle of toasted sesame oil mixed into the rice before shaping can add an extra layer of aroma and flavor.
FAQs
Q: Why do I need to wet my hands when making onigiri?
A: Wetting your hands with water, and then adding a pinch of salt, creates a barrier that prevents the sticky rice from clinging to your palms, making the shaping process much smoother.
Q: Can I use regular long-grain rice instead of Japanese-style rice?
A: While you can, Japanese short-grain rice is highly recommended for its inherent stickiness, which is crucial for holding the onigiri shape. Long-grain rice tends to be too dry and will not bind together as well.
Q: How long can I keep onigiri at room temperature?
A: Onigiri are best enjoyed fresh. They can be safely kept at room temperature for about 4-6 hours. After that, the rice quality can degrade, and it’s best to discard them.
Q: What is the best way to reheat onigiri?
A: For best results, gently warm them in a microwave for 15-20 seconds. Alternatively, for a slightly crisper exterior, use a toaster oven for a few minutes.
Q: What are some other popular fillings for onigiri?
A: Popular fillings include umeboshi (pickled plum), seasoned tuna mayo, grilled salmon, kombu (seaweed), and spicy cod roe (mentaiko).
Final Thoughts
Onigiri are more than just a meal; they are a delightful edible craft, a portable moment of culinary peace that can be enjoyed anywhere. Whether you’re packing a lunch, preparing for a potluck, or simply craving a taste of simple, satisfying goodness, these rice balls are sure to bring a smile to your face. Don’t hesitate to get your hands a little sticky and experience the joy of shaping your own delicious creation. I encourage you to try this recipe, experiment with your favorite fillings, and share your onigiri adventures. Happy shaping!