
An Ode to Old Fashioned Peach Cobbler
There’s a scent that can transport me instantly back to my grandmother’s sun-drenched kitchen, a comforting aroma that always signaled pure, unadulterated joy. It wasn’t the holiday roasts or the yeasty bread baking, but the sweet, warm perfume of peaches bubbling beneath a golden, buttery crust – her old-fashioned peach cobbler. I can still picture her, a dusting of flour on her apron, her hands deftly working magic with simple ingredients, creating a dessert that was both rustic and elegant, a true testament to the beauty of humble, seasonal produce. This isn’t just a recipe; it’s a memory, a warm hug in dessert form, and a taste of a time when simple pleasures were savored.
Recipe Overview
- Prep Time: 15 minutes
- Cook Time: 45 minutes
- Total Time: 1 hour
- Servings: 7
- Yield: 1 pie
- Dietary Type: Traditional
Ingredients
To capture that authentic, nostalgic flavor, we’ll rely on a few key components. Ripe, juicy peaches are the star, their natural sweetness enhanced by warming spices. The crust, a delightful contrast to the soft fruit, is made with simple pantry staples.
For the Filling:
- 6 fresh ripe yellow peaches
- 1 tablespoon melted butter
- 2 teaspoons cinnamon
- ½ teaspoon nutmeg
- ⅓ cup sugar
- 1 tablespoon flour
For the Crust:
- ⅓ cup refrigerated butter, cut into cubes
- ¾ cup all-purpose flour
- 2 tablespoons cold milk
Equipment Needed
- Oven
- Baking dish (approximately 8×8 inch or equivalent)
- Medium saucepan
- Bowl for fruit
- Rolling pin
- Plastic wrap
- Measuring cups and spoons
- Fork or pastry blender
Instructions
Crafting this classic cobbler is a wonderfully straightforward process, one that rewards patience and a gentle touch. The goal is to coax the best out of each ingredient, creating a harmonious balance of sweet fruit and tender, flaky crust.
-
Begin by preheating your oven to 325°F (160°C). While the oven heats, lightly grease your baking dish. This will ensure your cobbler releases beautifully once baked.
-
Now, let’s prepare the foundation of our crust. In a medium bowl, combine the ¾ cup all-purpose flour with the ⅓ cup refrigerated butter, cut into cubes. Using your fingertips or a pastry blender, mash the butter into the flour until the mixture resembles large crumbs. You want a texture that’s neither too fine nor too coarse, with distinct little butter pieces visible – these are key to a tender crust.
-
Slowly add the 2 tablespoons cold milk, mixing until a dough ball forms. Be careful not to overwork the dough at this stage; just bring it together. Once a cohesive dough has formed, cover it with plastic wrap and place it in the refrigerator for ten minutes. This chilling period is crucial for developing a tender crust.
-
While the dough chills, let’s turn our attention to the star of the show: the peaches. Bring a medium saucepan of water to a rolling boil. Carefully add the 6 fresh ripe yellow peaches to the boiling water. Boil them for precisely three minutes. This short blanching step will make the skins incredibly easy to remove.
-
Using a slotted spoon or tongs, remove the peaches from the boiling water and let them cool until they are cool enough to handle. Once cooled, slowly remove the skin from each peach. They should slip off with ease. Next, cut each peach in half. Then, move each side of the peach in a circular motion to remove the pit.
-
Chop the peeled and pitted peaches into small pieces and place them in a bowl. To this bowl, add the 1 tablespoon melted butter, the 2 teaspoons cinnamon, the ½ teaspoon nutmeg, and the ⅓ cup sugar. Toss gently to coat the peach pieces evenly. Finally, add the 1 tablespoon flour to the peaches and toss again. This flour will act as a thickener as the peaches bake, creating a delightful, syrupy filling.
-
After the peach filling is prepared and the dough has chilled, remove it from the refrigerator. The dough should feel cold to the touch. Set aside ⅓ of the dough for the lattice topping.
-
On a lightly floured surface, roll out the remained of the dough to match the size of your baking dish. Carefully place the rolled-out dough into the baking dish. The dough should form a layer approximately half an inch thick, creating a base for our filling.
-
Pour the prepared peach filling inside the bottom layer of the crust, spreading it evenly.
-
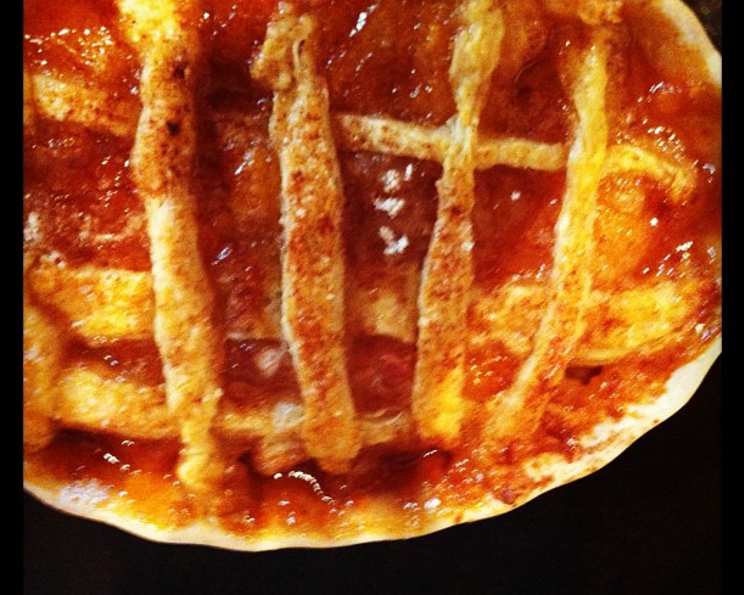
Now, for that beautiful lattice topping. Roll out the remaining ⅓ of the dough. Using a knife or a pizza cutter, cut the dough into ½ inch strips. Place these strips on the top of the cobbler in a crisscrossed lattice pattern. Press the ends of the strips gently onto the edge of the bottom crust to secure them.
-
Bake the cobbler at 325°F (160°C) for 45 minutes. Keep an eye on it; you’re looking for the crust to be a lovely golden brown and the filling to be bubbling gently around the edges.
-
Once baked to perfection, remove the cobbler from the oven and let it cool for 15 minutes before serving. This resting period allows the filling to set slightly, preventing a runny mess when you serve.
-
Serve your glorious old-fashioned peach cobbler warm.
Expert Tips & Tricks
- Peach Perfection: For the best flavor, use ripe but firm peaches. If your peaches are slightly underripe, a few extra minutes of baking might be needed, or you can add them to a paper bag with a banana for a day to speed up the ripening process.
- Butter’s Role: The cold, cubed butter in the crust is essential. It creates steam pockets as it melts in the oven, leading to a flakier texture. Don’t overwork the dough; keep those butter pieces intact!
- Spice Adjustment: Feel free to adjust the cinnamon and nutmeg to your preference. A pinch of cardamom can also add a wonderful depth of flavor.
- Dough Handling: If the dough becomes too soft while you’re rolling it out, pop it back into the refrigerator for a few minutes. This will make it easier to handle.
- Checking Doneness: If the crust starts to brown too quickly before the filling is bubbly, you can loosely tent the cobbler with aluminum foil for the remainder of the baking time.
Serving & Storage Suggestions
This cobbler is a dream served warm, especially with a generous scoop of vanilla bean ice cream or a dollop of sweetened whipped cream. The contrast of the warm, spiced peaches and the cool, creamy topping is pure bliss.
Leftovers can be stored, covered, at room temperature for up to two days, though they are best enjoyed within 24 hours. For longer storage, refrigerate the cobbler, tightly covered, for up to 4 days. To reheat, place individual servings in a microwave-safe dish and heat until warmed through, or gently reheat the entire cobbler in a 300°F (150°C) oven for about 15-20 minutes.
Nutritional Information
| Nutrient | Amount per Serving | % Daily Value |
|---|---|---|
| Calories | 237.3 kcal | |
| Calories from Fat | 42 % | |
| Total Fat | 11.1 g | 17 % |
| Saturated Fat | 6.8 g | 33 % |
| Cholesterol | 28.2 mg | 9 % |
| Sodium | 94.2 mg | 3 % |
| Total Carbohydrate | 33.7 g | 11 % |
| Dietary Fiber | 2.8 g | 11 % |
| Sugars | 20.4 g | 81 % |
| Protein | 3 g | 5 % |
Variations & Substitutions
While this recipe celebrates the classic, there’s always room for a little creative flair.
- Fruity Variations: Beyond peaches, this cobbler base is wonderfully adaptable. Consider using fresh berries (raspberries, blueberries, blackberries), sliced apples or pears, or a combination of stone fruits like plums or nectarines. Adjust the sugar slightly depending on the sweetness of your chosen fruit.
- Spice It Up: A pinch of ground ginger or allspice can add another layer of warmth to the spice blend. For a hint of citrus, a tablespoon of lemon zest can brighten the peach flavor.
- Nutty Addition: Toasted pecans or walnuts can be folded into the peach filling for added texture and nutty flavor.
FAQs
Q: What makes this cobbler “old fashioned”?
A: The term “old fashioned” typically refers to a more rustic preparation, often with a simple, unadorned crust and a focus on highlighting the natural flavors of the fruit. This recipe embodies that by using a straightforward crust and letting the peaches shine.
Q: Can I use canned or frozen peaches?
A: While fresh, ripe peaches are ideal for the best flavor and texture, you can use drained canned or frozen peaches in a pinch. If using canned peaches, reduce the added sugar as they are often packed in syrup. Frozen peaches will require a longer baking time to ensure they cook through and release their juices.
Q: My crust turned out tough. What went wrong?
A: Tough crusts are often a result of overworking the dough. It’s important to mix the ingredients until just combined and avoid excessive kneading. Keeping the butter and liquids cold also contributes to a tender, flaky crust.
Q: Can I make this cobbler ahead of time?
A: You can prepare the peach filling and the dough a day in advance and refrigerate them separately. Assemble and bake just before serving for the best results. The baked cobbler can also be stored and reheated.
Q: How do I know when the cobbler is done baking?
A: The cobbler is ready when the crust is golden brown and the fruit filling is bubbling around the edges. The lattice strips should also appear cooked through, not doughy.
Final Thoughts
There’s a profound satisfaction in creating something so comforting and delicious from simple, honest ingredients. This Old Fashioned Peach Cobbler is more than just a dessert; it’s an invitation to slow down, to savor the sweetness of the season, and to share a moment of joy with loved ones. Whether you bake it for a special occasion or a cozy weeknight treat, I encourage you to embrace the rustic charm of this timeless classic. I’d love to hear about your experience making it, and how you enjoy its warm, comforting embrace. Perhaps with a glass of chilled Moscato or a robust black tea? The possibilities are as delightful as the cobbler itself.