
Onion Herb Focaccia Bread: A Taste of Rustic Elegance
There are certain aromas that, when wafting from the oven, instantly transport me back to sun-drenched afternoons spent in my grandmother’s Tuscan kitchen. The scent of baking bread is one of them, but when that warm embrace is layered with the sweet, caramelized notes of slow-cooked onions and the earthy perfume of fresh herbs, it becomes something truly magical. This Onion Herb Focaccia Bread is more than just a recipe; it’s a fragrant hug, a slice of pure comfort that has graced countless family meals and impromptu gatherings, always met with eager anticipation and rarely lasting long enough to cool completely.
Recipe Overview
- Prep Time: 45 minutes (plus rising time)
- Cook Time: 25-30 minutes
- Total Time: Approximately 1 hour 40 minutes (plus rising time)
- Servings: 16-20
- Yield: 2 loaves
- Dietary Type: Vegetarian (can be made vegan by ensuring no dairy in serving accompaniments)
Ingredients
The beauty of this focaccia lies in its simplicity, allowing the quality of each ingredient to shine through. Gather these essentials for a truly authentic experience:
- 1 tablespoon active dry yeast
- 1 ¼ cups warm water (about 105-115°F)
- 3 tablespoons olive oil, plus more for brushing and drizzling
- 3 cups unbleached white flour, plus more for dusting
- ½ teaspoon salt
- 1 tablespoon sugar
- 1 medium red onion, sliced in very thin slivers
- ½ teaspoon rosemary, leaves (fresh or dried)
- ½ teaspoon thyme leaves (fresh or dried)
- ¼ teaspoon oregano leaves (fresh or dried)
Equipment Needed
While this recipe is wonderfully accessible, having a few key tools on hand will ensure a smooth and successful baking process:
- Large mixing bowl
- Measuring cups and spoons
- Fork or whisk
- Small bowl (for yeast proofing)
- Clean dish towel
- Lightly floured work surface
- Baking sheets (2)
- Your trusty oven
Instructions
Crafting this rustic delight is a journey of patience and tactile pleasure, from coaxing the yeast to life to the final golden bake. Follow these steps with care, and you’ll be rewarded with a truly exceptional bread.
-
Activate the Yeast: In a small bowl, sprinkle the active dry yeast over the 1 ¼ cups of warm water. Gently stir with a fork to help dissolve the yeast granules. Let this mixture sit undisturbed for about five minutes. You should see it become foamy and bubbly – a sure sign your yeast is alive and ready to work its magic.
-
Combine Dry Ingredients: In a large mixing bowl, whisk together the 3 cups of unbleached white flour, 1 tablespoon of sugar, and ½ teaspoon of salt. Create a well in the center of this dry mixture.
-
Form the Dough: Pour the activated yeast mixture and the 3 tablespoons of olive oil into the well you created in the flour. Begin to mix, gradually incorporating the flour from the sides into the wet ingredients. As the dough starts to come together, add the additional ¼ cup of warm water, one tablespoon at a time. Continue adding water only as needed, just until a soft, sticky dough begins to form. The dough should be quite moist and not at all dry; this is key to a tender focaccia.
-
Knead to Perfection: Turn the sticky dough out onto a lightly floured work surface. Knead the dough vigorously for approximately 10 minutes. You’re aiming for a dough that is smooth, elastic, and springs back when gently pressed. This process develops the gluten, which is essential for the bread’s structure and chew.
-
First Rise: Lightly brush the top of the kneaded dough with a little olive oil. Cover the bowl with a clean dish towel and place it in a warm, draft-free spot. Allow the dough to rise until it has doubled in size, which typically takes about 30 to 40 minutes.
-
Shape and Second Rise: Once doubled, gently punch down the risen dough to release the air. Divide the dough into two equal portions. Place each portion onto a separate baking sheet. Gently stretch and shape each piece of dough into a rectangular form, approximately 6 by 12 inches. Allow the shaped dough to rise again until it has doubled in size, another approximate 30 minutes.
-
Dimple and Garnish: After the second rise, use your fingertips to gently press into the surface of the dough, creating characteristic “dimples” that are about ½ inch deep. These indentations not only add visual appeal but also help the olive oil and toppings settle into the bread. Brush the entire surface of both loaves generously with olive oil. Scatter the thinly sliced red onion slivers evenly over the oiled surface. Finally, sprinkle the rosemary leaves, thyme leaves, and oregano leaves over the onions and oil.
-
Bake to Golden Perfection: Preheat your oven to 350°F (175°C). Place the prepared baking sheets into the preheated oven. Bake for 25 to 30 minutes, or until the focaccia is beautifully golden brown and sounds hollow when tapped on the bottom.
Expert Tips & Tricks
To elevate your focaccia experience, consider these seasoned chef insights:
- The Water Temperature is Crucial: Too hot, and you’ll kill the yeast; too cold, and it won’t activate properly. Aim for a temperature that feels comfortably warm to the touch, like a baby’s bath.
- Don’t Fear a Sticky Dough: A slightly wet dough is the secret to a light and airy focaccia. Resist the urge to add too much extra flour during kneading; a little flour on your hands and surface is all you need.
- The Olive Oil Investment: Use a good quality extra virgin olive oil for brushing and drizzling. Its fruity notes will infuse the bread with wonderful flavor and contribute to that coveted crisp exterior.
- Herb Freshness: If using fresh herbs, give them a gentle rub between your fingers before sprinkling to release their aromatic oils. Dried herbs are perfectly fine, but ensure they are fragrant and not past their prime.
- Caramelizing the Onions (Optional Enhancement): For an even deeper, sweeter onion flavor, you can very lightly sauté the onion slivers in a tablespoon of olive oil for a few minutes until they just begin to soften and turn translucent before adding them to the focaccia. This step isn’t strictly necessary but offers a delightful depth.
Serving & Storage Suggestions
This Onion Herb Focaccia Bread is a culinary chameleon, equally at home as a delightful appetizer, a side to a hearty Italian meal, or simply enjoyed on its own with a drizzle of your favorite olive oil.
- Serving: Serve the focaccia warm, straight from the oven, for the ultimate sensory experience. It can also be enjoyed at room temperature. For an extra touch of elegance, consider serving it with a small dish of balsamic glaze for dipping. It is also excellent cut into strips to serve as breadsticks alongside pasta or salads.
- Storage: Once completely cooled, store leftover focaccia in an airtight container or wrap it tightly in plastic wrap. It will keep well at room temperature for up to two days. For longer storage, you can refrigerate it for up to four days. To refresh, gently reheat slices in a warm oven (around 300°F/150°C) for a few minutes until warmed through. You can also freeze slices for up to three months; thaw at room temperature and reheat as desired.
Nutritional Information
(Note: Nutritional values are estimates and can vary based on specific ingredients and portion sizes.)
| Nutrient | Amount per Serving (approx. 1/16th of recipe) | % Daily Value (approx.) |
|---|---|---|
| Calories | 116 kcal | 6% |
| Total Fat | 2.8 g | 4% |
| Saturated Fat | 0.4 g | 1% |
| Cholesterol | 0 mg | 0% |
| Sodium | 74.2 mg | 3% |
| Total Carbohydrate | 19.7 g | 6% |
| Dietary Fiber | 0.9 g | 3% |
| Sugars | 1.1 g | 4% |
| Protein | 2.8 g | 5% |
Variations & Substitutions
While this recipe is a classic for a reason, feel free to explore its potential for delicious variations:
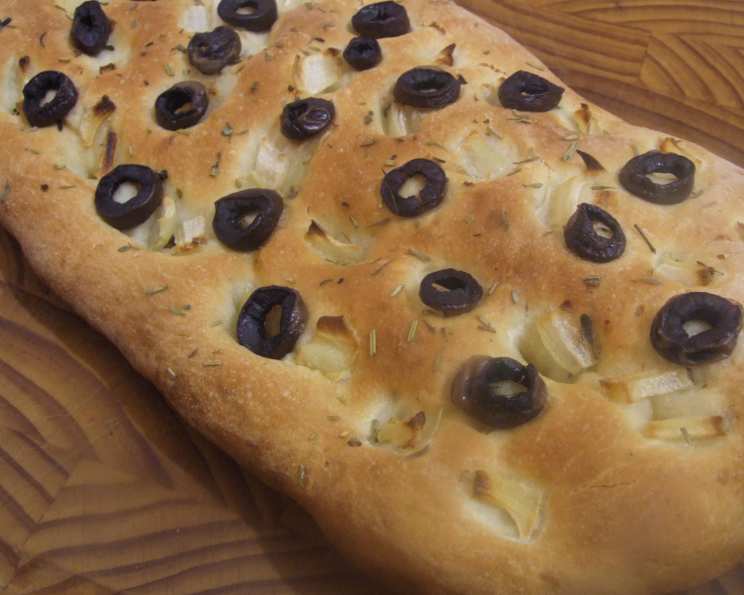
- Olive Addition: As Brenda Walsh sometimes does, consider adding thinly sliced Greek olives to the topping for a briny, savory counterpoint to the sweet onions.
- Garlic Infusion: For an extra layer of flavor, mince a clove or two of fresh garlic and mix it into the olive oil before brushing it onto the dough.
- Seed Sprinkle: A sprinkle of sesame seeds or poppy seeds over the top before baking can add a delightful crunch and nutty flavor.
- Spicy Kick: For those who enjoy a hint of heat, a pinch of red pepper flakes can be added to the herb and onion topping.
FAQs
Q: Why is my focaccia dough so sticky?
A: A slightly sticky dough is desired for focaccia as it contributes to a lighter, airier crumb. Avoid adding too much extra flour; use a little flour on your hands and work surface instead.
Q: How do I know when the yeast is still good?
A: If your yeast mixture becomes foamy and bubbly after about five minutes in warm water, it’s active and good to use. If it remains flat, your yeast may be expired.
Q: Can I make this dough ahead of time?
A: You can prepare the dough and let it do its first rise in the refrigerator overnight. Punch it down, let it come to room temperature, then proceed with shaping and the second rise.
Q: My focaccia came out a bit dry. What did I do wrong?
A: This often happens if too much flour was added during kneading or if the dough wasn’t sufficiently moist to begin with. Ensure you’re using the specified water amount and only adding more if absolutely necessary, one tablespoon at a time.
Q: What kind of olive oil is best for focaccia?
A: A good quality extra virgin olive oil is recommended for its flavor. It will be used for both enriching the dough and for finishing, so choose one you enjoy the taste of.
Final Thoughts
This Onion Herb Focaccia Bread is a testament to the power of simple, quality ingredients transformed through careful preparation and a little bit of love. It’s a bread that speaks of tradition, comfort, and the sheer joy of sharing good food. I encourage you to invite its warm, aromatic presence into your kitchen. Bake it, share it, and savor every delicious, herb-infused bite. Pair it with a robust red wine or a crisp white, or simply enjoy its rustic charm as a standalone masterpiece. May it bring as much warmth and happiness to your table as it has to mine.