
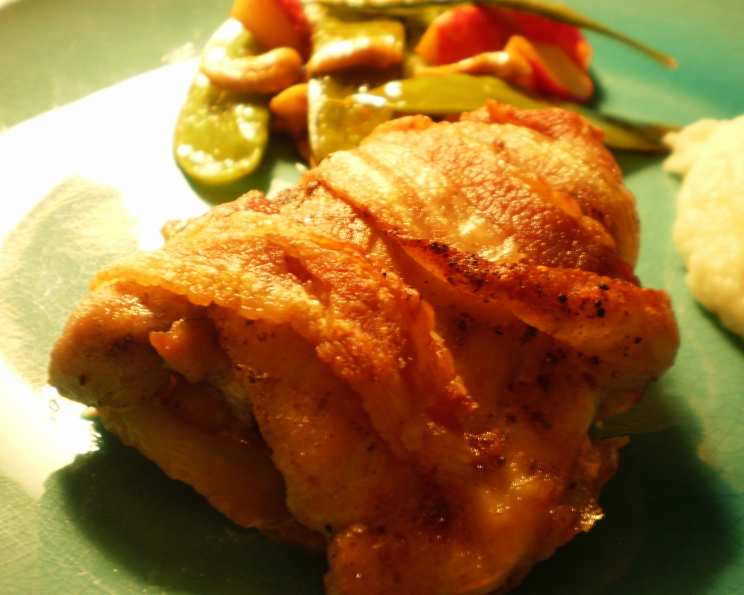
Old Bay Chicken Thighs: A Taste of Nostalgia and Simplicity
There are some dishes that, with a single whiff, transport you back in time. For me, Old Bay Chicken Thighs are precisely that. It’s the scent of this iconic seasoning, a fragrant blend of celery salt, black pepper, and a whisper of paprika, that conjures memories of bustling family gatherings and my husband’s absolute delight whenever this made its way to the table. It’s a dish born of pure, unadulterated comfort, a testament to how a few humble ingredients, elevated by a stellar spice blend, can create something truly magical. The crackling of bacon, the juicy tenderness of the chicken – it’s a symphony of simple pleasures that never fails to satisfy.
Recipe Overview
- Prep Time: 20 minutes
- Cook Time: 60 minutes
- Total Time: 1 hour 20 minutes
- Servings: 4-6
- Yield: 4-6 servings
- Dietary Type: Gluten-Free, Dairy-Free
Ingredients
- 2 lbs skinless chicken thighs
- 2 tablespoons olive oil
- 4-6 slices bacon
- 1 tablespoon Old Bay Seasoning
Equipment Needed
- Large skillet
- Paper towels
- Plate
- Baking dish
- Aluminum foil
Instructions
Embarking on the creation of these delightful Old Bay Chicken Thighs is a straightforward affair, a process that rewards your efforts with immense flavor and satisfyingly tender chicken. Let’s dive in.
- Begin by ensuring your chicken thighs are fully thawed if they were previously frozen. Once thawed, it’s crucial to pat them thoroughly dry with paper towels. This step is vital for achieving a good sear in the skillet and ensuring the seasoning adheres properly.
- Next, take your Old Bay Seasoning and sprinkle both sides liberally of each chicken thigh. Don’t be shy with the seasoning; this is where the magic happens! A generous coating ensures every bite is infused with that signature Old Bay flavor.
- Now, it’s time to bring some heat. Place your large skillet over medium-high heat and add the olive oil. Once the oil is shimmering and hot, carefully place the seasoned chicken thighs into the skillet.
- Brown the chicken on both sides. This process usually takes about 3-4 minutes per side, and its primary purpose is to develop a beautiful golden-brown crust, locking in those precious juices. You’re not cooking the chicken through at this stage, just building flavor and texture.
- Once browned, remove the chicken from the skillet and place it onto a clean plate.
- With the chicken resting, take your bacon slices. For each chicken thigh, wrap one slice of bacon snugly around it. The bacon will not only add a delightful salty crispness but also contribute to the overall moisture and richness of the dish.
- Carefully arrange the bacon-wrapped chicken thighs in your baking dish. Ensure they are in a single layer, not overcrowded, to allow for even cooking.
- Cover the baking dish tightly with aluminum foil. This will help to steam the chicken and cook it through gently, ensuring it remains incredibly moist.
- Preheat your oven to 350 degrees Fahrenheit (175 degrees Celsius).
- Bake for approximately one hour, or until the chicken is thoroughly cooked and tender. You can check for doneness by inserting a meat thermometer into the thickest part of a thigh; it should register at least 165 degrees Fahrenheit (74 degrees Celsius). The juices should also run clear when pierced with a fork.
- Once the chicken has reached its perfect doneness, remove the baking dish from the oven.
- Carefully remove the chicken from the baking dish to serve. Allow it to rest for a few minutes before serving to allow the juices to redistribute, resulting in an even more succulent final product.
Expert Tips & Tricks
- Thighs Over Breasts: Always opt for chicken thighs for this recipe. Their higher fat content makes them far more forgiving and results in a juicier, more flavorful outcome, especially when braised under foil.
- Bacon Fat Rendering: If you prefer extra crispy bacon, you can cook the bacon slightly before wrapping it around the chicken, but be mindful that it will continue to crisp up in the oven.
- Don’t Skip the Sear: While it might seem like an extra step, searing the chicken before baking adds a depth of flavor and a wonderful textural contrast that truly elevates the dish.
- Resting is Key: Just like a good steak, letting the chicken rest for a few minutes after it comes out of the oven allows the juices to settle back into the meat, ensuring maximum moisture and tenderness.
Serving & Storage Suggestions
These Old Bay Chicken Thighs are incredibly versatile. They’re fantastic served hot as a main course, and their robust flavor pairs beautifully with a variety of sides. Think simple steamed green beans, roasted red potatoes, or a crisp, fresh garden salad. For a more casual meal, consider serving them with cornbread or in a sandwich.
Leftovers can be stored in an airtight container in the refrigerator for up to 3-4 days. To reheat, you can gently warm them in a low oven (around 300°F / 150°C) to preserve their moisture, or simply microwave them until heated through. Be cautious not to overcook them during reheating, as they are already fully cooked.
Nutritional Information
Here’s an approximate nutritional breakdown per serving, assuming 6 servings:
| Nutrient | Amount per Serving | % Daily Value |
|---|---|---|
| Calories | 433.6 kcal | |
| Calories from Fat | 232 kcal | |
| Total Fat | 25.8 g | 39% |
| Saturated Fat | 6.6 g | 32% |
| Cholesterol | 203.8 mg | 67% |
| Sodium | 384.2 mg | 16% |
| Total Carbohydrate | 0.1 g | 0% |
| Dietary Fiber | 0 g | 0% |
| Sugars | 0 g | 0% |
| Protein | 47.2 g | 94% |
Note: Nutritional values are estimates and can vary based on specific ingredients and portion sizes.
Variations & Substitutions
While this recipe is a classic for a reason, there’s always room for a little culinary exploration!
- Bone-in, Skin-on Thighs: If you prefer, you can use bone-in, skin-on chicken thighs. You might need to adjust the baking time slightly, adding an extra 10-15 minutes. The skin will render and become wonderfully crispy.
- Spice Level: For those who enjoy a little heat, consider adding a pinch of cayenne pepper or a dash of your favorite hot sauce to the Old Bay seasoning mix.
- Herbs: Fresh herbs like chopped parsley or thyme can be sprinkled over the chicken just before serving for an extra layer of freshness and visual appeal.
- Different Cuts: While thighs are recommended for their succulence, you could experiment with chicken drumsticks using the same method.
FAQs
Q: Can I use chicken breasts instead of thighs?
A: While you can use chicken breasts, they are leaner and can dry out more easily. If you do use them, reduce the baking time and keep a close eye on them to prevent overcooking.
Q: Is Old Bay Seasoning gluten-free?
A: Yes, Old Bay Seasoning is naturally gluten-free, making this recipe suitable for those with gluten sensitivities.
Q: How do I know when the chicken is fully cooked?
A: The most reliable way is to use an instant-read thermometer. Insert it into the thickest part of the thigh, avoiding the bone, and it should register at least 165°F (74°C). The juices should also run clear.
Q: Can I make this recipe ahead of time?
A: You can season the chicken and wrap it in bacon a few hours in advance and refrigerate. However, it’s best to bake it just before serving for optimal texture and flavor.
Q: What if I don’t have bacon?
A: While the bacon adds a wonderful smoky richness, you can omit it if necessary. The chicken will still be delicious with just the Old Bay seasoning and olive oil.
Final Thoughts
This recipe for Old Bay Chicken Thighs is more than just a meal; it’s an invitation to a simpler, more flavorful time. It’s a dish that speaks to the heart of home cooking – easy to prepare, incredibly satisfying, and guaranteed to bring smiles to your table. So, gather your ingredients, embrace the ease of its preparation, and let the distinctive aroma of Old Bay fill your kitchen. Serve it up with your favorite accompaniments, perhaps some buttered corn on the cob or a creamy coleslaw, and savor every single, delicious bite. I encourage you to share your creations and any delightful twists you discover along the way!