
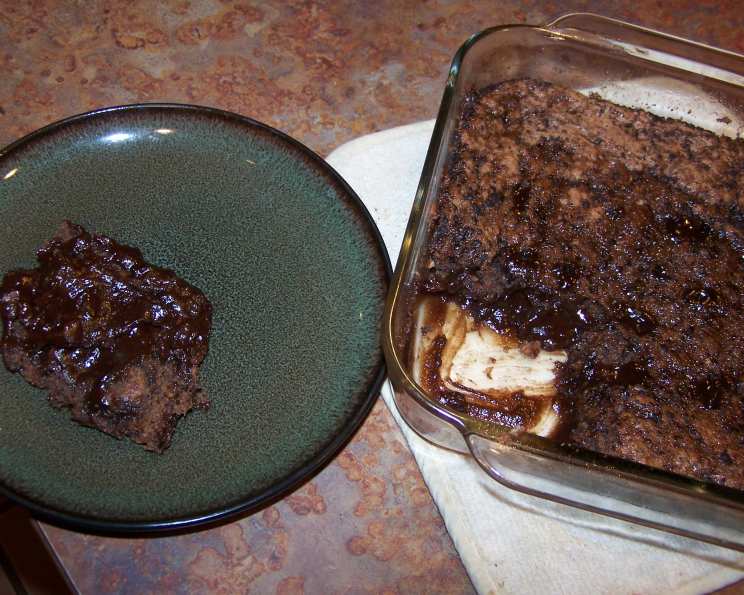
The One-Pan Wonder: Unearthing the Magic of Chocolate Pudding Cake
There are some dishes that, from the first bite, transport you back in time. For me, that dish is a deeply decadent, deceptively simple chocolate cake that hides a secret beneath its unassuming surface. This wasn’t just any cake; it was my grandma’s legendary Chocolate Pudding Cake, a treasure from her repertoire that my grandpa adored. It appeared to be a humble, unfrosted chocolate cake, but the real magic, the velvety, spoonable pudding layer, was a delicious surprise waiting to be discovered with every forkful. The memory of its rich aroma filling her kitchen on a Sunday afternoon is still as vivid today as the first time I tasted it.
Recipe Overview
- Prep Time: 15 minutes
- Cook Time: 35 minutes
- Total Time: 50 minutes (plus cooling time)
- Servings: 9
- Yield: 1 8×8 inch cake
- Dietary Type: Vegetarian (can be adapted for dairy-free/vegan with ingredient substitutions)
Ingredients
This recipe is remarkably straightforward, calling for pantry staples and coming together with minimal fuss.
- 1 cup all-purpose flour
- 1 teaspoon baking powder
- ½ teaspoon salt
- 4 ½ tablespoons baking cocoa, divided
- 1 ¾ cups granulated sugar, divided
- ½ cup milk (whole milk is recommended for richness)
- 1 teaspoon vanilla extract
- 2 tablespoons margarine, melted
- ½ cup chopped nuts (pecans or walnuts are excellent choices, optional)
- 1 cup boiling water (it is crucial that this water is boiling hot!)
Equipment Needed
- An 8×8 inch baking pan
- A medium mixing bowl
- A whisk
- Measuring cups and spoons
- A heatproof spatula or spoon for stirring
Instructions
The beauty of this cake lies in its “one-pan” nature, meaning everything bakes in a single dish, and the pudding layer miraculously forms on its own.
-
Begin by preheating your oven to 350 degrees Fahrenheit (175 degrees Celsius). Next, grease your 8×8 inch baking pan thoroughly to ensure your cake releases beautifully after baking.
-
In a medium mixing bowl, sift together the dry ingredients: 1 cup of all-purpose flour, 1 teaspoon of baking powder, ½ teaspoon of salt, and 1 ½ tablespoons of the baking cocoa. Add ¾ cup of the granulated sugar to this mixture. Whisk these dry ingredients together until they are well combined and no lumps remain. This ensures an even distribution of leavening agents and cocoa.
-
Now, incorporate the wet ingredients into the dry mixture. Add the ½ cup of milk, 1 teaspoon of vanilla extract, and the 2 tablespoons of melted margarine. If you are using chopped nuts, stir them in at this stage as well. Mix until just combined; be careful not to overmix, as this can lead to a tough cake.
-
Pour the batter into your prepared 8×8 inch pan. Smooth the top with your spatula to create an even layer.
-
In a separate small bowl or measuring cup, prepare the magical topping. Whisk together the remaining 1 cup of granulated sugar and the 3 tablespoons of the remaining baking cocoa. This is where the second part of the magic happens. Carefully pour the 1 cup of boiling water into this cocoa-sugar mixture and stir until it is smooth and well combined. The extreme heat of the water is essential for the pudding layer to form.
-
Gently pour this hot liquid mixture evenly over the top of the cake batter in the baking pan. Do not stir or mix it into the batter; it will naturally settle and create the distinct pudding layer as it bakes.
-
Bake in your preheated oven for approximately 35 minutes. The cake is done when the top has a light bounce when gently pressed with your finger. It should spring back slightly.
-
Once baked, remove the cake from the oven and allow it to cool completely in the pan on a wire rack. This cooling period is crucial for the pudding layer to fully set and for the cake to firm up.
-
My grandma always served this delightful cake with a drizzle of heavy cream poured over the top, or, for an extra special treat, a generous scoop of vanilla ice cream.
Expert Tips & Tricks
- Sifting is Key: Don’t skip sifting the dry ingredients. It aerates the flour and cocoa, leading to a lighter, more tender cake and preventing pockets of unmixed cocoa.
- Boiling Water is Non-Negotiable: The 1 cup of boiling water is the secret ingredient for the pudding layer. Using hot tap water or water that has cooled even slightly will not yield the same result. Ensure it’s just off the boil.
- Pan Preparation: A well-greased pan prevents sticking, which is especially important with a cake that has a distinct bottom layer. You can also line the bottom with parchment paper for extra security.
- Doneness Test: The “finger test” is reliable, but you can also insert a toothpick into the cakey part (avoiding the pudding layer if it seems liquidy) and it should come out mostly clean, with perhaps a few moist crumbs.
- Patience with Cooling: While it’s tempting to dive in while it’s warm, allowing the cake to cool completely is essential for the pudding to set. Cutting it too soon can result in a very messy, albeit still delicious, presentation.
Serving & Storage Suggestions
This One Pan Chocolate Pudding Cake is best served at room temperature or slightly warm. The contrast between the cakey top and the gooey pudding bottom is at its peak when the cake has cooled but the pudding is still tender.
- Serving: Drizzle with a bit of heavy cream, a dollop of whipped cream, or a scoop of vanilla ice cream. A dusting of powdered sugar can also add a beautiful finishing touch.
- Storage: Leftovers can be covered tightly with plastic wrap or aluminum foil and stored at room temperature for up to 2 days, as long as your kitchen isn’t too warm. For longer storage, refrigerate the cake for up to 4 days. The pudding layer will firm up considerably in the refrigerator. Reheat individual slices gently in the microwave for about 15-20 seconds to recapture some of its original gooeyness. This cake does not typically freeze well due to the texture of the pudding layer.
Nutritional Information
Here’s an approximate nutritional breakdown per serving, assuming 9 servings:
| Nutrient | Amount per Serving | % Daily Value |
|---|---|---|
| Calories | 240 kcal | 12% |
| Total Fat | 3.5 g | 5% |
| Saturated Fat | 1 g | 4% |
| Cholesterol | 1.9 mg | 1% |
| Sodium | 207.1 mg | 8% |
| Total Carbohydrate | 51.8 g | 17% |
| Dietary Fiber | 1.3 g | 5% |
| Sugars | 39 g | 156% |
| Protein | 2.4 g | 4% |
Note: Nutritional values are estimates and can vary based on specific ingredients and brands used.
Variations & Substitutions
- Dairy-Free/Vegan: To make this cake vegan, substitute the milk with your favorite non-dairy milk (almond, soy, or oat milk work well). For the margarine, use a vegan butter substitute or coconut oil. Ensure your chocolate cocoa is also vegan.
- Boozy Addition: For an adult twist, add a tablespoon or two of your favorite liqueur, such as Kahlua or a raspberry liqueur, to the batter.
- Chocolate Chips: Fold in ½ cup of chocolate chips into the batter for an extra chocolatey experience.
- Spice it Up: A pinch of cinnamon or a ¼ teaspoon of espresso powder added to the dry ingredients can deepen the chocolate flavor.
FAQs
Q: Why is the water supposed to be boiling hot?
A: The boiling water is essential for creating the distinct pudding layer that forms underneath the cake batter as it bakes. It helps to dissolve the sugar and cocoa properly and activates the magic of the recipe.
Q: Can I use Dutch-process cocoa instead of baking cocoa?
A: While you can, Dutch-process cocoa has a milder flavor and different pH. For this recipe, regular baking cocoa (natural unsweetened cocoa) is recommended as it reacts with the baking powder to provide lift and has a more robust chocolate flavor.
Q: My cake looks a bit wet on top after baking. Is that normal?
A: Yes, the pudding layer will appear slightly gooey or wet on top when the cake is hot. It will set up and firm as it cools. Ensure you’ve performed the “finger test” on the cakey part of the cake.
Q: How do I know if I’ve overmixed the batter?
A: Overmixing develops the gluten in the flour, which can result in a tough or dense cake. Mix the ingredients until they are just combined, meaning you no longer see streaks of dry flour.
Q: Can I bake this in a different sized pan?
A: While you can, baking times will need to be adjusted. An 8×8 inch pan is ideal for achieving the correct cake-to-pudding ratio and baking time. If you use a larger pan, the cake will be thinner and may overbake; a smaller pan will result in a thicker cake that may not bake through properly.
Final Thoughts
This One Pan Chocolate Pudding Cake is more than just a dessert; it’s a testament to the fact that some of the most memorable flavors come from the simplest recipes. It’s a comforting hug in cake form, perfect for a casual weeknight treat or a delightful finale to a special meal. Its ease of preparation means you can whip it up with minimal fuss, and its unique texture is always a crowd-pleaser. So, gather your ingredients, embrace the simplicity, and prepare to be enchanted by this wonderfully deceptive, utterly delicious chocolate creation. I encourage you to give it a try and experience a little bit of nostalgic magic for yourself.