
The Enduring Charm of Old Fashioned Chocolate Pie
There’s a certain magic that happens when the simplest ingredients come together to create something truly extraordinary. For me, that magic is embodied in an old-fashioned chocolate pie. I remember my mom making this on special occasions, the aroma of rich chocolate wafting from the oven filling our kitchen with anticipation. It wasn’t a fancy dessert, but its deep, fudgy flavor and incredibly tender crust were, and still are, pure comfort on a plate. It’s a testament to how a few humble components, treated with care, can conjure a taste of pure nostalgia, a delicious reminder of simpler times and cherished family moments.
Recipe Overview
- Prep Time: 15 minutes
- Cook Time: 26 minutes
- Total Time: 41 minutes
- Servings: 8-10
- Yield: 1 pie
- Dietary Type: Vegetarian
Ingredients
- For the Pie Filling:
- 2 (1 ounce) baking chocolate squares
- 1⁄2 cup butter (1 stick)
- 2 eggs, beaten
- 1 cup sugar
- For the Crust:
- 1 frozen pie crust
Equipment Needed
- Mixing bowl
- Small saucepan
- Whisk
- Oven
- Cooling rack
- Measuring cups and spoons
Instructions
Let’s embark on creating this timeless chocolate delight. The process is straightforward, allowing the quality of the ingredients to shine through.
- Begin by preheating your oven to 375 degrees Fahrenheit. This ensures an evenly baked crust and a perfectly set filling.
- In a mixing bowl, combine the beaten eggs and sugar. Set this mixture aside for now; it will form the creamy base of our filling.
- Next, take your butter and the baking chocolate squares. Place them in a small saucepan.
- Melt the butter and chocolate together over low to medium heat. Stir gently and consistently to ensure they melt smoothly without scorching.
- Once the chocolate and butter are fully combined and smooth, bring the mixture to a gentle boil. Keep a close eye on it as it heats.
- As soon as it reaches a boil, remove the saucepan from the heat. This is a crucial step to prevent the chocolate from becoming bitter.
- Now, it’s time to combine the two prepared mixtures. While whisking continuously, slowly pour the hot chocolate mixture into the egg and sugar mixture. This gradual addition and constant whisking are vital; they temper the eggs, preventing them from scrambling and ensuring a silky-smooth filling.
- Continue to beat the mixture well until it is thoroughly combined and smooth.
- Carefully pour this rich chocolate mixture into your frozen pie crust. Ensure the filling is distributed evenly.
- Place the pie into the preheated oven and bake at 375 degrees Fahrenheit for 26 minutes.
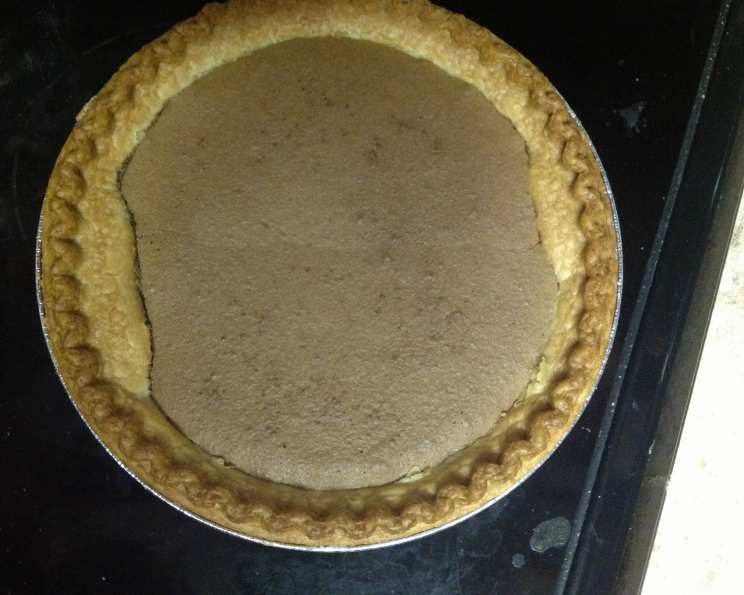
You’ll notice that during baking, a crust will indeed form on top. This is perfectly normal and a characteristic of this particular pie. However, the true magic lies beneath: the center will remain delightfully gooey and intensely chocolatey, creating an irresistible contrast in texture.
Expert Tips & Tricks
While this recipe is wonderfully forgiving, a few seasoned touches can elevate it even further. When melting the chocolate and butter, use a double boiler if you’re concerned about scorching, though low heat in a saucepan is generally sufficient. Ensure your eggs are at room temperature; they incorporate more easily into the sugar. For an extra decadent touch, consider a sprinkle of flaky sea salt on top just before serving – it beautifully balances the sweetness and enhances the chocolate flavor. If you find your pie browning too quickly around the edges, you can loosely tent the crust with aluminum foil during the last few minutes of baking.
Serving & Storage Suggestions
This Old Fashioned Chocolate Pie is best served slightly warm or at room temperature. It’s absolutely divine with a generous scoop of good quality vanilla ice cream melting into its warm, gooey center. A dollop of freshly whipped cream or a dusting of cocoa powder also makes for a beautiful and delicious presentation.
Leftovers can be stored at room temperature, covered loosely, for up to two days, provided your kitchen is not overly warm. For longer storage, cover the pie tightly with plastic wrap or foil and refrigerate. It will keep well in the refrigerator for up to 4 days. To reheat, gently warm individual slices in the oven or microwave until just warmed through; be careful not to overheat, as this can affect the texture.
Nutritional Information
(Note: Nutritional values are estimates and can vary based on specific ingredients used.)
| Nutrient | Amount per Serving | % Daily Value |
|---|---|---|
| Calories | 476.8 kcal | N/A |
| Calories from Fat | 216.8 kcal | N/A |
| Total Fat | 35.2 g | 54% |
| Saturated Fat | 19.9 g | 99% |
| Cholesterol | 77 mg | 25% |
| Sodium | 215.5 mg | 8% |
| Total Carbohydrate | 45.2 g | 15% |
| Dietary Fiber | 5.9 g | 23% |
| Sugars | 25.3 g | 101% |
| Protein | 7.2 g | 14% |
Variations & Substitutions
While the classic recipe is perfection, here are a few ideas to playfully alter this beloved pie:
- For a Gluten-Free Crust: Use your favorite store-bought or homemade gluten-free pie crust. Ensure it’s baked according to its package instructions, or blind bake it if the recipe calls for it.
- Add a Mocha Twist: Dissolve 1 teaspoon of instant espresso powder with the chocolate and butter mixture before bringing it to a boil. This will impart a subtle coffee flavor that beautifully complements the chocolate.
- Spiced Chocolate: A pinch of cinnamon or a whisper of cayenne pepper added to the chocolate mixture can add an unexpected and delightful warmth.
FAQs
Q: Why is it important to whisk the chocolate mixture into the eggs slowly?
A: Pouring the hot chocolate mixture slowly while whisking continuously tempers the eggs. This means the heat from the chocolate gently cooks the eggs without causing them to scramble, resulting in a smooth, custard-like filling.
Q: My pie crust is cracking. What can I do?
A: Ensure your frozen pie crust is handled as little as possible and is thoroughly thawed according to package directions. If you’re using a homemade crust, make sure it’s well-chilled before filling and baking.
Q: Can I use different types of chocolate?
A: While the recipe calls for baking chocolate squares, you can experiment with semi-sweet or bittersweet chocolate chips. However, be mindful that different chocolates have varying sugar content, which might slightly alter the sweetness of the final pie.
Q: How do I know when the pie is done?
A: The edges of the filling will appear set, and a crust will have formed on top. The center should still be slightly gooey; it will continue to set as it cools. Overbaking can result in a dry filling.
Q: Can I make this pie ahead of time?
A: Yes, this pie can be made a day in advance. It tastes wonderful at room temperature or slightly warmed. Ensure it’s covered and stored properly.
Final Thoughts
This Old Fashioned Chocolate Pie is more than just a dessert; it’s an experience. It’s a dish that brings people together, sparks conversations, and creates new memories while fondly recalling old ones. It’s a beautiful reminder that sometimes, the most profound flavors come from the most straightforward recipes. So, gather your ingredients, embrace the simplicity, and savor every rich, chocolatey bite. I encourage you to share this with loved ones and perhaps even pass on a slice of your own cherished food memories. And, as my mom would always insist, don’t forget that scoop of vanilla ice cream – it’s the perfect companion to this chocolate masterpiece.