
The Humble Potato, Elevated: Oven Potato Wedges (OAMC)
There are few ingredients as universally beloved and forgiving as the humble potato. I remember, as a young cook just finding my footing in a bustling restaurant kitchen, being tasked with preparing what felt like an endless mountain of potatoes for fries. It was a repetitive task, yes, but even then, I saw the potential for transformation. The way a simple potato could go from earthy and dense to crisp and golden with the right touch of heat and seasoning was pure magic. This recipe, born from that initial fascination and refined over years of experimenting, offers a brilliant way to transform a sale-rack bounty of potatoes into a truly irresistible side dish, perfect for weeknight dinners or impromptu gatherings.
Recipe Overview
- Prep Time: 15 minutes
- Cook Time: 30 minutes (initial bake) + 30-45 minutes (final bake)
- Total Time: 1 hour 15 minutes (excluding freezing time)
- Servings: 6
- Yield: Approximately 3 pounds of wedges
- Dietary Type: Vegan, Gluten-Free, Dairy-Free
Ingredients
Here’s what you’ll need to create these incredible oven-baked wedges:
- 6-8 medium russet potatoes (approximately 3 pounds)
- 2 tablespoons olive oil
- 2 tablespoons seasoning (your favorite blend for fries – think salt, pepper, garlic powder, paprika, or a custom mix!)
Equipment Needed
- Large baking sheet(s)
- Sharp knife or chef’s knife
- Cutting board
- Large mixing bowl
- Spatula or large spoon for tossing
- Freezer-safe bags or containers
Instructions
Let’s transform those potatoes into crispy, golden perfection.
- Preheat your oven to 400 degrees Fahrenheit (200 degrees Celsius). This initial high heat is crucial for getting a good sear on the potatoes.
- Scrub the potatoes thoroughly. You want to remove any dirt, but don’t worry about peeling them. The skins add fantastic texture and flavor to the wedges.
- Cut each potato into 6 to 8 long wedges. Aim for wedges that are roughly the same size to ensure even cooking. If you have very large potatoes, you might cut them into more wedges. The key is uniformity.
- Toss the wedges in olive oil. Use just enough to lightly coat each piece. You don’t want them swimming in oil; a thin sheen is perfect. This helps the seasoning adhere and promotes crisping.
- Sprinkle your chosen seasoning over the oiled wedges. Be generous! Then, toss them again to ensure the seasoning is evenly distributed. This is where you can get creative with your flavors.
- Lay the seasoned wedges out on an ungreased baking sheet. Arrange them in a single layer, making sure they are not overlapping. Overcrowding will cause them to steam rather than roast, resulting in soggy wedges. You may need to use two baking sheets.
- Bake for 30 minutes. Keep an eye on them; you’re looking for them to start softening and developing a light golden hue.
- Remove the baking sheet from the oven and allow the wedges to cool on the sheet. This step is important before freezing.
- Once cooled, leave the wedges on the baking sheet and place the entire sheet into your freezer. This is the “flash freeze” step that prevents them from clumping together when stored.
TO FREEZE:
- After an hour or two in the freezer, check the wedges. They should be firm and frozen solid. The exact time will depend on your freezer’s temperature and how spread out the wedges are.
- Once frozen, carefully transfer the wedges from the baking sheet into labeled freezer bags or airtight containers. Ensure they are well-sealed to prevent freezer burn. You can now store them in the freezer for future use.
TO SERVE:
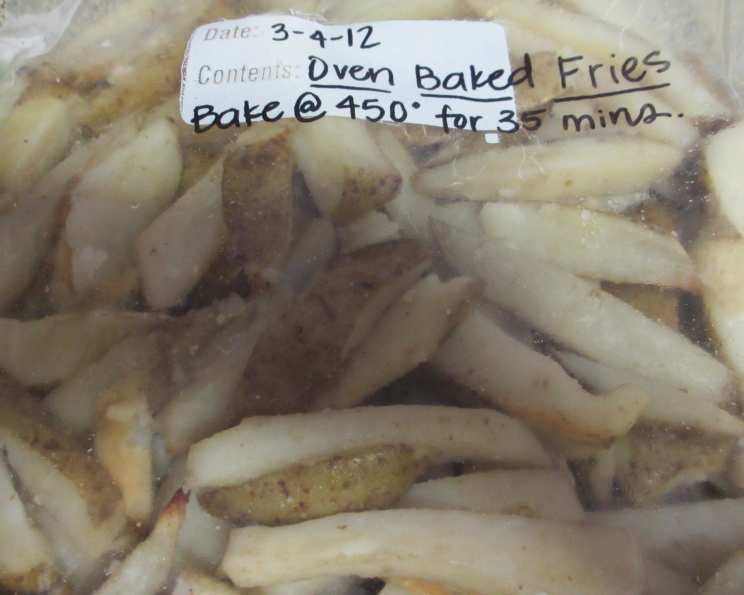
- Preheat your oven to 450 degrees Fahrenheit (230 degrees Celsius). A hotter oven is essential for achieving that perfect crispy exterior when reheating.
- Pull out however many wedges you want to serve from the freezer.
- Place the frozen wedges on a greased or nonstick baking sheet. Again, ensure they are in a single layer and not overcrowded.
- Bake for 30 to 45 minutes. The cooking time will vary depending on the size of your wedges and how cold they are from the freezer. You’re looking for them to be heated through, golden brown, and wonderfully crispy.
- These can also be deep-fried. If you opt for deep frying, ensure the wedges are fully frozen. Fry at around 350°F (175°C) until golden and crispy.
Expert Tips & Tricks
- The Russet Advantage: Russet potatoes are the champions here. Their high starch content and lower moisture make them ideal for achieving that coveted fluffy interior and crispy exterior. If you can’t find russets, Yukon Golds are a decent second choice, though they may yield a slightly less crispy result.
- Seasoning is Key: Don’t be shy with your seasonings! The initial 30-minute bake allows the flavors to meld and become deeply infused into the potato. Consider creating your own signature fry seasoning with smoked paprika, onion powder, and a pinch of cayenne for a little kick.
- Uniformity Matters: Cutting your wedges to a consistent size is the secret to even cooking, both in the initial bake and when reheating from frozen.
- The Power of the Freeze: Flash freezing is the game-changer for make-ahead wedges. It separates the pieces and allows them to crisp up beautifully when reheated. Without this step, you’d likely end up with a potato-shaped brick.
- Don’t Crowd the Pan: I can’t stress this enough. Good airflow around each wedge is paramount for crispness. If you have to use two baking sheets, do it. It’s worth the extra dishwashing.
- Oven Variations: All ovens are a little different. If your oven tends to run hot, keep a closer eye on the wedges during the final bake. Conversely, if your oven is cooler, you might need to add a few extra minutes to reach optimal crispness.
Serving & Storage Suggestions
These oven potato wedges are incredibly versatile. Serve them hot and fresh as a side to burgers, grilled chicken, fish, or steak. They also make a fantastic base for loaded potato wedges – top them with cheese, bacon bits, sour cream, or your favorite chili.
Storage:
- Freshly baked (not frozen): Leftover wedges can be stored in an airtight container in the refrigerator for 2-3 days. They will lose some of their crispness.
- Frozen: Properly frozen wedges will maintain their quality in the freezer for up to 3 months.
Reheating:
The best way to reheat is to follow the “TO SERVE” instructions (Step 4 in the Instructions section) and bake them in a 450°F (230°C) oven until they are heated through and crispy again. Microwaving is not recommended as it will result in a soft, limp texture.
Nutritional Information
(Estimates are based on using russet potatoes, olive oil, and a basic salt and pepper seasoning. Actual values will vary based on potato size and specific seasoning blend used.)
| Nutrient | Amount per Serving (approximate) | % Daily Value |
|---|---|---|
| Calories | 203.8 kcal | 10% |
| Total Fat | 4.7 g | 6% |
| Saturated Fat | 0.7 g | 3% |
| Cholesterol | 0 mg | 0% |
| Sodium | 12.9 mg | 1% |
| Total Carbohydrate | 37.2 g | 13% |
| Dietary Fiber | 4.7 g | 17% |
| Sugars | 1.7 g | 2% |
| Protein | 4.3 g | 9% |
Variations & Substitutions
- Spice it Up: For a touch of heat, add a pinch of cayenne pepper or a dash of hot sauce to your seasoning blend.
- Herbal Infusion: Toss in some finely chopped fresh rosemary or thyme with the oil and seasoning before baking.
- Garlic Lover’s Dream: Add a teaspoon of garlic powder or even some minced fresh garlic to the oil mixture.
- Sweet Potato Twist: While the recipe is written for russets, you can experiment with sweet potatoes. Adjust baking times as sweet potatoes cook slightly faster.
- Parmesan Pep: For a non-vegan variation, you could toss the cooked wedges with grated Parmesan cheese in the last 10 minutes of the final bake.
FAQs
Q: Can I use other types of potatoes besides russets?
A: While russets are ideal for their starch content, Yukon Golds can be used. They may result in a slightly less crispy exterior. Avoid waxy potatoes like red or fingerlings, as they tend to become mushy when baked.
Q: Why do my wedges come out soggy?
A: This is most commonly due to overcrowding the baking sheet, preventing proper air circulation, or not using a hot enough oven for the final bake. Ensure wedges are in a single layer and the oven is preheated to 450°F for reheating.
Q: How long can I store the frozen wedges?
A: When stored properly in airtight containers or freezer bags, the frozen wedges will remain good in your freezer for up to 3 months.
Q: Can I add other vegetables to bake with the potato wedges?
A: Yes, you can! Consider adding broccoli florets or carrot sticks. Ensure they are cut to a similar size as the potato wedges for even cooking.
Q: What’s the best way to season these wedges?
A: The best seasoning is truly personal preference! A simple mix of salt, black pepper, garlic powder, and paprika is a classic. For something different, try a Cajun seasoning, Italian herbs, or even a sprinkle of smoked sea salt.
Final Thoughts
This recipe for Oven Potato Wedges (OAMC) is more than just a way to cook potatoes; it’s an invitation to savor simplicity and deliciousness. The ability to prepare a batch in advance and have perfectly crispy wedges ready to go at a moment’s notice is a true kitchen win. Whether you’re serving them as a humble side or a star appetizer, I guarantee they’ll disappear fast. So next time you see those russets on sale, grab a bag, and get ready to experience potato perfection.
Enjoy your perfectly crafted wedges!