
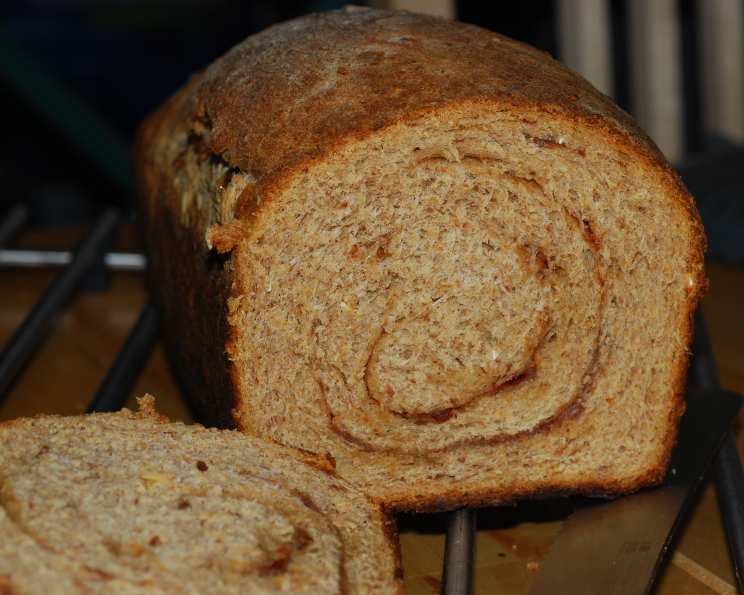
Rustic Wheat Cinnamon Raisin Bread: A Hug in Every Slice
There’s something deeply comforting about the aroma of baking bread, a scent that instantly transports me back to my grandmother’s kitchen. Her loaves were always a bit rustic, made with flours she ground herself, and often studded with whatever treasures she had on hand – plump raisins, fragrant cinnamon, and a whisper of honey. This particular Rustic Wheat Cinnamon Raisin Bread evokes that same feeling of warmth and nostalgia. I remember spending hours as a child watching her patient hands knead dough, the rhythmic thud a familiar lullaby. When I couldn’t find a recipe that captured that wholesome, slightly hearty, wheat-forward character without relying on specialized equipment, I set out to create my own, aiming for that perfect balance of tender crumb and chewy crust, infused with the comforting embrace of cinnamon and sweet raisins.
Recipe Overview
- Prep Time: Approximately 20 minutes active, plus 2-3 hours for rising
- Cook Time: 40-45 minutes
- Total Time: 3 hours to 3 hours and 30 minutes
- Servings: 16 slices (for one large loaf) or 24 slices (for two smaller loaves)
- Yield: 1 large loaf or 2 small loaves
- Dietary Type: Can be adapted; this recipe contains wheat and honey.
Ingredients
This recipe embraces simple, wholesome ingredients to create a truly satisfying loaf. You’ll find it balances the structure of bread flour with the heartiness of wheat flour and oatmeal.
- 2 ½ cups bread flour, plus more for kneading
- 2 ¼ teaspoons instant yeast (Crucial for this recipe’s success and ease!)
- 1 teaspoon salt
- 1 ½ teaspoons cinnamon
- 1 ¼ cups water, hot (around 120-130°F)
- ¼ cup honey
- ¼ cup sugar-free maple syrup (or more honey if preferred)
- ¾ cup raisins
- 1 tablespoon oil (for the dough and greasing)
- 1 cup wheat flour
- 1 cup oatmeal (rolled oats or quick oats work well)
A Note on Yeast: As mentioned in the introduction, this recipe is specifically designed for instant yeast. Its forgiving nature makes it ideal for home bakers. If you are an experienced bread maker and wish to use active dry yeast, you will need to adjust the quantity and method, which involves proofing the yeast separately in warm water with a pinch of sugar. However, for the intended outcome of this recipe, instant yeast is strongly recommended.
Equipment Needed
- Stand mixer with dough hook attachment (highly recommended for ease)
- Large mixing bowl
- Saucepan
- Measuring cups and spoons
- Floured surface for kneading
- Oiled bowl for rising
- Greased baking sheet or 9×5 inch loaf pan(s)
- Wire cooling rack
- Oven
Instructions
Crafting this Rustic Wheat Cinnamon Raisin Bread is a rewarding journey that culminates in a loaf perfect for toasting, sandwiches, or simply enjoying with a slather of butter.
- Combine Dry Ingredients: In the bowl of your stand mixer, combine 1 ½ cups of the bread flour, the instant yeast, cinnamon, and salt. Give it a quick whisk to distribute everything evenly.
- Warm the Liquids: In a saucepan, gently heat the hot water (120-130°F), honey, and sugar-free maple syrup over low heat. Stir until the honey is dissolved and the mixture reaches the desired temperature. Be careful not to overheat, as this can kill the yeast.
- Begin Mixing the Dough: With your stand mixer on low speed, gradually add the warm liquid mixture to the dry ingredients. Mix until just combined and there are no visible lumps of flour. Increase the speed to medium and continue mixing for about 2-3 minutes until the batter is smooth.
- Incorporate the Wheat and Oats: With the mixer still on low speed, begin adding the wheat flour and oatmeal to the bowl, about half a cup at a time. Alternate this with adding the remaining bread flour, again, about half a cup at a time. Continue mixing until the dough begins to pull away from the sides of the bowl. The dough will likely be quite sticky at this stage; this is normal.
- Knead and Add Raisins: Turn the sticky dough out onto a lightly floured surface. Begin to knead the dough with your hands. This process will take approximately 5 minutes. As you knead, gradually incorporate the raisins, working them into the dough. If the dough becomes excessively sticky, add more flour, one tablespoon at a time, until it is smooth and manageable but still has a slight tackiness.
- First Rise: Lightly grease a large mixing bowl with oil. Place the kneaded dough into the oiled bowl, turning it over once to ensure the entire surface of the dough is lightly coated with oil. Cover the bowl tightly with plastic wrap or a clean kitchen towel. Let the dough rise in a warm place until it has doubled in size, which typically takes 60-90 minutes, depending on your kitchen’s temperature.
- Shape the Loaves: Once the dough has doubled, gently punch it down to release the air. Using lightly oiled hands (this prevents sticking), turn the dough out onto your floured surface. You have two options for shaping:
- For two small, rustic round loaves: Divide the dough in half and shape each piece into a round loaf. Place these on a greased baking sheet.
- For one large loaf: Shape the entire dough into a cohesive loaf and place it into a greased 9×5 inch bread pan.
Cover the shaped loaves loosely with plastic wrap or a clean towel and let them rise again for another 60-90 minutes, or until they have visibly increased in size and appear puffy.
- Prepare for Baking: If you desire a softer crust, you can brush the tops of the loaves with a little oil just before baking.
- Preheat and Bake: Preheat your oven to 375°F (190°C).
- Bake the Bread: Place the baking sheet with the loaves or the bread pan(s) into the preheated oven. Bake for 40-45 minutes.
- Monitor and Adjust: After the first 30 minutes of baking, check the loaves. If the crust is browning too quickly, loosely cover the top(s) with aluminum foil to prevent further darkening. If you are baking two smaller loaves, they may be done sooner than the larger loaf; check for doneness by tapping the bottom of the loaf – it should sound hollow.
- Cool Completely: Once baked, remove the bread from the oven. Immediately turn the loaves out of their pans (if using a loaf pan) and place them on a wire cooling rack. It is absolutely essential to cool the bread completely before slicing. This allows the internal structure to set properly, ensuring a perfect texture.
Expert Tips & Tricks
- Temperature is Key: The 120-130°F water temperature is critical for activating instant yeast. Too cold and it won’t activate sufficiently; too hot and you’ll kill it. Use a thermometer if you’re unsure.
- The Sticky Dough Secret: Don’t be afraid of sticky dough! It often results in a more tender and moist crumb. Resist the urge to add too much extra flour during the initial mixing stages. The kneading process will help manage the stickiness.
- Raisin Rehydration: For plumper, juicier raisins, you can soak them in warm water or juice for about 15-20 minutes before draining and adding them to the dough. Be sure to drain them thoroughly to avoid adding excess moisture to the dough.
- Proofing Environment: If your kitchen is cold, find a warm spot for the dough to rise. This could be a slightly warmed (then turned off) oven, or near a sunny window.
- Doneness Test: Beyond tapping the bottom, the internal temperature of the bread should reach around 190-200°F when checked with an instant-read thermometer for perfect doneness.
Serving & Storage Suggestions
This Rustic Wheat Cinnamon Raisin Bread is wonderfully versatile. It’s delightful served warm, freshly baked, with a generous spread of butter. It makes an excellent base for your morning toast, French toast, or even as a side for breakfast dishes. For a more substantial meal, it pairs beautifully with hearty soups or stews, its slightly sweet and spiced notes offering a lovely contrast.
Leftovers can be stored at room temperature in an airtight container or bread bag for 2-3 days. For longer storage, slice the cooled bread and freeze it in a freezer-safe bag for up to 3 months. To reheat frozen slices, simply pop them into the toaster or thaw them at room temperature.
Nutritional Information
Here’s an estimated nutritional breakdown for a slice of this hearty bread:
| Nutrient | Amount per Serving | % Daily Value |
|---|---|---|
| Calories | 162.2 kcal | N/A |
| Calories from Fat | 14g | 14% |
| Total Fat | 1.6g | 2% |
| Saturated Fat | 0.2g | 1% |
| Cholesterol | 0mg | 0% |
| Sodium | 148mg | 6% |
| Total Carbohydrate | 33.9g | 11% |
| Dietary Fiber | 2.4g | 9% |
| Sugars | 8.5g | 17% |
| Protein | 4.1g | 8% |
Note: Nutritional values are approximate and can vary based on specific ingredients used.
Variations & Substitutions
While this recipe is wonderfully balanced as is, here are a few ideas to customize your Rustic Wheat Cinnamon Raisin Bread:
- Nutty Addition: Incorporate ½ cup of chopped walnuts or pecans along with the raisins for added texture and flavor.
- Spice it Up: A pinch of nutmeg or allspice can complement the cinnamon beautifully.
- Sweetness Adjustment: If you prefer a sweeter bread, you can increase the honey or maple syrup slightly, keeping in mind that too much liquid can affect dough consistency.
- Seed Swirl: For a more artisanal look and added nutrients, consider swirling a tablespoon or two of poppy seeds or sunflower seeds into the dough during the final kneading.
FAQs
Q: Why is my bread not rising properly?
A: Ensure your yeast is fresh and that your water temperature was within the 120-130°F range. Also, check that your dough was allowed to rise in a warm, draft-free environment.
Q: My dough is too sticky to knead. What should I do?
A: It’s normal for this dough to be sticky initially. Continue to knead, adding flour only one tablespoon at a time as needed, until the dough is smooth and pulls away from the sides of the bowl.
Q: Can I use active dry yeast instead of instant yeast?
A: While possible, it’s not recommended for this specific recipe as it’s formulated for instant yeast. If you do, you’ll need to proof the active dry yeast in warm water with a pinch of sugar before adding it to the other ingredients, and expect a longer rising time.
Q: My bread is browning too quickly on top. How can I prevent this?
A: As instructed, loosely cover the top of the loaf with aluminum foil after the first 30 minutes of baking. This shields the crust from direct heat while allowing the interior to cook through.
Q: How can I get a crispier crust?
A: Avoid brushing the loaves with oil before baking, and consider placing a shallow pan of water on the bottom rack of your oven during the initial part of the baking process to create steam.
A Baker’s Farewell
This Rustic Wheat Cinnamon Raisin Bread is more than just a recipe; it’s an invitation to slow down, embrace the simple pleasures, and create something truly delicious with your own two hands. The aroma alone is a reward, and the taste – a comforting, wholesome slice of home – is the ultimate prize. I hope this loaf brings as much warmth and joy to your kitchen as it does to mine. Share it with loved ones, savor it with your favorite morning beverage, and enjoy every rustic bite.