
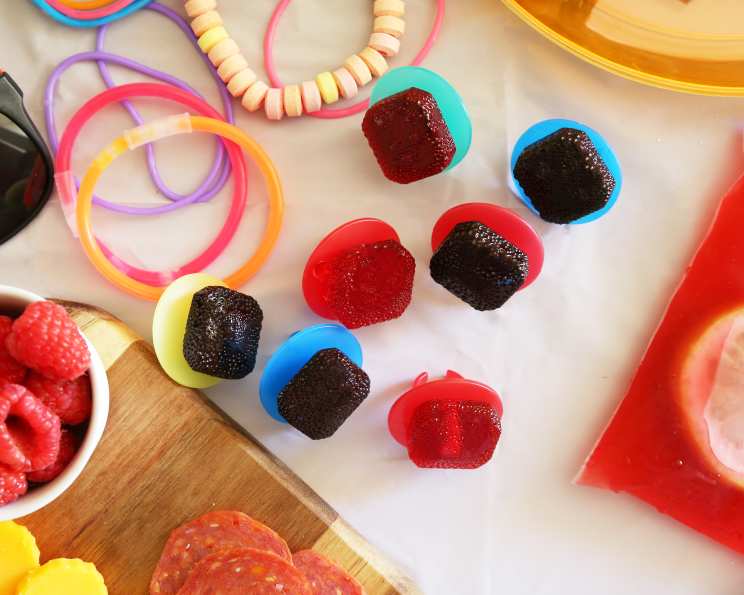
The Sweet Art of Edible Jewels: Crafting Homemade Ring Pops
As a child, there was a certain magic to the humble Ring Pop. It wasn’t just candy; it was wearable art, a vibrant, sweet statement piece that brought a burst of joy and color to any occasion. I remember meticulously peeling back the wrapper, the satisfying click as the hard candy met my tongue, and the sheer delight of sporting my sugary accessory all day long. These pops were the ultimate party favor, the coveted prize in a game, and a delightful way to make even an ordinary afternoon feel extraordinary. Now, with years of experience in the kitchen, I find that same childlike wonder translating into a sophisticated culinary adventure, transforming simple ingredients into dazzling, edible jewelry.
Recipe Overview
- Prep Time: 10 minutes
- Cook Time: 15 minutes
- Total Time: 25 minutes
- Servings: 16
- Yield: 16 ring pops
- Dietary Type: Vegetarian, Gluten-Free
Ingredients
This recipe is wonderfully straightforward, relying on just a few pantry staples to create its vibrant magic.
- 1 1/4 cups granulated sugar
- 1/2 cup water
- 3/4 cup light corn syrup
- 2 teaspoons candy flavoring (such as cherry, strawberry, lemon, or orange)
- Food coloring (a few drops of your desired colors)
Equipment Needed
- A large, heavy-bottomed pot is essential for even heating and preventing scorching.
- A candy thermometer is crucial for achieving the perfect hard-crack stage.
- A silicone candy ring mold (specifically designed for ring pops, or a similar-sized cavity mold).
- Plastic rings to insert into the candy (you can often find these online or reuse thoroughly cleaned rings from pre-made Ring Pops once the candy is removed).
- A heat-resistant spatula or wooden spoon for stirring.
- Parchment paper or a silicone baking mat for any potential spills or drips.
- Measuring cups and spoons.
Instructions
Crafting these edible jewels is a delightful process that requires attention to detail and a bit of patience, but the results are truly dazzling.
-
Begin by placing your large, heavy-bottomed pot over medium heat. Add the granulated sugar, water, and light corn syrup to the pot. Stir these ingredients gently until the sugar is completely dissolved. It’s important to ensure all the sugar crystals have melted before proceeding.
-
Once the sugar has dissolved, increase the heat to high. Carefully attach your candy thermometer to the side of the pot, ensuring the tip is submerged in the syrup but not touching the bottom of the pot. Bring the mixture to a boil.
-
Continue to heat the syrup, stirring as needed to prevent sticking or uneven cooking, until the candy thermometer registers 300 degrees F (149 degrees C). This is the hard-crack stage, where the sugar syrup will form hard, brittle threads when dropped into cold water.
-
Immediately after reaching 300 degrees F, carefully add a few drops of your chosen food coloring to the hot syrup. Stir gently until the color is evenly distributed and combined.
-
Continue to heat the mixture until it reaches 310 degrees F (154 degrees C).
-
Once the syrup hits 310 degrees F, remove the pot from the heat. Be cautious, as the syrup will be extremely hot and will continue to bubble for a short while. Stir the mixture until the bubbling subsides.
-
Now, it’s time to add the flavor! Stir in the candy flavoring until it’s well incorporated. The aroma will likely be quite intense at this stage.
-
Working quickly but carefully, pour the hot candy into your silicone candy ring mold. Be sure to fill each cavity to the desired level.
-
Immediately after pouring the candy, carefully stick a plastic ring into the center of each candy in the mold. Make sure the ring is pushed in far enough to be securely held by the hardening candy, but not so far that it touches the bottom of the mold.
-
Leave the pops at room temperature to cool and harden completely. This process can take anywhere from 10 to 20 minutes, depending on the ambient temperature and humidity. Resist the urge to touch or move them too soon, as this can cause them to deform.
-
Once the candy has hardened and is no longer sticky to the touch, carefully remove the pops from the silicone mold. Gently twist or pull them to release them.
-
Your homemade Ring Pops are now ready to be enjoyed or shared!
Expert Tips & Tricks
When working with hot sugar, safety is paramount. Always use heat-resistant gloves and long sleeves to protect yourself from potential burns. Have all your ingredients and equipment measured and ready to go before you start heating the sugar syrup, as the process moves quickly. If you notice any crystallization on the sides of your pot during the heating process, you can use a pastry brush dipped in water to gently brush down the sides of the pot. This helps prevent unwanted crystal formation in your final candy. For a smoother finish, ensure your silicone mold is perfectly clean and dry before pouring.
Serving & Storage Suggestions
These vibrant Ring Pops are best served at room temperature. They make for spectacular party favors, classroom treats, or a fun afternoon pick-me-up. Store any uneaten Ring Pops in an airtight container at room temperature. Properly stored, they can last for several weeks, maintaining their crisp texture. Avoid storing them in the refrigerator, as the humidity can cause them to become sticky and lose their shine.
Nutritional Information
| Nutrient | Amount per Serving | % Daily Value |
|---|---|---|
| Calories | 105.7 kcal | |
| Calories from Fat | 0 g | 0% |
| Total Fat | 0 g | 0% |
| Saturated Fat | 0 g | 0% |
| Cholesterol | 0 mg | 0% |
| Sodium | 10.3 mg | 0% |
| Total Carbohydrate | 27.9 g | 9% |
| Dietary Fiber | 0 g | 0% |
| Sugars | 19.9 g | 79% |
| Protein | 0 g | 0% |
Variations & Substitutions
While the classic Ring Pop is a beloved treat, feel free to get creative!
- Flavor Fun: Experiment with different candy flavorings. Beyond the fruity classics, consider vanilla, peppermint, or even a hint of ginger for a unique twist.
- Color Play: Combine food colorings to create pastel shades or vibrant swirls. You can even add a tiny pinch of edible glitter for extra sparkle.
- Shaped Molds: If you can’t find a ring pop mold, use other small, fun silicone molds for lollipops or individual candies. Just be sure they are heat resistant.
FAQs
Q: Can I make Ring Pops without a candy thermometer?
A: While it’s possible to estimate doneness by dropping the syrup into cold water (hard-crack stage forms hard, brittle threads), a candy thermometer provides the most accurate and consistent results for achieving the perfect texture.
Q: My candy seems cloudy. What went wrong?
A: Cloudiness can occur if the sugar wasn’t fully dissolved before boiling, or if there was too much steam introduced during the cooking process. Ensure your sugar is completely dissolved and avoid stirring vigorously once the syrup starts to boil.
Q: How long does the candy mixture stay pourable?
A: The hot sugar syrup will begin to set fairly quickly once removed from the heat. You’ll likely have only a few minutes to pour it into your molds before it becomes too thick to work with.
Q: Are these Ring Pops suitable for children?
A: While they are a fun treat, due to the extreme heat of the candy syrup during preparation and the hard nature of the candy, adult supervision is absolutely necessary during the entire process. Children can certainly enjoy the finished product, but they should always be supervised when eating hard candies.
Q: Can I make these vegan?
A: This recipe is inherently vegetarian and can be considered vegan as it uses standard ingredients. Ensure your chosen candy flavoring and food coloring do not contain any animal-derived products if strict veganism is a concern.
Final Thoughts
There’s a profound satisfaction in creating something beautiful and delicious with your own hands, and these homemade Ring Pops are a perfect example. They capture the spirit of simple joy and vibrant fun, reminding us that sometimes, the most delightful treats come from the most unexpected places. I encourage you to gather your ingredients, embrace the process, and create your own edible masterpieces. Share them with loved ones, watch their eyes light up, and savor the sweet, sparkling moment.