
Red Velvet Cookies with Cream Cheese Frosting: A Symphony of Color and Flavor
There’s something undeniably magical about red velvet. It’s not just a flavor, but an experience – a vibrant hue that promises decadence and a taste that’s subtly rich and comforting. I remember the first time I encountered red velvet in cookie form. It was at a bustling neighborhood bake sale, a small table overflowing with treats, and amidst the chocolate chip and sugar cookies, a batch of these crimson beauties stood out like jewels. Their deep, alluring color was captivating, and the promise of a tangy cream cheese frosting perched atop each one was simply irresistible. That first bite was a revelation: a soft, slightly chewy cookie with that distinct red velvet essence, perfectly complemented by the cool, sweet tang of the frosting. It’s a classic for a reason, and one that never fails to bring a smile to my face, a culinary echo of childhood joys and the simple pleasure of a truly delicious homemade treat.
Recipe Overview
- Prep Time: 15 minutes
- Cook Time: 8-10 minutes per batch
- Total Time: Approximately 30-40 minutes (including baking and cooling)
- Servings: 36-48 cookies
- Yield: 36-48 cookies
- Dietary Type: Contains Dairy, Eggs
Ingredients
For the Cookies:
- 1 (18 ounce) box red velvet cake mix (any brand will do)
- 2 eggs
- 1/3 cup oil
For the Cream Cheese Frosting:
- 1 (8 ounce) package cream cheese (softened)
- 1/4 cup stick margarine (softened) or 1/4 cup butter (softened)
- 2 teaspoons milk
- 1 teaspoon vanilla
- 4 cups powdered sugar
Equipment Needed
To create these delightful Red Velvet Cookies, you’ll want to have the following on hand:
- A large mixing bowl for combining cookie ingredients.
- A medium bowl for preparing the cream cheese frosting.
- An electric mixer (handheld or stand mixer) is highly recommended for achieving a smooth frosting.
- Measuring cups and spoons.
- A baking sheet. For best results, use a lightly greased one or one lined with parchment paper.
- A cookie scoop or two spoons for portioning dough.
- A wire cooling rack for allowing the cookies to cool completely before frosting.
Instructions
Let’s embark on the journey to create these stunning Red Velvet Cookies. The process is delightfully straightforward, making it an ideal bake for any skill level.
-
Prepare the Cookie Dough: In a large mixing bowl, combine the contents of the red velvet cake mix, the 2 eggs, and the 1/3 cup oil. Mix all these ingredients together until they are well incorporated. You will notice the mixture transforming into a cohesive, thick cookie dough.
-
Portion and Shape the Cookies: Begin by preheating your oven to 375°F (190°C). Take the cookie dough and roll it into balls. The size of your balls will determine the final size and thickness of your cookies. Place these dough balls onto a lightly greased cookie sheet. Gently flatten the balls down slightly. You can do this with the bottom of a glass or your palm, depending on the thickness you desire for your cookies. A thinner cookie will bake faster and be crispier, while a slightly thicker one will be softer and chewier.
-
Bake the Cookies: Carefully place the cookie sheet into your preheated oven. Bake at 375°F (190°C) until the tops crackle, which typically takes about 8 to 10 minutes. Alternatively, you can bake them until they reach your desired level of doneness. Keep an eye on them, as oven temperatures can vary. The crackled appearance is a good indicator of the characteristic red velvet cookie texture.
-
Cool the Cookies: Once baked, remove the cookies from the oven and let them cool on the baking sheet for a minute or two before carefully transferring them to a wire cooling rack to cool completely. It’s crucial that the cookies are entirely cool before you attempt to frost them, otherwise, the frosting will melt and slide right off.
-
Prepare the Cream Cheese Frosting: While the cookies are cooling, it’s time to whip up the heavenly frosting. In a medium bowl, combine the softened cream cheese, softened margarine (or butter), 2 teaspoons milk, and 1 teaspoon vanilla. Using your electric mixer, beat these ingredients together on a low speed until they form a smooth mixture.
-
Incorporate the Powdered Sugar: Gradually add the 4 cups of powdered sugar to the cream cheese mixture. Continue to beat on low speed, adding the powdered sugar about 1 cup at a time, until the frosting is smooth and has a spreadable consistency. You want it to be thick enough to hold its shape but still easy to spread.
-
Frost the Cookies: Once the cookies have completely cooled, generously frost them with the prepared cream cheese frosting. You can use a knife, an offset spatula, or even a piping bag for a more decorative finish.
Expert Tips & Tricks
To elevate your red velvet cookie game, consider these professional insights:
- Room Temperature is Key: Ensure both your cream cheese and margarine/butter are truly at room temperature before you begin making the frosting. This will prevent lumps and ensure a beautifully smooth, emulsified frosting. If you’re short on time, you can carefully cut the butter into smaller cubes and let them sit out, or microwave them in very short bursts (5-10 seconds at a time) until softened, but not melted.
- Don’t Overmix the Dough: While the cake mix does a lot of the heavy lifting, avoid overmixing the cookie dough once the wet ingredients are added. Overmixing can develop the gluten too much, leading to tougher cookies. Mix just until the ingredients are combined.
- Cookie Sheet Temperature: Allow your baking sheets to cool slightly between batches. A hot baking sheet can cause the dough to spread too quickly, resulting in thinner, crisper cookies than you might intend.
- Achieving the “Crackle”: The “crackle” on top of red velvet cookies is a sign of a slightly baked-through exterior with a tender interior. If you prefer a chewier cookie, slightly underbake them; for a crispier cookie, bake for a minute or two longer, but watch carefully to prevent burning.
- Frosting Consistency: If your frosting seems too thick, add a tiny bit more milk, just a teaspoon at a time. If it’s too thin, add a little more powdered sugar. Aim for a consistency that’s easy to spread but won’t ooze off the cookie.
Serving & Storage Suggestions
These Red Velvet Cookies with Cream Cheese Frosting are a showstopper on their own, but they also pair wonderfully with a tall glass of cold milk or a steaming cup of coffee. For an extra touch of indulgence, consider serving them alongside fresh berries or a scoop of vanilla bean ice cream.
For storage, keep any unfrosted cookies in an airtight container at room temperature for up to 3 days. Frosted cookies are best stored in an airtight container in the refrigerator. The cream cheese frosting can soften at room temperature, so refrigeration is recommended to maintain its structure and freshness. They will keep well in the refrigerator for up to 5 days. If you wish to freeze them, it’s best to freeze the unfrosted cookies. Once baked and completely cooled, place them in a single layer on a baking sheet and freeze until solid. Then, transfer them to a freezer-safe bag or container. They can be stored in the freezer for up to 2 months. Thaw them at room temperature and then frost as desired.
Nutritional Information
Here is an estimated nutritional breakdown per cookie, assuming 42 cookies are made and frosted:
| Nutrient | Amount per Serving | % Daily Value |
|---|---|---|
| Calories | 200 kcal | 10% |
| Total Fat | 10g | 13% |
| Saturated Fat | 4g | 20% |
| Cholesterol | 20mg | 7% |
| Sodium | 80mg | 3% |
| Total Carbohydrate | 25g | 9% |
| Dietary Fiber | <1g | 1% |
| Total Sugars | 18g | 36% |
| Protein | 2g | 4% |
Note: Nutritional values are estimates and can vary based on specific ingredients and brands used.
Variations & Substitutions
While this recipe is a delightful classic, feel free to play with it to suit your preferences:
- Chocolate Cream Cheese Frosting: For a richer, more decadent frosting, incorporate 2 ounces of unsweetened baking chocolate, melted and cooled, into the cream cheese mixture along with the margarine/butter. This adds a wonderful chocolatey depth that complements the red velvet flavor beautifully.
- White Chocolate Chips: Fold 1/2 cup of white chocolate chips into the cookie dough before baking for little bursts of creamy sweetness within the cookies.
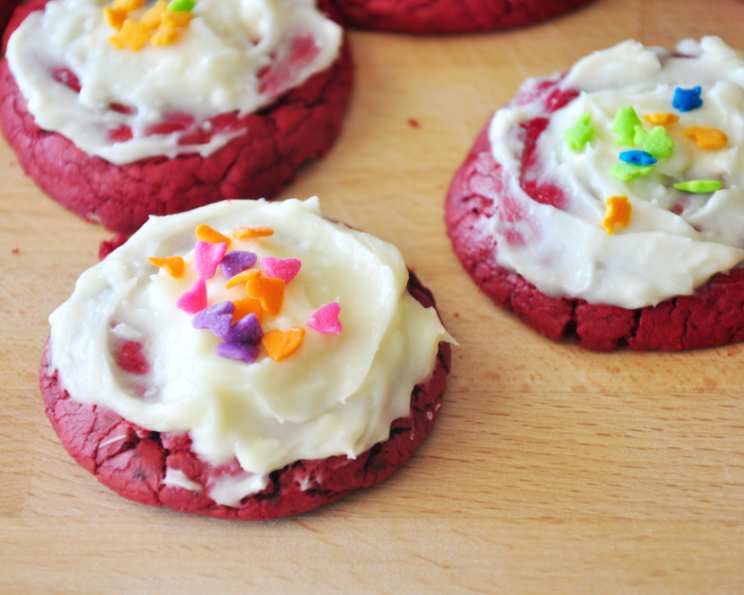
- Sprinkle Extravaganza: Before baking, press a few colorful sprinkles onto the tops of the dough balls for a festive touch, especially perfect for holidays.
- Gluten-Free Option: While not explicitly detailed in the original recipe, you can experiment with a gluten-free red velvet cake mix and ensure all other ingredients are gluten-free to create a gluten-free version. The texture might vary slightly.
FAQs (Frequently Asked Questions)
Q: Why are my cookies spreading too much?
A: This can happen if your oven is too hot, or if the dough is too warm. Ensure your oven is accurately preheated and allow the baking sheet to cool slightly between batches. For a thicker cookie, roll the dough balls slightly larger and don’t flatten them as much.
Q: Can I make the frosting ahead of time?
A: Yes, the cream cheese frosting can be made up to 2-3 days in advance and stored in an airtight container in the refrigerator. You may need to let it soften slightly at room temperature and re-whip it briefly before frosting the cookies to regain its ideal consistency.
Q: How can I get a more intense red color?
A: While the cake mix provides color, you can add a few drops of red food coloring to the cookie dough for a more vibrant hue. Be mindful not to add too much, as it can affect the texture.
Q: Are these cookies nut-free?
A: Typically, red velvet cake mix and the frosting ingredients are nut-free. However, it’s always best to check the ingredient labels of your specific cake mix and any additions like chocolate chips to ensure they meet your dietary needs and are free from allergens.
Q: Can I freeze the baked and frosted cookies?
A: While unfrosted cookies freeze best, you can freeze frosted cookies. However, the frosting might be more prone to damage or texture changes during freezing and thawing. If you do freeze them, wrap them well in plastic wrap and then place them in a freezer-safe container.
Final Thoughts
There’s a certain joy that comes with creating something as visually striking and deliciously satisfying as these Red Velvet Cookies. They’re more than just a dessert; they’re a celebration of color, flavor, and the simple pleasure of a homemade treat. Whether you’re baking them for a holiday gathering, a special occasion, or just because, I encourage you to dive into this recipe. Savor the process, enjoy the vibrant results, and most importantly, share them with those you cherish. I’d love to hear about your baking adventures and any delightful twists you might discover. Happy baking!