
Ribbon Pudding Pie: A Symphony of Creamy Layers and Instant Gratification
There are some desserts that, with their sheer presence, transport you back to a specific time and place. For me, Ribbon Pudding Pie is one of those. I remember a particular summer afternoon, the kind where the air hung thick and humid, and the only relief came from the promise of something cool and sweet. My aunt, a whirlwind of energy in her tiny kitchen, pulled this masterpiece from the refrigerator. The sight of those distinct, colorful layers peeking through the whipped topping was like a stained-glass window of dessert dreams. Each spoonful was a delightful surprise, a creamy, smooth journey through vanilla, butterscotch, and chocolate, all cradled in a crisp graham cracker crust. It’s the kind of pie that whispers of simple pleasures and effortless elegance, a true testament to the magic of instant pudding and a little bit of culinary wizardry.
Recipe Overview
- Prep Time: 10 minutes
- Cook Time: 0 minutes (plus refrigeration)
- Total Time: 10 minutes (plus at least 30 minutes refrigeration)
- Servings: 8
- Yield: 1 (8-inch) pie
- Dietary Type: Dessert
Ingredients
This pie is a testament to how a few pantry staples can create something truly spectacular. The beauty of this recipe lies in its simplicity and the delightful contrast of flavors and textures.
- For the Layers:
- 4 cups cold milk, divided
- 1 (1-ounce) package vanilla instant pudding mix
- 1 (1-ounce) package butterscotch instant pudding mix
- 1 (1-ounce) package chocolate instant pudding mix
- For the Topping and Crust:
- 1/2 cup whipped topping (like Cool Whip or homemade)
- 1 graham cracker crust (8-inch, pre-made or homemade)
- For Garnish (Optional):
- 2 tablespoons chopped pecans
Equipment Needed
While this pie requires minimal cooking, a few essential tools will make the process seamless:
- Mixing bowls: At least three, for preparing each pudding layer separately.
- Whisk: An electric hand mixer or a sturdy manual whisk will work.
- Spatula: For spreading the pudding layers evenly.
- Measuring cups and spoons: For accurate ingredient measurements.
- Refrigerator: To allow the pie to set properly.
Instructions
The magic of this Ribbon Pudding Pie is in its speed and ease. You’ll be amazed at how quickly you can assemble this beautiful dessert.
- Prepare the Vanilla Layer: In a mixing bowl, combine 1 1/3 cups of cold milk with the vanilla instant pudding mix. Beat on low speed with an electric mixer for 2 minutes, or until smooth and thickened. This is just enough time for the pudding to begin to set.
- Form the Base Layer: Carefully pour the prepared vanilla pudding mixture into the graham cracker crust. Spread it evenly using a spatula to create a smooth, even base.
- Prepare the Butterscotch Layer: In a separate mixing bowl, combine another 1 1/3 cups of cold milk with the butterscotch instant pudding mix. Beat on low speed for 2 minutes, or until smooth and thickened.
- Add the Middle Layer: Gently spoon the butterscotch pudding mixture evenly over the vanilla pudding layer in the crust. Try to distribute it without disturbing the layer beneath too much.
- Prepare the Chocolate Layer: In a third mixing bowl, combine the remaining 1 1/3 cups of cold milk with the chocolate instant pudding mix. Beat on low speed for 2 minutes, or until smooth and thickened.
- Complete the Pudding Layers: Carefully spread the chocolate pudding mixture evenly over the butterscotch layer. Now you should have three distinct, colorful layers of pudding.
- Add the Topping: Spread the whipped topping evenly over the top of the chocolate pudding layer. This creates a soft, cloud-like finish.
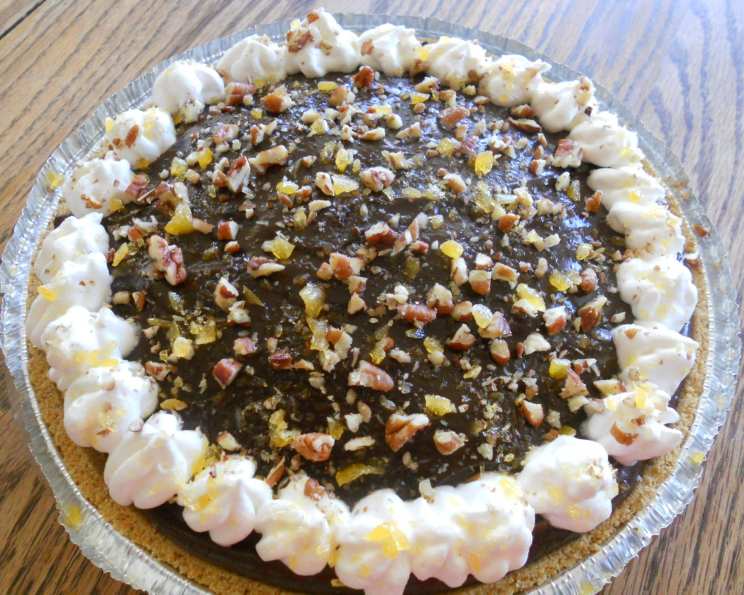
- Garnish (Optional): If you desire, sprinkle the chopped pecans over the whipped topping. This adds a lovely textural contrast and a hint of nutty flavor.
- Chill to Set: Refrigerate the pie for at least 30 minutes. This is crucial for the pudding layers to fully set and firm up, ensuring clean slices when you serve.
Expert Tips & Tricks
To elevate your Ribbon Pudding Pie from simply delicious to absolutely divine, consider these professional insights:
- Milk Temperature is Key: Always use ice-cold milk. This is non-negotiable for instant pudding to thicken properly. If your milk isn’t cold enough, the pudding might remain too thin.
- Don’t Over-Mix: While you need to mix the pudding for the specified time to activate the thickeners, avoid prolonged over-mixing, which can sometimes lead to a gummy texture. The “2 minutes on low speed” is precisely engineered for optimal results.
- Crust Integrity: If you’re using a pre-made graham cracker crust, ensure it’s not cracked or broken before you begin. A sturdy crust is essential for holding the layers. If making your own, press it firmly into the pie plate and bake it for a few minutes to help it set before filling.
- Layering Technique: For the cleanest visual layers, be gentle when spooning and spreading each pudding mixture. A flexible spatula or the back of a spoon can help achieve a smooth surface.
- Whipped Topping Choice: While store-bought whipped topping is convenient and works beautifully, if you prefer, you can whip your own heavy cream with a touch of sugar and vanilla. Make sure it’s well-chilled for the best volume and stability.
- Nut Variations: If pecans aren’t your favorite, consider other chopped nuts like walnuts or almonds. For an extra layer of flavor, toast them lightly before chopping.
- Make-Ahead Marvel: This pie is a fantastic make-ahead dessert. You can prepare it a day in advance, cover it well with plastic wrap (making sure the wrap doesn’t touch the whipped topping directly if possible, or using parchment paper first), and refrigerate. The flavors meld beautifully overnight.
Serving & Storage Suggestions
This Ribbon Pudding Pie is a showstopper all on its own, but it pairs wonderfully with a cup of coffee or a glass of milk.
- Serving: To serve, use a sharp knife to cut clean slices. The distinct layers are part of its charm, so a clean cut will highlight them beautifully. A small dollop of extra whipped cream on top or a dusting of cocoa powder can add an extra touch of elegance.
- Storage: Leftovers should be stored in the refrigerator, covered tightly with plastic wrap or in an airtight container. The pie will keep well for 2 to 3 days. Because it contains dairy (from the milk and whipped topping), it should not be left at room temperature for more than 2 hours. Freezing is generally not recommended for pudding pies, as the texture can become watery and grainy upon thawing.
Nutritional Information
Please note that the following nutritional information is an estimate and can vary based on the specific brands of ingredients used.
| Nutrient | Amount per Serving | % Daily Value |
|---|---|---|
| Calories | 286.5 kcal | |
| Calories from Fat | 48 % | |
| Total Fat | 15.4 g | 23 % |
| Saturated Fat | 5.1 g | 25 % |
| Cholesterol | 19.9 mg | 6 % |
| Sodium | 337 mg | 14 % |
| Total Carbohydrate | 32.5 g | 10 % |
| Dietary Fiber | 0.9 g | 3 % |
| Sugars | 17 g | 68 % |
| Protein | 5.8 g | 11 % |
Variations & Substitutions
While the classic Ribbon Pudding Pie is perfection as is, feel free to get creative!
- Crust Options: Don’t have graham crackers? A chocolate cookie crust or even a vanilla wafer crust would be a delightful alternative. For a gluten-free option, use a gluten-free graham cracker crust.
- Pudding Flavors: The beauty of instant pudding is the endless flavor combinations. Consider swapping one of the layers for banana cream, lemon, or even a chocolate fudge instant pudding. Just ensure you’re using the standard 1-ounce packages for the correct ratios.
- Topping Twists: Instead of plain whipped topping, try folding in some mini chocolate chips or sprinkles into the topping for added texture and fun. A drizzle of chocolate syrup or caramel sauce over the top can also be a delicious addition.
- Fruity Additions: While not traditional, a thin layer of fresh berries (like raspberries or sliced strawberries) between the pudding layers could add a refreshing tartness.
FAQs
Q: Can I use regular pudding mix instead of instant pudding?
A: No, this recipe relies on the quick-setting properties of instant pudding mix. Regular pudding requires cooking on the stovetop and will not set up correctly in this no-bake application.
Q: My pudding layers seem too runny. What did I do wrong?
A: The most common reason for runny pudding is not using ice-cold milk. Ensure your milk is very cold, and beat the pudding for the full 2 minutes to allow the thickeners to activate properly.
Q: How long does the pie need to refrigerate before it’s firm enough to slice?
A: It needs to refrigerate for at least 30 minutes to set. For best results and cleaner slices, you might want to let it chill for an hour or even longer.
Q: Can I make individual pudding pies in small tart shells?
A: Absolutely! This is a fantastic idea for parties. Simply prepare individual crusts and divide the pudding layers accordingly. Adjust refrigeration time as individual portions will set faster.
Q: What is the best way to store leftovers?
A: Leftovers should be stored in the refrigerator, covered tightly. They will remain fresh and delicious for 2 to 3 days.
Final Thoughts
The Ribbon Pudding Pie is more than just a dessert; it’s a delightful experience. It’s a testament to the fact that you don’t need complicated techniques or exotic ingredients to create something truly memorable. With its cool, creamy layers and instant gratification, it’s the perfect solution for a quick weeknight treat or a show-stopping dessert for any gathering. I encourage you to give this recipe a try, and I’m confident it will bring as much joy to your kitchen as it does to mine. Pour yourself a glass of cold milk, grab a fork, and dive into a slice of pure, unadulterated happiness. I’d love to hear about your ribbon creations – share your photos and your favorite flavor combinations!