
Oven Bag Rump Roast: A Tender Triumph of Simplicity
There’s a special magic that happens when a humble cut of beef transforms into something spectacularly tender and flavorful with minimal fuss. This Oven Bag Rump Roast is one of those dishes that has become a cherished fixture in my culinary repertoire, a testament to its foolproof nature and incredibly satisfying results. I recall making this on a particularly chaotic weeknight, juggling childcare and looming deadlines, when I needed a meal that would essentially cook itself while I tackled other tasks. The aroma that eventually wafted from the oven, promising a delicious, slow-cooked feast, was a welcome reassurance. It’s the kind of recipe that makes you feel like a kitchen wizard, even when you’re barely keeping your head above water.
Recipe Overview
- Prep Time: 20 minutes
- Cook Time: 1 hour 45 minutes to 2 hours 15 minutes
- Total Time: 2 hours 5 minutes to 2 hours 35 minutes (plus 20 minutes resting)
- Servings: Up to 10 (depending on roast size and sides)
- Yield: 1 beautifully roasted beef roast with vegetables
- Dietary Type: Gluten-Free (ensure bouillon is gluten-free)
Ingredients
Here’s what you’ll need to bring this wonderfully simple yet elegant roast to life:
- 1 boneless beef rump roast, approximately 4 lbs
- 1/2 cup all-purpose flour
- 1 (14.5 ounce) can tomato sauce
- 1/2 cup water
- 1 teaspoon instant beef bouillon powder
- Salt and freshly ground black pepper, to taste
- 2 medium-size onions, peeled and quartered
- 3 stalks celery, cut into 1-inch pieces
- 1 whole green bell pepper, chopped, or 1 whole red bell pepper, chopped
- 3 medium-size carrots, peeled and quartered
- 8 whole new potatoes (or halved regular Yukon Gold potatoes if new potatoes are unavailable)
- 1 large oven cooking bag (14″x20″)
Equipment Needed
To achieve this tender roast, you’ll want to have these items ready:
- Oven
- 9×13 inch baking pan
- Large oven cooking bag (included in ingredients)
- Tie or closure for the oven bag
- Sharp knife for chopping vegetables and slicing the roast
- An instant-read meat thermometer (highly recommended for perfect doneness)
Instructions
This recipe is designed for ease and fantastic results, making it a go-to for any occasion.
- Preheat your oven to a steady 350°F (175°C). This consistent temperature is crucial for even cooking within the oven bag.
- Prepare your oven cooking bag. Shake the flour inside the bag, ensuring a light, even coating on the interior. This flour will help to thicken the natural juices into a delightful sauce.
- Place the floured oven bag into your 9×13 inch baking pan. This pan will catch any potential drips and provide a stable base for the roast and vegetables.
- Roll down the top of the bag to create an opening.
- Add the tomato sauce, water, instant beef bouillon powder, and season generously with salt and pepper to your liking.
- Gently squeeze the bag to combine these liquid ingredients. Be sure to do this carefully, as you don’t want to create a hole in the bag.
- Now, place the beef rump roast into the bag.
- Next, add all of your prepared vegetables: the quartered carrots, quartered onions, chopped celery, halved potatoes, and chopped bell pepper.
- Turn the bag gently, ensuring that the roast and vegetables are nicely coated with the sauce mixture. This step helps to distribute the flavors evenly.
- Close the bag securely with the provided tie.
- Make about 6 (1/2-inch) slits in the top of the bag. These slits are important for releasing steam during the cooking process, preventing the bag from bursting.
- If you are using an electronic thermometer, set it for 140°F (60°C). Insert the probe through one of the slits in the bag, ensuring it is placed into the thickest part of the roast, avoiding any bones if present (though rump roast is typically boneless).
- Bake for 1 hour and 45 minutes to 2 hours and 15 minutes, or until your thermometer signals that the roast has reached the desired 140°F (60°C). The exact time will depend on your oven and the thickness of the roast.
- Once the roast reaches temperature, remove the pan from the oven.
- Allow the roast to rest for about 20 minutes inside the bag. This resting period is critical for allowing the juices to redistribute throughout the meat, ensuring maximum tenderness and moisture.
- After resting, snip off the strings that closed the bag.
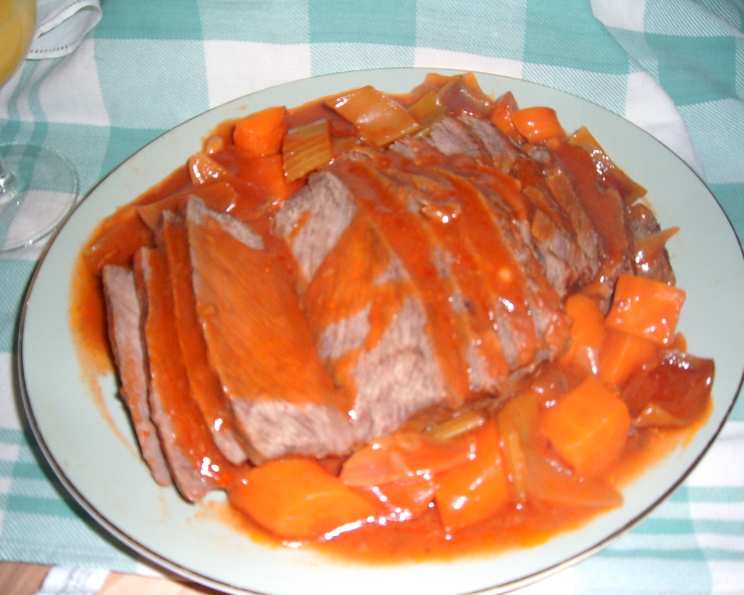
- Carefully remove the roast and vegetables from the bag and arrange them on a serving platter.
- Serve with the delicious juices spooned generously over the vegetables and roast.
Expert Tips & Tricks
As a chef, I always look for ways to elevate even the simplest of recipes. Here are a few tricks to make your Oven Bag Rump Roast truly shine:
- Don’t Skimp on the Resting Time: I can’t emphasize this enough. That 20-minute rest is non-negotiable for a tender, juicy roast. It allows the muscle fibers to relax and reabsorb the flavorful juices.
- Vegetable Prep is Key: Ensure your vegetables are cut into roughly uniform sizes. This guarantees they cook evenly alongside the roast. If you prefer softer vegetables, you can add them about 45 minutes into the cooking time.
- Flavor Boosters: For an extra layer of flavor, consider adding a sprig of fresh rosemary or thyme to the bag along with the vegetables. A bay leaf can also impart a wonderful aroma.
- Seasoning Savvy: Taste your sauce mixture before adding it to the bag. This allows you to adjust the salt and pepper to your preference, as the flavors will concentrate during cooking.
- Beef Bouillon Quality: The quality of your instant beef bouillon powder can make a difference. Opt for a good brand to ensure a rich, savory base for your sauce. If you prefer a richer sauce, you can reduce the water slightly.
- Thermometer Precision: While the baking time is a good guideline, an instant-read thermometer is your best friend for achieving perfectly cooked beef. For those who prefer their roast more well-done, simply adjust the target temperature accordingly (e.g., 160°F for medium-well).
Serving & Storage Suggestions
This Oven Bag Rump Roast is a complete meal in itself, but it pairs beautifully with a variety of side dishes. Consider serving it with a crusty bread to soak up those delectable juices, a simple green salad for a touch of freshness, or some steamed green beans.
For storage, allow any leftovers to cool completely. Store them in an airtight container in the refrigerator for 3 to 4 days. When you’re ready to reheat, you can gently warm the roast and vegetables in a covered dish in a low oven (around 300°F or 150°C), or on the stovetop over low heat, adding a splash of extra beef broth or water to keep it moist. The juices can also be reheated and used as a flavorful sauce. Freezing is also an option for longer storage; wrap portions tightly and freeze for up to 2 months.
Nutritional Information
| Nutrient | Amount per Serving (approx.) | % Daily Value |
|---|---|---|
| Calories | 148.8 kcal | – |
| Calories from Fat | 44 kcal | – |
| Total Fat | 5 g | 6% |
| Saturated Fat | 2 g | 10% |
| Cholesterol | 50 mg | 17% |
| Sodium | 200 mg | 9% |
| Total Carbohydrate | 8 g | 3% |
| Dietary Fiber | 2 g | 7% |
| Sugars | 3 g | 3% |
| Protein | 18 g | 36% |
Note: Nutritional values are estimates and can vary based on specific ingredients and portion sizes.
Variations & Substitutions
While this recipe is fantastic as is, feel free to experiment:
- Root Vegetable Medley: Swap out some of the vegetables for parsnips, sweet potatoes, or even turnips for a different flavor profile.
- Herbal Infusion: Experiment with different fresh herbs. Thyme, rosemary, and even a touch of sage can add wonderful aromatic notes.
- Spicy Kick: Add a pinch of red pepper flakes to the sauce mixture for a subtle warmth.
- Garlic Lovers: Toss in a few whole garlic cloves with the vegetables. They will soften and become wonderfully sweet.
- Gluten-Free Adaptation: To ensure this recipe is gluten-free, use a gluten-free flour blend for coating the bag and make sure your instant beef bouillon powder is also certified gluten-free.
FAQs
Q: Why use an oven bag?
A: Oven bags create a steam-filled environment that cooks the roast and vegetables gently and evenly, locking in moisture and resulting in incredibly tender meat with minimal effort.
Q: Can I use a different cut of beef?
A: While this recipe is specifically designed for rump roast, you could try it with other tender cuts like sirloin tip or bottom round. Adjust cooking time based on thickness.
Q: What if I don’t have an oven bag?
A: You can achieve a similar result by using a Dutch oven or a heavy-bottomed pot with a tight-fitting lid. Brown the roast first, then add the sauce and vegetables, cover, and bake at 350°F until tender. You may need to add a little more liquid.
Q: How can I tell if the roast is done without a thermometer?
A: After the minimum baking time, you can carefully open the bag and pierce the roast with a fork. It should feel tender and easily yield to the fork. For more precise results, a thermometer is recommended.
Q: Can I prep this recipe ahead of time?
A: Yes! You can prepare the vegetables and mix the sauce ingredients in a bowl the day before. On the day of cooking, simply place everything into the floured oven bag.
Final Thoughts
This Oven Bag Rump Roast is a testament to the beauty of simple cooking. It’s a dish that delivers on comfort, flavor, and impressive tenderness without demanding hours of active kitchen time. It’s the kind of meal that brings people to the table, fostering warmth and connection. I encourage you to give this recipe a try, perhaps on a busy weeknight or for a relaxed Sunday dinner. I’d love to hear about your experience and any delightful variations you discover. Enjoy every tender, flavorful bite!