
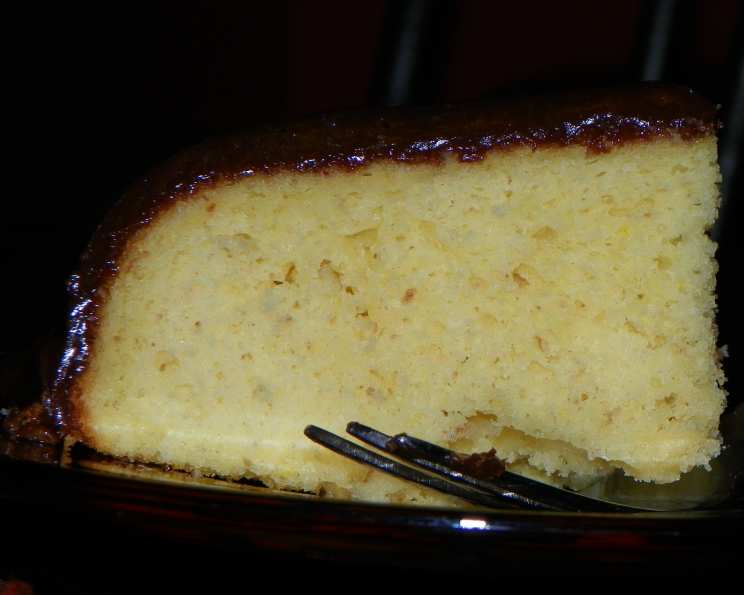
The Enduring Charm of Old-Fashioned Yellow Cake with Chocolate Icing
There are certain flavors that transport you instantly, like a warm hug from your childhood. For me, that sensation is inextricably linked to a perfectly tender yellow cake crowned with a rich, fudgy chocolate icing. I remember my grandmother meticulously sifting flour, the rhythmic hum of her old stand mixer a constant soundtrack to our kitchen. She’d always make this cake for special occasions, and the anticipation of that first slice, the way the frosting would melt on your tongue, was pure magic. It’s a dessert that doesn’t need fancy embellishments; its beauty lies in its honest simplicity and comforting familiarity, a testament to the enduring power of classic baking.
Recipe Overview
- Prep Time: 30 minutes
- Cook Time: 25 minutes
- Total Time: 55 minutes (plus cooling time)
- Servings: 12
- Yield: One 8-inch, two-layer cake
- Dietary Type: Classic Baking
Ingredients
This recipe is a beautiful balance of simple, readily available ingredients that come together to create something truly special.
For the Yellow Cake:
- 1 cup vegetable shortening
- 1 cup granulated sugar
- 1 whole egg
- 3 egg yolks
- 1 ½ cups sifted cake flour
- 2 teaspoons baking powder
- 1 pinch salt
- ½ cup milk
- 1 teaspoon vanilla extract
- 3 egg whites
For the Chocolate Icing:
- 3 ounces unsweetened chocolate
- 1 (14-ounce) can sweetened condensed milk
- ½ cup unsalted butter, cut into 8 pieces
- 1 egg yolk, beaten
- 1 ½ teaspoons vanilla extract
Equipment Needed
- Two 8-inch round cake pans
- Mixing bowls (one large, one medium)
- Electric mixer (handheld or stand mixer)
- Whisk
- Sifter
- Rubber spatula
- Toothpicks or cake tester
- Wire cooling racks
- Double boiler (or a heatproof bowl set over a saucepan of simmering water)
- Measuring cups and spoons
Instructions
Crafting this classic cake is a rewarding process, and with a little attention to detail, you’ll achieve a perfect result every time.
To make the cake:
- Preheat your oven to 350°F (175°C). This is a crucial first step to ensure even baking.
- Prepare your cake pans. Butter and flour both 8-inch round cake pans thoroughly. This prevents the cake from sticking and ensures easy removal after baking.
- In a large bowl, beat the vegetable shortening until it becomes light and fluffy. This aeration is key to a tender cake crumb.
- Slowly beat in the granulated sugar to the creamed shortening until the mixture is well combined and appears pale and fluffy.
- Add the whole egg and the egg yolks, one at a time. Beat well after each addition, ensuring each is fully incorporated before adding the next.
- In a separate medium bowl, sift the cake flour with the baking powder and salt. Sifting ensures a light texture and removes any lumps.
- Now, begin to add the dry ingredients to the batter in three parts, alternating with the milk. Start and end with the dry ingredients. For example, add one-third of the flour mixture, then half of the milk, then another third of the flour mixture, then the remaining milk, and finally the last third of the flour mixture. Mix until just combined after each addition; overmixing can lead to a tough cake.
- Stir in the vanilla extract.
- In a clean, dry bowl, beat the egg whites until they are stiff. You should be able to hold the bowl upside down without the egg whites sliding out.
- Gently fold the beaten egg whites into the cake batter using a rubber spatula. Be careful not to deflate the egg whites, as this is what will give the cake its lightness.
- Pour the batter evenly into the two prepared 8-inch round cake pans.
- Bake for about 25 minutes, or until a toothpick inserted into the center of the cakes comes out clean. Keep a close eye on your oven, as baking times can vary.
- Once baked, cool the cakes on a wire rack for about 10-15 minutes in the pans before inverting them onto the wire racks to cool completely. Ensure they are fully cooled before icing to prevent the frosting from melting.
To make the icing:
- Set up your double boiler. Fill the bottom saucepan with about an inch or two of water and bring it to a gentle simmer over medium heat.
- In the top of the double boiler (or a heatproof bowl set over the simmering water), melt the unsweetened chocolate. Stir occasionally until it is smooth.
- Stir in the sweetened condensed milk into the melted chocolate.
- Beat the mixture until it is smooth.
- Now, stir in the butter, one piece at a time, making sure each piece is fully incorporated and the mixture is smooth before adding the next. This gradual addition helps create a luscious texture.
- Finally, stir in the beaten egg yolk and the vanilla extract.
- Continue beating the icing until it is smooth and thick. If you find the icing becomes too thick to spread easily, you can thin it with a little hot water, a teaspoon at a time, until you reach your desired consistency.
Expert Tips & Tricks
- Room Temperature Ingredients: For the cake batter, ensuring your whole egg, egg yolks, and milk are at room temperature will help them emulsify better, leading to a smoother, more uniform batter and a finer cake crumb.
- Sifting is Key: Don’t skip the sifting step for the cake flour. It’s essential for a light and airy cake texture. If you don’t have a sifter, you can use a fine-mesh sieve.
- Gentle Folding: When incorporating the egg whites, use a light touch. Overmixing will knock out the air you’ve so carefully beaten in, resulting in a denser cake.
- Double Boiler Hack: If you don’t have a double boiler, a heatproof glass or metal bowl that fits snugly over a saucepan of simmering water works perfectly. Just ensure the bottom of the bowl doesn’t touch the water.
- Icing Consistency: The consistency of the chocolate icing can be finicky. It should be thick enough to hold its shape but spreadable. If it sets up too firm, a tiny bit of hot water is your friend. If it’s too thin, continue to stir it off the heat; it will thicken as it cools.
- Cake Leveling: For a professional-looking cake, you can use a serrated knife to carefully trim the domed tops off your cooled cake layers before icing, creating perfectly flat surfaces for stacking.
Serving & Storage Suggestions
This classic yellow cake with chocolate icing is best served at room temperature. Once the cake is fully cooled and iced, it can be stored at room temperature in an airtight container for 2-3 days. If your kitchen is particularly warm, or if you prefer a firmer icing, refrigerating it is an option, but be sure to bring it back to room temperature before serving for the best flavor and texture. The cake can also be frozen, well-wrapped, for up to 2 months. Thaw it overnight in the refrigerator and then bring to room temperature.
Nutritional Information
(Please note: Nutritional information is an estimate and can vary based on specific ingredients and brands used.)
| Nutrient | Amount per Serving | % Daily Value |
|---|---|---|
| Calories | 6277.2 kcal | |
| Calories from Fat | 3631 g | |
| Total Fat | 403.5 g | 620% |
| Saturated Fat | 177.2 g | 885% |
| Cholesterol | 1246.1 mg | 415% |
| Sodium | 1749.7 mg | 72% |
| Total Carbohydrate | 614.2 g | 204% |
| Dietary Fiber | 17.6 g | 70% |
| Sugars | 419.6 g | 1678% |
| Protein | 91 g | 181% |
Variations & Substitutions
While this recipe is a beloved classic for a reason, here are a few ideas to put your own spin on it:
- Citrus Zest: Add the zest of one lemon or orange to the cake batter for a subtle citrusy note that complements the chocolate beautifully.
- Espresso Kick: Dissolve 1 teaspoon of instant espresso powder in the milk for the cake batter to deepen the chocolate flavor of the icing.
- Nutter Butter: Swirl a tablespoon or two of peanut butter into the chocolate icing for a delightful chocolate-peanut butter combination.
- Boozy Indulgence: For an adult twist, add 1-2 tablespoons of bourbon or dark rum to the icing while it’s still warm.
FAQs
Q: Can I use all-purpose flour instead of cake flour for the cake?
A: While you can, using all-purpose flour will likely result in a slightly denser cake. If you must substitute, reduce the amount of all-purpose flour by about 2 tablespoons per cup, and sift it well.
Q: My chocolate icing seems too thick. What can I do?
A: If your icing becomes too thick, gently warm it over low heat or stir in a teaspoon of hot water at a time until it reaches a spreadable consistency.
Q: How can I ensure my cake layers are perfectly even?
A: After the cakes have cooled completely, you can use a long, serrated knife to level the domed tops before frosting for a neat, even presentation.
Q: Can I make the cake and icing ahead of time?
A: Yes, the unfrosted cake layers can be wrapped tightly and stored at room temperature for a day or two, or frozen for longer storage. The icing can also be made ahead and stored in an airtight container at room temperature; it may need a gentle rewarming if it thickens too much.
Q: What’s the best way to store leftover cake?
A: Store leftover cake in an airtight container at room temperature for up to 3 days. If your kitchen is warm, refrigerating is an option, but bring it back to room temperature before serving for optimal texture and flavor.
A Slice of Nostalgia
This Old-Fashioned Yellow Cake with Chocolate Icing is more than just a dessert; it’s a connection to cherished memories and simpler times. It’s the perfect centerpiece for birthdays, anniversaries, or simply a weekend treat to brighten your day. I encourage you to bake this cake, to savor its comforting flavors, and perhaps, to create new memories with loved ones around its sweet, familiar goodness. It pairs wonderfully with a tall, cold glass of milk, a nostalgic complement that completes the experience. Happy baking!